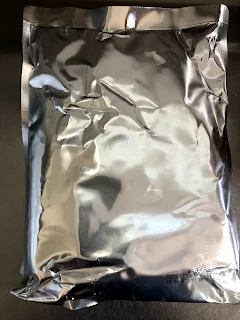
How to make home made gin from vodka

Friday, December 27, 2019
making home made gin with a kit and vodka

How to make gin with vodka and a gin kit 


One of my favorite TV shows as a kid was M.A.S.H. Even as a young kid I could pick up on most of the seriousness of that show, comedy aside.

One of the things that always amused me was how Pierce Hawkeye and his doctor buddies were always distilling alcohol in their tent and having a few drinks after performing harrowing surgery on wounded soldiers.

And then going straight back to it.

It wasn't till I was an adult, had actually drunk alcohol and understood its effect and also had a comprehension of the true reality of war that I understood why Captain Hawkeye would feel the need to have a few drinks in him.

Because war is hell.

Lucky for us though, most of us just want to make our own alcohol and have a quiet evening drink before we retire for the night, and our choice of poison?

Gin.

Home brewed gin.

Home brewed gin with a vodka base!

So let's make some using this kit!

What is gin brewed from?


Gin is never just gin.

It is always made from a base of alcohol and that's why this why The Homemade Gin Kit has all the necessary ingredients and materials - you just need to supply 750 mls of vodka. 

The vodka is the starting point. 

So what does this gin brewing kit actually come with?
  • Includes: Two 375ml Glass Bottles, Fine Stainless Steel Strainer, Stainless Steel Funnel
  • Includes: One tin of juniper berries & One tin of botanical blend
  • Made in USA so you're helping Americans keep their jobs.
Essentially what the kit is helping you do is soaking the berries and spices in the alcohol.  Because we using the historical soaking method, we're more likely to get more solids and some color (potentially like amber).

So how to use the gin making kit? 

  • Sterilize the bottle bottles. You could boil them or using something like sodium percarbonate.
  • Add your botanicals to the jar
  • Add your vodka, then leave to infuse in a cool dark place for 24 hours or so
  • The next day, taste your infusion – it should already be beginning to taste like gin. That's the juniper taking hold. If you're feeling fancy add some fresh peel orange peel and any extra botanicals whose flavor you want to boost.
  • Leave for up to another 24 hours. Give the bottles a shake a couple of times during that time. 
  • You are done. Use the strainer to get rid of the sediment and bottle. 
  • Enjoy with friends (and food!)
Here's a handy tip. If you want a stronger juniper flavor, and most gin drinkers prefer this, you can crush the juniper berries before adding them to the vodka.

If you want to add even more juniper berries, they're usually available at the spice counter at any major grocery store. You can also find them on Amazon.

So am I making gin or not?


Now, we'll say this upfront just in case some naysayers tut in with,' this is not how you make proper gin!' 

We are not making distilled gin, we are making infused gin. So you won't need any distilling equipment.

Because gin by definition is an alcoholic drink where juniper berries are the main ingredient.

Is this cheating? Maybe, either way, it's a nice drink to make.

The economics of making your own gin


What you are doing here is not making gin to make a cheap gin. 

You are making gin for the experience of it and the taste and enjoyment reward.

While the vodka infusion method is not difficult at all, there's some reward in taking the time to follow the instructions and the process of making your own gin. 

The reward will be the same any home beer brewer gets, the satisfaction of having made the thing you are drinking. 

If you are trying to make a fine gin, this method is not for you. You could try setting up a still or a home distillery but that's for keen enthusiasts only. 

So, are you ready to order then? The Homemade Gin Kit also have refill options so you can reuse the bottles and make over 2 litres of homemade gin!

Add some fine tonic, bottoms up and to your good health Hawkeye!


Using heat pads to keep beer at correct brewing temperature

Thursday, December 12, 2019
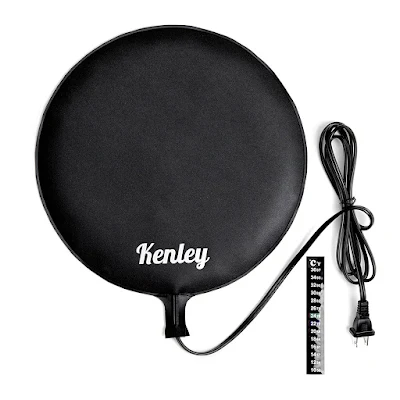
heat pad for brewing beer kenley

How to use a heat mat to keep homebrew warm


If you know a thing or two about beer making, it's how crucial temperature management is

It's kind of like how Goldilocks thought the porridge was too hot or too cold, it's only when the beer is made at the right temperature that you get one that tastes just right.

If you live in a cool climate, it's winter or you just don't' have the right place to brew your beer, then a heat pad could be what you need.

Heat pads or (panels) are electric heaters for fermenters and carboys that maintain the temperature so that your beer will brew as you want it. One does not use these units for necks, or shoulders but your cat might want to sleep on one....

Using a heat pad means you can brew all year round.

And the best thing about them is that they are to easy to use, you plug them in, place it under your fermenter and away you go.

Most units have a thermal regulator so that the pad doesn't overheat the wort. Generally speaking, this means you are able to keep your brew to 5-20 degrees Fahrenheit above room temperature.

Kenley reckon that when you’re making beer, mead, wine, cider or kombucha home brewing is part art, part science and part luck. So you can improve your chances of making a good beer by using their fermentation pad to create a consistent brew temperature throughout the brewing cycle.

At 12in (30cm) in diameter, this round heating mat is big enough to accommodate your standard carboy letting.

The bottom-up heating mimics and enhances the natural heat created by active yeast, giving you a better brew sooner. Check out the price on Amazon.

Don't like the black? Try the Propagate Pro in blue.

  • Flexible and easy to clean heating mat, it includes stick on LCD Temp Strip 
  • Built-in temperature regulation it will keep your brew, at the perfect temperature. 
  • Voltage: 120 VAC 50/60hz 
  • Wattage:25-Watts with a 6 foot long chord.

how to use a heat pad for brewing
If you're wondering how well the unit does the job. Check out these reviews from people who have used it with success.

"Perfect for keeping the chill off during fermentation. I love mine"

"When I first began brewing Kombucha I couldn't get a good batch very quickly. It was taking over 3 weeks to ferment. After a little reading about what the problem could be, I realized the temperature was too cool. Bought this warmer and it did the trick. Perfect batches of Kombucha in about 10 days."

"This was great for maintaining a constant temp for fermentation of home brew. We used a sweatshirt to wrap around the top of the carboy."

"This little gem solved my problem of holding my fermentation to a specific temperature. I added a temperature controller to make this a plug-in and forget it operation.

"This product is super simple and works great!!" 

If these haven't warmed your heart, then nothing will make you check the price on Amazon.
Just be wary that if you are ordering outside of the US, you'll need to ensure the unit has the correct plug for your needs.

These units can also come in a 'wrap' format, where the wrap goes around the fermenter, not underneath.

Pads have also been known to keep a dog's sleeping area warm!

The best ways to improve your beer kit brew results!

Saturday, November 23, 2019
The world of homebrewing has come a long way. While traditional methods involved meticulous gathering and processing of various ingredients, the advent of beer kits has democratized the art of brewing. Much like a ready-made cake mix simplifies baking, a beer kit streamlines brewing by offering pre-measured, prepared ingredients. However, akin to a gourmet cake requiring more than just a mix, crafting an exquisite beer involves more than following the steps on a beer kit.

This guide aims to explore techniques and strategies that can transform your regular homebrew into a work of art.

beer brewing tips for malt kits

Beyond the Basics: Understanding Beer Enhancers

Understanding the biochemistry of brewing can greatly benefit your beer. Yeast converts sugars into alcohol and carbon dioxide through fermentation. This process prefers simple sugars like glucose or fructose. A beer enhancer essentially adds these simpler forms of sugars—in this case, malt extract and dextrose—making the yeast's job easier and more efficient.

Employing a beer enhancer adds depth to your beer’s flavor profile and facilitates a cleaner fermentation process. The dextrose ensures that there's no residual sweetness in the brew, thus allowing the more subtle notes of malt and hops to shine through. This approach provides the added benefit of higher alcohol content without negatively impacting the beer’s taste.

Crafting Flavor Profiles: The Extra Hop Dimension

Choosing Your Hops

The hop plant contributes the bitter and aromatic characteristics to beer. The choice of hops can depend on the type of beer you're aiming to brew. For instance, lagers pair exceptionally well with hops like Green Bullet or Cascade. Green Bullet offers a traditional bittering quality, while Cascade adds citrusy, floral notes.

Timing and Technique

The timing of adding these complementary hops is also crucial. Whether you choose to do it during the boil or later during fermentation (a technique known as dry hopping) can substantially change the aromatic and flavor profile of the beer.

The Wisdom in Waiting: Extended Fermentation

The Microbial Ecosystem

Yeast doesn't just work alone. A variety of microbes come into play, each contributing to the complexity of your brew. Over time, these flavors meld together, creating a harmonious blend that significantly improves the overall tasting experience.

Fermentation Vessels

The type of vessel used for fermentation can also influence the flavor. Whether it's a glass carboy, a stainless steel drum, or a wooden barrel, each adds its own set of characteristics to the brew. Thus, longer fermentation should not be seen just as a test of patience but as an artistic decision.

Navigating the Bottleneck: The Subtleties of Bottling

The Enemy: Oxygen

Exposure to oxygen post-fermentation can lead to a stale, cardboard-like flavor in the beer, a phenomenon known as oxidation. Minimizing this exposure is crucial during the bottling stage.

The use of a bottling wand, for instance, ensures that beer flows smoothly from the fermenter to the bottle with minimal agitation. This avoids unnecessary oxygen incorporation, preserving the integrity of your beer.

Temperature: A Crucial Variable

Temperature is not just a setting; it’s an active ingredient. During the initial two-day warm storage, the yeast is more active, aiding in secondary fermentation which helps in natural carbonation. Later, moving the bottles to a cooler, dark setting stabilizes the beer and allows the yeast to slowly refine the brew's flavors.

The Balanced Brew: Advantages of Batch Priming

Batch priming serves multiple purposes. Firstly, it guarantees a uniform level of carbonation across all bottles. Secondly, it mitigates the risk of over-carbonation, a dangerous situation that could lead to exploding bottles and wasted beer.

When batch priming with sugar, it's also easier to calculate the precise amount of sugar needed to achieve the desired pressure within the bottle, reducing guesswork and increasing consistency.

The Balancing Act of Alcohol Content

The Sugar-Yeast Equilibrium

Yeast metabolism is sensitive to sugar concentration. Adding too much sugar can stress the yeast cells, leading to incomplete fermentation or even yeast death. Thus, striking the right balance is critical.

Nutritional Supplements for Yeast

To aid the yeast in metabolizing extra sugar, brewers often turn to yeast nutrients. These contain essential minerals and vitamins that help the yeast thrive, even in sugar-rich environments.

Clarity Through Fining Agents and Cold Crashing

Types of Fining Agents

Fining agents like isinglass, gelatin, or Irish moss work in unique ways but achieve the same result: a clearer beer. The choice of fining agent can also subtly influence the beer’s final flavor.

The Cold Crash Method

Cold crashing is the process of rapidly lowering the beer's temperature just before bottling. This causes the particles and haze to precipitate, resulting in a clearer brew.

Upgrading Your Arsenal: When to Scale Up

Need for a Bigger Kettle

As you become more comfortable and experimental with your brewing, a bigger kettle allows for more brewing flexibility. It gives you the freedom to create larger batches or more complex brews involving multiple ingredients.

Future-Proofing Your Setup

Moreover, investing in quality equipment from the outset can save both time and money in the long run. After all, a larger kettle is not just an accessory; it’s an investment in your brewing future.

The art of brewing is an ever-evolving journey, replete with opportunities for experimentation and mastery. So, as you fill that glass with your next homebrew, remember, each drop contains not just malt and hops, but the essence of a craft honed through time and dedication. Cheers!


Embracing the Complexity of Craft Brewing

Having navigated the complexities of homebrewing, from understanding the biochemical nuances to fine-tuning the fermentation process, it becomes apparent that brewing is both an art and a science. This intricate balance allows for limitless possibilities—each decision you make, from the type of malt to the timing of hop addition, culminates in a beer that is distinctly your own. But the process doesn’t end with the last sip; each brew serves as an enlightening experience, offering insights that can be integrated into future brewing endeavors.

The Community Aspect: Shared Experience and Knowledge

Homebrewing is not a solitary venture. There's a robust community of like-minded individuals, each brimming with their own techniques and secrets. Sharing your own experiences and learning from others can deepen your understanding of this craft. Platforms like forums, local brew clubs, or even social media offer a wealth of collective knowledge. In these spaces, you can discuss the intricacies of yeast strains, debate over the ideal fermentation time, or simply share your success and, yes, even your failures.

The Journey Over the Destination

In the world of craft brewing, the journey truly is more fulfilling than the destination. The process, from that initial spark of inspiration to the final, frothy pour, is where the joy of homebrewing lies. It's not about fast results or shortcuts but the gradual, learned art of making something extraordinary out of ordinary ingredients. So, the next time you find yourself impatiently waiting for that batch to ferment or agonizing over the perfect hop blend, remember: you're not just brewing beer; you're crafting an experience, both for yourself and those lucky enough to share in your brew.

Whether you're new to homebrewing or have been at it for years, it's important to recognize that each batch presents its own set of challenges and opportunities. Thus, the act of brewing is a perpetual lesson, continually refined but never truly mastered. Cheers to that eternal quest for the perfect brew!

How make a hops tea for home brewing?

Wednesday, November 6, 2019


How to make a hops tea for brewing with a beer kit


Sometimes when making homebrew, beer makers also like to make a cup of hop tea!

Why would we do this?

The idea here is that the great hops aromas and oils have been removed from the bullets due to the boiling and will then mix more easily with your wort brew. You are not making a tea to drink but rather simply trying to better extract the oil from the hop bud or pellet.

This means you have extracted more of the hops from the bullet than you would if you simply dry hopped them.

hops tea preparation for home brewing

How to make a hops tea for homebrewing


Put the hops in a muslin bag (or tie up a square of it) and then boil it for several minutes in water.

During the boil, have a good smell and enjoy the aromas as it wafts around your kitchen.

That's the deliciousness you want to impart into your beer.

We love using Cascade hops as we think they give the best smell in the world! It's also damn fine hops for making beer with, particularly pilsners and lagers.

When you've boiled the hops for long enough, turn the pan off but leave everything right where it is to cool.

Try not to let anything get into the pot as everything that's in there is going into your beer wort. I say this with experience as I did this the other month - made the tea over the stove with the back door open late at night and somehow a moth managed to land it.


Too bad, I made a hops and moth tea!

You have probably already prepared your wort, so now put everything you've boiled - the whole muslin bag and the tea that you've made into the primary fermenter.

You are good to go on and now pitch your yeast - as long as the wort is at the correct temperature.

You can also drink your own hops tea too!

It's done slightly differently to the above method for beer - you let the hops steep as you would any other tea and then drink when cool enough. It's not for us though, too bitter!


hops tea for brewing beer

Brewing with two malt kits

Friday, November 1, 2019
brewing two malt kits

Brewing beer with two malt extract kits 


As a beer kit brewer - I've often seen brewing forums chatter about brewing with two cans of malt rather than the traditional one can with added sugars such as dextrose.

I thought it was time to do an experiment and see for myself if using solely two kits for a beer would translate into a good tasting beer.

Given two kits can effectively double the cost of your brew, I grabbed two cans of the cheapest kits I could find at the supermarket which just happened to be Cooper's Stout. Having made reasonable brews with Coopers DIY Kits in the past, I was confident I'd be able to make a drinkable beer!

So how did this experiment go down?

One makes the double kit beer wort in the traditional one kit way except the recipe is effectively doubled.

This means I am adding double the usual amount of malt. This means there's going to be a lot of fermentable molecules in the wort, at a higher ratio than normal (standard 1 KG plus roughly 700 grams more).

Given there is hops oil in each can, I am also doubling the hops count of the batch - this will likely mean that the bitterness of the beer will double (well, let's see how that pans out).

What is also happening is that we are not adding any extra sucrose or dextrose (I usually use a beer enhancer to assist with better taste and good mouth feel). I think that is going to have quite an effect on the beer as I noted above that there will be a vastly higher ratio of malt to water than my usual beer kit brews.

Given this, I suspect the Final Gravity will be higher than the norm and I imagine the ABV may be in the range of 5 - 6 percent though that may be pushing it. Even if it's not that high, I'll get a nice sweet brew.

I am also adding double the yeast as having two kits means I've got two sachets. I think I could have got away with just using one packet but figured let's roll the dice and see what happens. It's possible the extra 700 grams of malt could give the yeast some trouble so some extra will probably help.

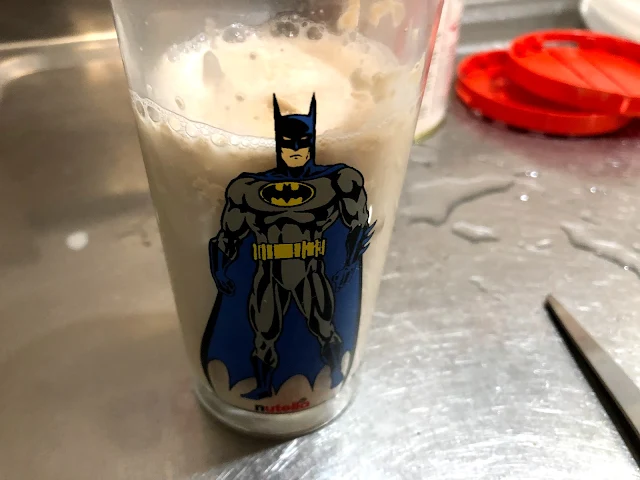
I added both packets to a glass of warm water so that it was 'activated' before it when into the wort. I'm not hugely convinced this actually makes a massive difference but I've read that it helps where there's a lot of sugars (malt) in the wort.

using two yeast sachets in brew
The Dark Knight watches over the yeast
I prepared the brew after cleaning and sanitizing the fermenter drum and left it overnight in the kitchen where it was warm.

Here's my trick for getting all the malt out of a can without making too much mess:

extracting all the malt from a can

So how did this experiment work out?

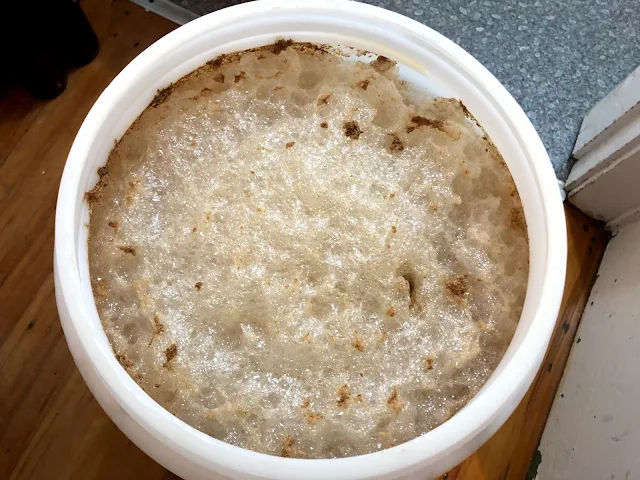
On return from work that evening (so roughly 36 hours) I observed that fermentation had been going really well. This is probably due to having used two yeast sachets as I have never seen this much bubble activity before:


Those dark brown spots you can see are actually yeast clumps that got caught in the foam after fermentation went into hyperdrive (attack of the Krausen!). I grabbed a clean spoon and gently stirred them back into the wort. I then closed the lid back up nice and tight and carried the drum up to the shed where I wrapped it up in a pile of old towels.

It's just settling into spring here so it will not be too cold in the shed. I'll leave it there for a week at least to let the fermentation fully complete. If I'm really patient, I'll leave the brew to settle a bit longer than that.

Let's see how we go.


-

And we're back!

It's been just under two weeks since we pitched the yeast into the wort.

I have bottled the beer. A test taste at the time revealed it has quite a strong flavor and it smelt really 'heavy'. It also had a very 'Coopers' taste to it. It appeared to be a nice dark brown color.

Let's wait another couple of weeks before we do a taste test once the bottles have carbonated and conditioned.

-

Time for a drink?

Spring has kicked in quite nicely so there should have been a fairly even brewing / conditioning temperature (other than night and day changes).

The verdict:

This is a 'fair beer' and with another two weeks of conditioning, it will be a very enjoyable beer.

It's malty as fuck. That should really be no surprise eh?

Having drunk the whole glass fairly quickly, I get the impression the beer has an ABV higher than the brews I usually make (around 4 per cent ABV) so I would suspect it's over 5 but not close to 6. Yes, yes, I should have done some gravity readings...

This double malt kit brew would have benefitted definitely from some additional hops such as Goldings or Fuggles. This mostly is because Coopers is simply a 'stock standard' beer kit.

Given this is the first Cooper's stout I've brewed, I'm fairly happy with how the beer has turned out.

The beer had little head as I suspect I slightly under sugared the batch for the secondary carbonation.

In terms of economy, the two kits cost about 35 bucks (NZ price) whereas a usually single can and enhancer combo would cost around 27 - so the question is whether the extra 8 bucks makes enough of a difference to the brew?  If one is trying for a higher than usual ABV stout, then yes, especially one that is dripping with malty tones!

Best oxygenation kit with aeration wand for home brewing

Friday, August 16, 2019
Making beer is a curiously scientific process.

You have to have the right ingredients. Your boil needs to be at the right temperature and your hop additions done at the right time.

You also need your wort to be properly oxygenated.

The yeast loves oxygen during fermentation. So, if you want your yeast to have the best chances of doing a great job, efficiently and effectively, then using an oxygen kit with an aeration wand is a great way to get some air in your beer!

This is especially true if your beer is going to be a high-gravity beer - these brews will usually have a lower oxygen concentration in the wort when compared to standard beers. Adding extra oxygen will improve the effectiveness of the yeast.

This then begs the question:

What is the best kit to make wort oxygen rich?


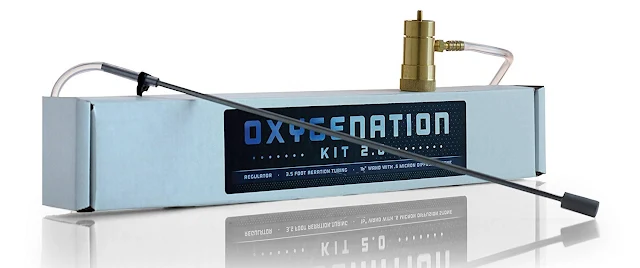
aeration wand for oxygenation


Improve the flavor of your homebrew with less effort and impress your friends and family with better results with the Northern Brewer aeration kit. Its use will reduce the 'lag phase' of fermentation and off-flavor-producing fermentation by-products.

It will take less than a minute to infuse the wort with the wand. The kit comes with a valve to attach to an oxygen tank, tubing, aeration want, 0.5 micron air stone, herbie clamp to secure the tubing to the wand.

To be clear, this kit does not come with an oxygen tank, you'll need to source your own.

Here's some reviews and comments from actual user's of Nothern Brewer's kit:

"I sterilized the wand and tubing, put it in my carboy, turned it on and it bubbled up from bottom to the top. I pitched my yeast around 5pm. By 8pm I saw a couple bubbles, by the next morning, it was bubbling like crazy!! I am very glad that I used a blow off tube on my primary!"

"Great starting oxygenation kit! if you're like me and you don't like shaking your carboy for upwards of 20 minutes then you need something like this"

"Used it to oxygenated a chocolate cherry porter and following the instructions for creating more of a "simmer" than a "rolling boil" for 40 seconds I have a healthy fermentation going in under 12 hours.

How long do you oxygenate wort for?


Regardless if you are using a kit or a stone, the total amount of time needed to oxygenate wort can be pretty short - from 30 seconds to a minute for a 20 litre batch. Double the time if you are doing double the volume. 

If you making a higher ABV beer, then you may wish to give it a bit longer. In reality, a standard brew will benefit from a saturation level of 8 - 10pp and a higher ABV brew will benefit from a level closer to 12pp (though as usual with brewers, there's some debate that 15pp is the goal). 

Before you add the wand to the wort, make sure it is properly sanitized.

Can I make my own oxygenation kit?


You sure can, it's a pretty simple process to make your own. You only need a few parts:
All you then need to do is connect the diffusion stone to the tubing, the tubing to the regulator and the oxygen bottle.

Pretty easy set up eh?

Final worn on aeration:

While it is very important to ensure your wort is aerated before you pitch your yeast to start fermentation, you do not want to add oxygen post-fermentation completion. This means you should take particular care when moving your fermentation drum and especially when bottling or kegging your beer. 

↠ Tips on how to properly brew a good lager

Friday, June 21, 2019
How to easily make a great lager home brew

You might have heard that it's hard to home brew a good lager.

You might have heard beer kit lagers can be unforgiving beers to make and any mistakes will ruin the beer.

It's almost ironic that the world's most popular beer style is apparently too hard to make.

But, is this really the case?

What if I told you it was easy to make a great tasting kit lager brew?

Would you believe me?

The proof is in the tasting of course. Let me show you the secrets and tips of making a delicious lager from a beer kit.

I've made some great lagers and I look back fondly on the batch I called 'J' and just how good it came out. I was basically trying to make a Steinlager clone and it was truly superb.

If this backyard brewer can easily make a great lasting lager, you can too.

Are you ready for the secret of easily making a good lager?

Stop reading all the online nonsense and JUST BREW IT.

That's all you have to do. It's that easy a tip.


brewing lager beer

But just in case you think I'm pulling your leg, here's some tricks and tips for brewing lagers (and hard seltzer brews too).

Don't rush in like a school boy


The key to making a good lager is patience.

Even if you think fermentation is complete, let your lager beer rest a few more days longer in the fermenter.

It's a chemical process after all. 

It's very common for lagers to exhibit sulfur-like characters during fermentation (hence part of the rationale for people saying lagers are hard to brew).

Leaving your beer to sit for a bit longer will allow such characteristics to fade and largely disappear - which leaves you with a great tasting and smelling lager.

In the cold, cold night


In conjunction with time, lagers need the cold to condition and mature.

It's a lesson the Nordic people discovered long ago - they put their beer in cold caves over the winter and found they came out well ... lagered!

Indeed, the word lager actually means storeroom or warehouse so you can see how the cave thing / naming of the style happened.

Ideally, once you have bottled your lager, leave it in a warmish place to carbonate for a few days. If it's TOO cold at this stage, you won't get bubbles in your beer!

Once carbonation takes place, feel free to put your beer bottles in the garden shed for a few weeks where it's nice an cold.

For this reason, it's often considered good timing to make your lager near the end of autumn or the start of winter.

Keeping your lager cold will result in the production of fewer esters and fusel alcohols, giving your beer a better taste balance.

Expert brewers often refrigerate their lager.

Consider using well known lager yeasts 


It's a trait of lager that certain yeasts tend to suit being lagered. Your larger kit will come with a standard yeast - if you're feeling adventurous, you might want to order the Lager Yeast WL833 - it's a popular yeast for lager brewing.


Match your hops to well known lager hops


Saaz hops, in particular, are associated with the brewing of lagers as well as the classic German hop, Hallertauer . We've discovered New Zealand derived Green Bullet hop is also very handy.

Read more on good hop matches to beer.


You need to be  super vigilant with your sanitization


Ales are more forgiving than lagers, it's true.

The taste of an ale can overpower some of the niggles of brewing like unwanted smells.

So, to avoid these happen to your lager beer, the best cure is prevention.

That means being meticulously clean during the brew and ensuring your equipment is sanitized.

The tip here? Sanitize, sanitize and sanitize.

Remember what the word lager means! 


It means basically to store.

So once you have bottled your beer, leave it to store for as long as you can.

Maybe even over the whole of winter, in a cold place.

At a minimum three weeks but it could be worth leaving your lager alone for a couple of months.

Summary - how to easily brew a lager:

  • Leave your brew to ferment a little longer than you would and ale
  • Select a tried and true lager yeast
  • Match with appropriate hops
  • Watch your temperatures, especially post bottling for carbonation and conditioning.
So these have been a few basic tips that will help you easily make a fine tasting lager beer.

Forget the hysteria that it's hard to make a lager and JUST DO IT!

Review of Mangrove Jack's New Zealand Brewers Series Beer Kit

Monday, June 10, 2019
mangrove jacks new zealand brewers series review

Review of Mangrove Jack's New Zealand Brewers Series beer pouch kit


I was in checking out Brewshop the other week and I saw that Mangrove Jack's (an Aussie based company) had a new kit on the market called the "New Zealand Brewer's Series".

This piqued my curiosity as what is uniquely New Zealand about beer kits? 

Other than Black Rock and Williams Warn both being made in the Speights factory, Nothing is the answer - so this means the kit is probably just a rebrand of their existing products for the NZ market.

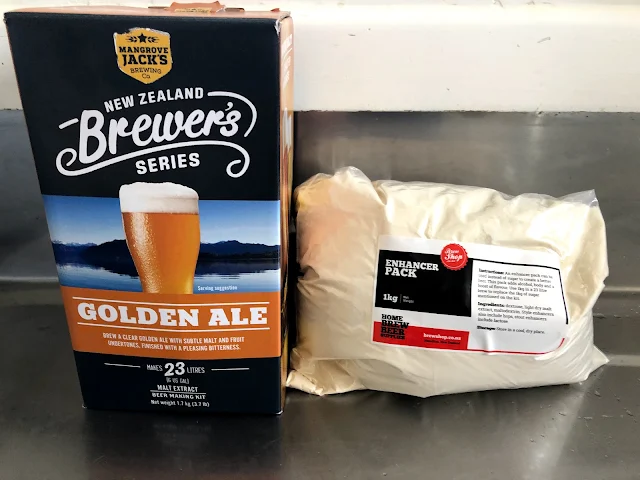
I spied their Golden Ale, which purports to be "A clear golden ale with subtle malt and fruit undertones, finished with a pleasing bitterness."

At 20 NZ bucks, it was a competitive price so I thought I'd give it a brew and review.

So, what do we do first? I cleaned and sanitized the fermenter drum with boiling water and sodium percarbonate.

I then added the brew enhancer from Brewshop and added a kettle of boiling water.

pouch kit review mangrove jacksI then opened the Mangrove Jack's box pack and to my surprise, it was actually a pouch inside the box.

This actually should have been no surprise as Mangrove Jack's are well known for their kits being in pouch form rather than tin can!

I cut open the pouch with my key chain multi-tool and added the contents to the drum. Perhaps the kit's contents were a bit cold as I really had to squeeze it out.

Indeed, I felt there was quite a lot left in the pouch so I added some boiling water to it to help melt the remainder and made sure I got most of it out it and into the wort.

This process was a bit more difficult than doing it with a tin can kit. I venture a complete novice at brewing would have made a huge mess!

I then gave it all a good stir and then added water so that there were about 23 liters in the drum. I then added the yeast that I had set aside in a glass of warm water to help hydrate it.

I noticed when adding the yeast that it all came out pretty easily and there were not many bits of it stuck to the inside of the packet (which happens a lot with Blackrock kits for example).

I then chucked the drum into the shed.

It's currently the start of winter so it will be a bit cold out there so we'll see how the fermentation goes!

Let's check back in about ten days after primary fermentation.

...and we're back.

It's actually been two whole weeks and tonight I have just bottled the beer. Instead of batch priming, I sugared each bottle individually. This is because I have somehow managed to over prime my last two stouts and those were some wee fizzy buggers which kind of ruined the beer drinking experience.

So, let's check back in another two weeks for a taste test.

...and we're back.

Honestly, this is an 'average' result. Not average in the sense people say that word to not mean good but average in the mathematical sense. It's not an inspiring brew by any means however it feels like a stock standard beer.

Another two weeks conditioning will improve this beer but I've made enough of these brews to know where the beer is headed.

It's flavour would definitely have been improved by the addition of some English or Citrus type hops.

So, what we've got here is a good result in the sense this Mangrove's Jack offering is a stock standard homebrew kit and for the price, you can't complain if that's the kind of beer you want to make!

If you want to try a different kind of brewing experiment, consider brewing with two malt kits at the same time!

Kegco 5 Gallon Ball Lock Keg is great for homebrewing

Friday, May 10, 2019
When a brewer gets tired of bottling their beer, sick of gushers and dreading cleaning bottles over and over again, they might decide that kegging their beer with a ball lock keg so they can have a beer when they want it and not have to worry about a beer gusher or an exploding bottle ever again...

There are plenty of ways to keg home brew but a popular choice is to use a 5-gallon ball lock keg.

They are an ideal size for standard brews made in a 5-gallon fermenter and are easily connected to a jockey box and stainless steel faucet for an efficient pour!

So what is the best ball lock keg to keg with?

best ball lock keg for brewing

Kegco's rubber handle home brew beer keg is a popular choice for American beer makers. It torpedoes the other's out of the water, leaving them in a foamy mess!

This corny keg is designed for use with ball lock keg couplers and features a 304-grade stainless steel construction.

That just means the Kegco is a durable beast!

This keg has a permanently molded rubber bottom skirt and top handle that makes it easy to carry and stack, making it ideal for smaller breweries and home brewers with limited available storage space. The stainless steel lid also fastens tightly to the body and features an integrated pressure release valve that allows you to easily depressurize the keg.

The ball lock fittings that are naturally designed for use with ball lock keg couplers. The ball lock fittings can be easily accessed to make cleaning and maintenance fast and simple.

The beauty of this pepsi keg is that it can also be used to store not only beer, but also wine, soda, kombucha, and cold brew coffee.

Here's what some actual users of this keg have had to say about how it works and whether it's worth the purchase:

"I have been bottling my beer for over 20 years. I received the two 5 gallon kegs today and I was happy both were shipped with positive pressure. So I immediately knew that all the seals were good without pressurizing. The kegs were new and had no dents. I then immediately cleaned and sanitized a keg and transferred a batch of Peach Ale from secondary. Within minutes I had an amazing beer. I’m not going back to bottling. The next keg is going to be filled with a stout so I’ll have some variety on tap. I’m so happy."

"This product arrived in great condition. Everything seals tight and the ball lock valves are very nice. The keg is obviously high quality and will be a great addition to my home brew equipment - I'm just sorry this will be hidden in my kegerator. :)"

"Shiny, shiny. In recent years, used soda kegs have become scarce enough the price for one that merely holds pressure has risen pretty high. Might as well buy a new one, and get it clean, with fresh seals and O-rings all round, to boot. Kegco offers a solid product, and I like the rubber all around the perimeter of the top."

If those reviews float your boat, check out the price on Amazon:

⇒ What equipment do I need to start home brewing?

Friday, April 12, 2019
What equipment do I need to start home brewing?

What equipment do I need to start home brewing?


If you’ve decided to brew beer, you’re in great company.

Einstein, Churchill, the mighty Thor himself and every man with a shed, has at one point or another, brewed some tasty beverages.

But they all had to start somewhere, and so here’s a list of what equipment you might need to get started brewing beer.

We’re talking about brewing using a beer kit here, the kind of brewing where your ‘beer wortbasically comes in a can.

You get to choose what hops or sugar you add (jelly beans maybe?) and the rest is simply following some good brewing instructions.

But what do you need to brew some good home made beer?


This list is just the basics, you could probably actually get away with using less but at the very least, this guide should help you decide what you need to get that golden ale flowing down your gullet. 


What equipment you might use on Brew day

Here's a handy checklist for your set up. Not everything is a 'must have' but you must have clean and sanitized gear, no matter what you do.

Ingredients
Equipment for brewing

Bottling day - what you need

* denotes an optional item of equipment

Also, I'm just gonna randomly add that if you like Mortal Engines, check out the behind the scenes work that goes into the movie.
Powered by Blogger.

Tags

absorption caps abv acetaldehyde acid adjuncts advice about beer brewing aeration aeration kit aging air lock alcohol alcohol poisoning ale ale beer kits alkaline alkaline brewery wash all grain american amylase apera apples attenuation autolysis automatic temperature compensation bacteria baker's yeast baking yeast ball lock ball valve bar keepers friend barley batch prime beer brewing beer capper beer dispenser beer filtration kit system beer gushers beer kit beer kit review beer kits beer lines beer salt beer taps beerstone best brewing equipment biotin bittering BKF black rock bleach blichmann blow off tubing bluelab bohemian pilsner boil in a bag boil over boneface bottle cap bottle caps bottle conditioning bottling bottling beer bottling spigot bourbon brettanomyces brew and review brew day brewing beer guide brewing salts brewing spoon brewing sugar brewing thermostat brewzilla british thermal unit brix brix scale BTU budvar buffer buffer solution burton snatch buyer's guide calcium chloride calcium sulphate calibration calibration probe calibration solution campden tablets capping carbon dioxide carbonation carbonation drops carboy cascade caustic soda cherry wine chinook chlorine christmas chronicle cider clarity cleaning your equipment clear beer clone recipe cloudy beer cold crashing coldbreak conditioning tablets conductivity conical fermenter contamination coopers copper tun corn sugar cornelius corny keg craft beer creamy beer crown cryo hops cubes danstar nottingham demijohn dextrose distilation DIY DME dopplebock draught dry hopping dry malt extract edelmetall brü burner eisbock ekuanot electrode enhancer enzyme equipment ester ethanol experiments in beer making faucet fermcap-s fermentables fermentation fermenter fermentis fermentor final gravity finings five star flat beer floccing foam inhibitor force carbonation french fresh wort pack fridge fruit fusel alchohol garage project gas burners gelatin gift and present ideas gin ginger beer glucose golden ale golden syrup goldings gose grain grain mill green bullet grist guinness gypsum hach hacks hallertauer heat mat heat pad heat wrap home brew honey hop schedule hops hops spider how not to brew beer how to brew that first beer how to brew with a beer kit how to grow hops how to make a hop tea how to wash yeast hydrated layer hydrogen sulfide hydrometer IBU ideas idophor infection inkbird instruments isoamyl acetate jelly beans jockey box john palmer juniper keezer keg cooler keg regulators kegco kegerator kegging kegs kettle kombucha krausen lactic acid lager lagering lauter lion brown liquid malt extract litmus LME lupulin lupulin powder lupuLN2 making beer malic acid malt malt mill maltodextrin mangrove jack's maple syrup mash mash paddle mash tun mccashins mead methanol micro brewing milling milwaukee MW102 mistakes mixing instructions moa mouth feel muntons must nano brewing New Zealand Brewer's Series no rinse nut brown ale oak oak wood chips off flavors original gravity oxygen pacific gem palaeo water pale ale panhead parsnip PBW pear pectine pectolase perlick ph levels ph meter ph pen pH strips ph tester pico brewing pilsner pitching yeast plastic drum poppet valve pot powdered brewing wash ppm precipitated chalk pressure relief valve priming prison hooch probe problem solving propane and propane accessories pruno pump system purity law radler re-using yeast recipe record keeping reddit refractometer reinheitsgebot removing beer labels from bottles review rice hulls riwaka rotten eggs saaz saccharomyces cerevisiae salt sanitization secondary regulator sediment seltzer session beer silicon simple tricks for brewing siphon site glass skunked beer small batch brewing soda soda ash soda stream sodium carbonate sodium carbonate peroxyhydrate sodium hydroxide sodium metasilicate sodium percarbonate sour beer sparge spigot spirals spirits spoon spraymalt star san starch STC-1000 steinlager steralisation sterilisation sterilization sterliization still stoke storage solution stout sucrose sugar supercharger tannins temperature temperature controller therminator thermometer tips for beginners tri-sodium phopsphate tricks and tips trub tubing tui turkey vodka infused gin vorlauf water water testing wet cardboard taste wet hopping weta whirlfloc tablets white claw williamswarn wine winter brewing wood wort wort chiller yeast yeast energizer yeast nutrient yeast rafts yeast starter yeast traps zinc
Back to Top