Boneface is a great brewery to have a beer and a meal

Wednesday, December 12, 2018
bonehead brewery logos

I recently had an opportunity to have a pint at the Boneface Brewery in Upper Hutt.

It's a great establishment!

boneface ipl lager logoSet simply in an old factory of some kind, it's part eatery part brewery.

The staff were a bloody friendly bunch and the roast lunch we had was bang on. Do try the potatoes...

We did a short tour of the brewery and while it was standard stuff, it was well received as it was clear they had a genuine love of beer and were only too happy to share their knowledge.

For myself, the beer of the day was their Outlaw IPL which was a hoppy lager. Yes, this is a very popular style of beer these days, I did, however, find it simply refreshing.

The 'Juice' was not for me, it was too tart. My drinking buddies reported the Darkness Stout was very agreeable!

I particularly liked the artwork above. They had it in large posters on the side of the brewery - reminded me of Judge Dredd!

19 best ways to make homebrewing cheaper

Friday, November 16, 2018
making cheap homebrew

Brewing beer cheaply 


Many brewers like to make homebrew because they can make it to their own taste preferences and also because it's much cheaper than paying $15 bucks a pint at the local.

Seriously, the price of a handle of some craft beers is simply ridiculous - usually due to a poor economy of scale for small breweries and high hop prices.

And that's why brewers like to make cheap beer.

They buy their own hops in bulk.

Indeed buying ingredients in bulk is a great way to save your cash money when brewing. It makes your own beer cheaper by the bottle!

The three best ways to save money are:
  • reuse your yeast (by way of a starter)
  • buy grains and malt in bulk
  • purchase your hops in bulk

Saving on the cost of hops


You can do this with a quick visit to your local beer supplier or buying online from specialty suppliers or even Amazon. It's amazing the range of hops found on there.

A really handy trick to keep your yeast fresh is to buy your own vacuum sealer - so you can reseal your hops, or break them up into your desired batch size. You can then store them in the freezer until they are required on brewing day.

Saving cash on yeast purchasing


Buying yeast can be an expensive exercise, especially when there's so much choice out there nowadays - a brewer's access to quality yeast has never been better.

The beauty of a good yeast is that it doesn't need to be a used once with a brew and then you buy another sachet next time you brew - no, you can recycle the yeast from the trub or you can keep a yeast starter going for the whole brewing season.

Saving money on the price of grains


Most brewers simply purchase a bulk sack of 50 lb base grain. It will usually be uncrushed to you need to mill it so having your own grain mill might be part of the deal - buy a good one so it lasts a lifetime of brewing (a handy trick is to connect a powered drill and save yourself some time instead of doing it by hand).

Some brewers can use up to 20 base pounds for a brew (remember, brewers like to mix and match their malts to get unique flavors) so a 50-pound sack is good for at least two brews! Specialty grains that are added to the base are usually bought in smaller bagged amounts.

If you have a good relationship with the local craft brewer, they may be able to sling a couple of sacks your way. 

Sealable food-grade buckets are a great way to store grains so that they remain fresh and they will keep out those cliched eaters of grain, mice, and rats.

If you are a keen malt kit user, then a great way to save money is to buy them from supermarkets rather than from beer stores. I've found a great place near where my mother lives and every time I visit I buy several of their Coopers kits which are often priced 5 or 6 dollars cheaper than my local beer shop.

There are also other ways to save money when brewing beer, you may already know these but here we go:

  1. Instead of using a 'branded' sanitizer, use a generic product such as a laundry soak that contains sodium percarbonate.
  2. Make your own DIY version of powdered brewery wash
  3. Instead of buying bottles, save your empties and remove the labels. You can also source glass bottles by raiding your neighbor's recycling bins.... best done under the cover of darkness. Given so many people drink craft beer featuring perfect sized bottles for brewing (500 - 600 mls give or take) there's many a bottle to be scrounged. 
  4. If you want to save on buying caps, then you can use swing cap bottles.
  5. All grain brewers often will use a wort chiller to cool down the brew - handy brewers can make their own, saving a few quid. 
  6. Instead of using a wort chiller, you could freeze empty soda bottles with water, say 4 1.5 litre bottles. When it's time to cool the wort, cut the ice from the bottles and drop them into your kettle...
  7. An old fridge can be turned into a fermentation chamber with the smart use of a temperature controller.
  8. A great way to find cheap or free second-hand brewing equipment is to keep an eye out on craigslist - it's quite popular but you'll have to be patient and quick! This is quite true for fridges and freezers, some people just want them out of the house quickly so are prepared to let them go at no cost.
  9. If you want to save on hops, by not using them, you can brew certain styles that don't need them such as Hefeweizen or a low ABV bitter.
  10. Grow your own hops! Homebrew groups on Facebook are a great way to source rhizome cuttings, usually, all it will cost you is a couple of bottles of brew!
  11. Don't use so much hops!
  12. You can find all sorts of handy keg parts on Aliexpress, though if you want quality, you may want to check out sites like Amazon. It's a jungle out there though.
  13. You can also make your own mash tun out of commonly available items such as water coolers.
  14. Organized homebrew clubs can often make purchasing arrangements which means cost savings can be passed to you directly, especially so if shipping costs are kept low.
  15. In winter, you can always use snow to cool wort instead of buying ice for your chiller. Dissolve it in water...
  16. Make your own beer enhancer with supplies bought cheaply online.

Some cautions about cheaping out when buying equipment


There's a long established concept that buying cheap items like tools or shoes will cost you more in the long run than buying a quality implement or boot because you'll need to replace them more often than you would a durable item.

The same applies to brewing in many ways. For example, if you have to choose between kettle sizes, buy the bigger one. Sure, it may cost more but if you stick with brewing, then eventually you'll go all grain at scale and you'll have to buy the larger kettle, thus, you've ultimately spent more than you may have wanted.

This is especially so for items like ph testers - go for quality over cheapness every time, especially all when making kombucha.


The Art of Water Chemistry in Homebrewing


While much of the focus has been on grains, hops, and yeast, one shouldn't overlook the importance of water chemistry when it comes to brewing beer cost-effectively. After all, water makes up the majority of your brew. Many experienced homebrewers invest in water testing kits or seek information about their local water supply to better understand its mineral content. By adjusting your water's chemical makeup with cost-effective additives like gypsum, calcium chloride, or even simple baking soda, you can significantly improve the efficiency of your brewing process and, ultimately, the taste of your beer. 

This fine-tuning allows you to better emulate the water profiles of certain beer styles’ places of origin, such as the soft water for brewing a Czech Pilsner or the hard, sulfate-rich water for an English Pale Ale. What's more, getting your water chemistry right can actually make your ingredients go further, saving you money in the long run. 

Consider this: a more efficient mash process facilitated by optimal water conditions can extract more fermentable sugars from the same amount of grain. It's an advanced technique, but for those committed to the craft and cost-efficiency, it's an area ripe for exploration.

Sourcing Local Ingredients for Authenticity and Cost-Saving

Let’s consider an often overlooked avenue for cost-saving and unique flavor—locally sourced ingredients. Homebrewers who take advantage of seasonal and regional ingredients not only save on costs but also add a touch of local flavor to their brews. Imagine a pumpkin ale brewed with pumpkins grown in your own garden or a stout made with local coffee. The opportunities are endless and often, you're contributing to local agriculture and small businesses. 

Depending on where you live, you might find farmers willing to trade fresh produce for a share of the end product—a win-win scenario that builds community around the art of brewing. Some homebrewers have even been known to forage for wild ingredients, like berries or pine needles, to use in their brewing experiments. While this practice necessitates some knowledge of safe and suitable plants, it offers an intriguing method for incorporating unique, hyper-local flavors into your brews without incurring additional expenses.

Best stainless steel ball valves for homebrew kettles

Wednesday, November 7, 2018
Best stainless steel ball valves beer

Best stainless steel ball valves for homebrew kettles


When you've decided to upgrade from using beer kits with plastic or glass fermenters and you want to use a bit of steel kit in your beer making, you're probably going to want to use a brewing kettle.

Every kettle needs a valve of some sort to release the beer wort and it's crucial that that exit point will work correctly every time and that it doesn't leak. You can even use them with your mash tun.

A quality steel ball valve will do the job. Once properly attached and sealed to the kettle, it's a simple matter of connecting the hose, and your wort's away!

What to look for when buying a valve for you're brewing kettle


Most brewers tend to use valves manufactured out of steel but there are some parts made of brass. Some brewers suggest brass parts corrode too easily and need to be cleaned as a result. We'd recommend you focus your search on buying a steel valve.

A valve made of 304 Stainless Steel will provide for maximum corrosion resistance.

Size is important - most brew kettles have a pre-made hole that is 7/8" inches in diameter - accordingly, you should be sourcing a 1/2" ball valve.  The seal on the valve should take care of the difference!

You'll also want to ensure the nozzle or hose bard is the right size for your needs. A 1/4" nozzle may result in a beer flow to slow for an impatient brewers, so you may want to consider the commonly used half inch nozzle hose barb

What are the best valves to use?


We never recommend cheap products as in the long term they can cost you more trouble than they are worth but mid range is a fine place to start with this bulkhead:


Features
  • 1/2"x10mm Stainless Steel Hose Barb
  • Stainless Steel Full Port Ball Valve
  • Sanitary Ball Valve
  • It features a 1/2" Full Port ball valve and a 1/2" barb, which means you'll get a decent wort flow
Check out the price on Amazon.

CONCORD 304 Stainless Steel Weldless Bulkhead Ball Valve


Concord Cookware have produced a no-nonsense valve and boast the following specifications:

  • Weldless Bulkhead Set Includes 1/2" Barbed Hose, Ball Valve, Hex Nipple, Washer, Red O-Ring x2, Grooved Lock Nut
  • 304 Cast Stainless Steel for highest corrosion resistance
  • High Temp silicon O-Ring for heat resistance
  • Grooved Lock Nut for leak free installation
  • Standard 1/2" NPT fittings made to fit your 7/8" kettle hole
Heh, they said nipple! It's no joke though to check the price out on Amazon.

The "L" Shaped Ball Valve


If you want your hose barb to point more downwards, this model from Tizze will suit your needs.

l shaped ball valve for a kettle

Tizze's specifications:
  • 1/2" weldless bulkhead fitting fits 7/8" kettle hole
  • Made from 304 stainless steel
  • Full port ball valve
  • Heat resistant O ring and it will hold a really good seal on the coupler
Here's a review that an actual brewer left on Amazon:

"Nice valve for transferring wort from the brew kettle to the fermenter. Takes 3/8" tubing doesn't leak and works great!"

So, what are you waiting for? Check out the price on Amazon.

How to attach a ball valve to a drilled kettle


This great instructional video shows you how to easily install the valve. A key take-away is that you can use teflon tape to further prevent leakage.


Another good idea relayed in the video is to test that your valve is correctly installed and your o-rings have made a good seal. Instead of using beer, test it with water!

How do I clean the valve?


Most valves can be taken apart for easy cleaning. A spanner or wrench is quite handy but then, you don't need to tighten these units to death.

Cleaning with a strong brush, hot water and soap will do the trick.

Why are brass made valves a controversial topic?


Both brass and steel are alloys. The metals they are made with each have different properties when they mix with alkalines and acids.

Brass is more likely to corrode, so brewers prefer to use quality stainless steel products to avoid the issue of metal leakage into beer. For example, brass can leach zinc and that's not really a key ingredient of beer is it? (it's actually really helpful as a yeast nutrient though...)

The top beer kit ideas to give for Christmas presents in 2025

Tuesday, November 6, 2018

The best beer kit ideas for Christmas presents in 2025

It was my wife who gave me the push I needed to get into home brewing beers.

I'd been saying for at least a year I was going to do it and even started collecting and cleaning the labels off beer bottles but I never made that jump. And then on Christmas Day, my lovely lady presented me with a Mangrove Jacks home brew kit and I was away!

If you are considering buying your partner / husband / best friend a beer kit for Christmas, we've got some great beer kit gift ideas for you!

There's a lot of gear out there but don't fall into the trap of going overboard and spending too much money. If your gift recipient is new to brewing, only the most simple and cheap brewing kit is required.

I was a slightly nervous first-time brewer. I read up all I could about brewing on websites, I read the instructions on the can. I read them 5 times. I called a mate who had done it few times. I read some more.

And I didn't need to as it is so easy to make beer!

I just did it and it was bloody fun. Because all you need is a simple drum, your equipment and some clean hands! But maybe follow this brewing advice too.

What beer kits do make ideal Christmas presents?

Let's start with the kit I was given for Christmas, the Mangrove Jack's beer kit.

This was an awesome present. It came with everything I needed to make my first batch of beer with. All I need to supply was the bottles. The first thing I realised was just how much beer you can make with it.

23 litres of beer is a lot!

The kit came with the malt, cleaners, brew enhancer, a hydrometer (for working out when fermentation was complete) and some easy to follow instructions.

The beer I made was pretty good all things considered - I just wish I had let it bottle condition a little more!

This gift was perfect for me as a home brewer, I personally recommend it as a great starter kit.

Mr. Beer Premium Gold Edition Homebrewing Craft Beer Making Kit

This is a handy kit as it has all you need to start brewing – the brewing extract, fermenter, bottles and ingredients. It even has brewing carbonation drops to make the first bottling experience a breeze. Mr Beer, the company that makes this kit, describes it like this:


“Mr Beer’s Premium Gold Edition Complete Homebrewing Kit provides aspiring brewers with our patented brewing equipment and high-quality ingredients that simplify the homebrewing process. 

Our patented brewing system includes a compact, lightweight fermenter that is modelled after the design of professional brewing equipment. Eleven 25 oz. reusable and shatterproof bottles that are specially designed for carbonating the beer.

We also include a can of brewing extract - a concentrated form of all natural malted barley and hops - produced in a state-of-the-art facility by Australia’s oldest family owned brewery, as well as No-Rinse Cleanser and unique Carbonation Drops to simplify the sanitization and carbonation process.”

So what are you waiting for? Order it now so you get it in time for Christmas!

The beauty of these kinds of beer kits is that they are so easy to clean as well - a rinse with a hose and then a splash of hot water with a cloth or non scratching brush and you are done - ready for the next batch to be made!

Not convinced?

Here's one more awesome brewing kit that would make the best Christmas present:

You could try the Brooklyn Brew Shop Beer Making Kit, Everyday IPA.

You could say it's a little bit fancier than the Mr Beers kit as it involves a slightly different way of making the beer.

The Brooklyn kit involves you making an oaty mash on your stove or gas burner and doing a little bit of boiling.

The Brooklyn Brew shops described it's product like this:

"If you can make oatmeal, you can make beer. Brooklyn Brew Shop's apartment friendly Beer Making Kits make it easy to bring brewing out of the garage and into the kitchen using only fresh, whole ingredients and traditional methods used in homes and breweries for centuries.

By brewing with the same ingredients (cracked barley, hops, spices, and yeast) that the best craft breweries in the world use, making high quality and complex beers becomes possible on the stove top in your very own kitchen, big or small."

Which is all very nice, but is it any good for a Christmas present? Here's what a user of the kit said in their review on Amazon:

If you "enjoy REAL beer and are actually INTERESTED in the process of brewing and how it works, this kit is an excellent way to jump right in by DOING it. They tell you WHAT to do, you do it, and you get very good beer out of it. "

So no complaints then. An easy choice for a Xmas present!

If beer is not the best idea, why not giving a gift of a cider kit?

If your partner is not really a beer drinking, they could well be into making cider! Good drinking ciders are quite the popular product these days.

They seem to have lost that ‘thing’ about them and are more accepted as something to drink in a bar. Which seems strange as cider has been around for centuries!

Our friends Brookyln Brew do a handy cider kit and so does Mr Beer.

If your partner is pretty experienced, take it to the next level with a ph Meter for testing the brew.

What are adjuncts used for in beer brewing?

Tuesday, October 23, 2018
Adjuncts are unmalted grains (such as corn, rice, rye, oats, barley, sugars, and wheat) or grain products that are used in beer making to supplement the main mash ingredient (which is usually malted barley).

Under the German Beer Purity Laws, and adjunct could really be considered anything which is water, barley, hops, and yeast but that's just being a bit German eh?

So an adjunct can be anything added to beer such as:
  • Unmalted wheat, barley, rye, oats, maize, and other grains
  • Belgian syrups 
  • Honey, maple syrup, molasses, other sugars like jelly beans.
  • Fruit, pumpkins (!)
The reasons for adding an adjunct are varied. Some brewers will seek them for head foam retention, flavour or even to cut costs!


There is another reason why brewers use high-adjunct beers, and that's to make high alcohol beers. 

By adding extra sugars, for example, the yeast will ferment that in addition to the malt, thus produce more alcohol. 

When adding adjuncts to the beer one needs to understand that this can hamper an efficient fermentation as the yeast can tend to get a bit overwhelmed by all the extra sugar. 

To adjust for this, brewers who are looking to brew a high ABV beer, will add a yeast nutrient to give the yeast some respite from all the sugar.

Adjuncts can also be used to achieve specific beer styles and flavors:
  • Use simple sugars such as that from corn can be used to lighten the beer body and encourage a good rate of attenuation of your high-gravity styles.
  • The addition of flaked barley or rye can promote a strong head and a full body (which is good for mouth feel).
  • Tossing in a handful of flaked oats is known to result in silky mouthfeel.
  • Flaked rice, when matched with an earnestly hopped pale lager, is another method of changing the taste profile.
  • Using cherries and raspberries in sour ales is a popular trick

    The Art and Science of Brewing With Adjuncts

    While the use of adjuncts in beer making is sometimes met with skepticism by purists, who may invoke the German Beer Purity Laws as a standard, the craft lies in the brewer's skill to balance these supplementary ingredients without compromising the integrity of the beer. Knowledgeable brewers understand the intricate chemistry behind the fermentation process, tailoring their use of adjuncts to achieve the desired flavor profile, mouthfeel, or alcohol content. 

  • The key is to keep the yeast's capabilities and limitations in mind, especially when brewing high-alcohol beers. Properly employed, adjuncts can serve as the brewer's palette, offering a spectrum of colors and textures to create a truly unique masterpiece.

  • The Future of Adjuncts in Beer Brewing

    As the craft beer industry continues to evolve, so too will the use of adjuncts. From nano-breweries to large-scale operations, the quest for unique, marketable flavors has never been more intense. Today's consumers are adventurous and open to experimental brews—be it a sour ale bursting with the tartness of cherries and raspberries, or a strong stout enriched with the complex flavors of molasses and flaked oats. Brewers who are attuned to the potentials and pitfalls of adjunct usage are well-positioned to innovate, capturing the palates of a new generation of beer enthusiasts who seek the extraordinary in every sip.

Best wort aeration pump systems

Monday, October 22, 2018

The best aeration pumps provide an efficient and inexpensive way to aerate the wort in your primary fermenter.


An aquarium pump forces room air through a properly sanitized tubing. The air is delivered then delivered the wort through a diffusion stone. This promotes rapid absorption into the wort.

So what pumps do this the best?

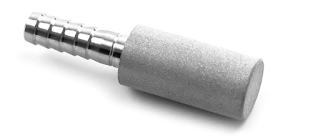
best pump for adding oxygen to beer wortSmarter brewers than I have worked out that your wort should ideally have an oxygen level of 8 ppm (parts per million) before pitching the yeast.

The reality is that many brewers only achieve between 2.5 - 4.5 ppm if they do not aerate with a pump.

By using this wort aeration system you can probably easily double the oxygenation you might normally be getting.

A brewer who brought this unit on Amazon left this genuine review:

“Works great! Bubbles quite a bit, and foamed out of the top (mainly because I didn't leave enough room), but I didn't have any issues at all. My yeast took off like a bat out of hell when I pitched, which seemed to be better than when I didn't oxygenate in the past. I would highly recommend this to any homebrewer looking to improve fermentation.”

What are you waiting for?

Incomplete fermentation to occur?

Check out the price on Amazon:

Eagle Brewing FE380 Aeration System


Eagle Brewing FE380 Aeration System wort pump
The Eagle Aeration System does what you want it to do, quietly and effectively.

Attach the ⅜-inch transfer tubing to the unit and your stone and you will be aerating in no time. 

There’s not much more to say about this unit, it’s basically 'plug and play' once you’ve submerged the stone at the base of the fermenter.

Just bear in mind that the tubing (as with all pumps) will be wound up on arrival due to packaging constraints so you may want to stretch it out a bit so it settles on the bottom of the fermenter.

Check out the price on Amazon:

Using diffusion stones to oxygenate beer wort


diffusion stone for brewing oxygenation
Here’s a funny thing we learned.

Diffusion stones are not actually made of stone.

How about that eh?

They are actually made of stainless steel which is added to a porous mold.

They do work a treat in making bubbles get that oxygen into your beer. You’ll want your stone to have a micron level of between .5 to 2 microns. This is pretty standard for brewers.

When using a diffusion stone you’ll want to ensure that you’ve sanitized it in an appropriate sanitization solution (don’t forget the tubing as well!).

I’ve read some punters warn that your hand can leave natural oils on the unit which can then clog it up - I say if you’ve washed your hands prior to use, then you should be fine.

It can be hard to attach a diffusion stone to the tubing. Instead of trying to force it in, place the end of the tubing in some near boiling water for a short time. This should soften the tubing enough so you can insert the stone’s connector part.

When placing your stone in the wort, you want it to get to the bottom of the fermenter, not near the top. If your tubing is a bit curly, you may want to try and straighten it out.

If this continues to be a problem, you may wish to consider using an oxygenation wand which will sit quite nicely in the fermenter, ensuring the oxygen bubbles start at the bottom and filter into the whole wort.

Learn more about oxygen wand kits here!

When aeration is good but oxygenation is bad

Sunday, October 21, 2018
carboy areation wort shake

How to properly aerate wort for brewing


While in some ways beer brewing is simply following a recipe but it sure is not like making a cake. There are some many variables at play.

Is the yeast viable?

How much hops do I need to add?

Is my equipment germ-free?

Is the temperature correct?

And on and on.

There's also one more variable that sometimes gets overlooked in the brewing and bottling processes and that's the role that oxygen plays in fermentation.

Oxygen supports yeast growth and effectively then has an influence on the ABV of one's beer so understanding the best way to manage this element will help improve your beer drinking experience.

First up, let's discuss the:

The relationship between yeast and oxygen


The yeast in your beer requires the presence of oxygen so that is can develop new yeast cell walls. The oxygen is used to develop unsaturated fatty acids and sterols, of which the yeast membrane is built.

Good oxygen levels promote strong yeast which in turn means it can handle high alcohol concentrations which means it was last longer and do a better job on your beer.

An efficient yeast means one gets quicker fermentation times and a reduce chance of a stuck fermentation. This also will mean that you will get fewer off flavors in your beer.

The higher the desired ABV, the more oxygen required


We made reference to it above but if you intend to make a high alcohol beer, you need to create an environment where the yeast can handle that - and a strong yeast is key.

At the same time, you are probably intending to pitch your yeast at a higher rate than you would for a 'session beer' so, all things being equal, you'll want to increase the oxygen ready to be used by that yeast.

How to aerate your wort with oxygen 

Before you aerate your wort the first thing to consider is WHEN.

If you aerate when the wort is too hot (this includes being warm) there is a vastly increased change the oxygen will bind to wort particles. 

If this happens, the risk is that over time these compounds will begin to break down, adding the oxygen back into the beer. The harm occurs as the oxygen can tend to oxidize the hop and alcohols.

This can produce 'off flavors' which are often described as being like 'wet or damp cardboard' or sherry like.

How to prevent oxygen from getting into your beer


We discussed above that aeration at hot temperatures is undesirable - so cooling your wort quickly is the best thing you can do.

Using a wort chiller will quickly bring your beer down to the right temperature so you can pitch your yeast but before you pitch, it's the time to oxygenate.

Carboys

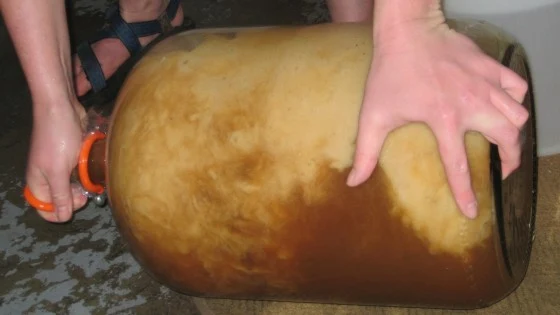
If your wort is in a glass carboy, cover the mouth of the carboy with a cap and gently rock the carboy back and forth to encourage oxygenation of the wort. You can do this with a plastic fermenter too. 

Just make sure you have a firm grip!

If you're making a beer with a kit, once you have the kit in (along with hops and brew enhancer) then I fill it up with water from the garden hose. This will easily add plenty of oxygen to the wort. 

Once your beer is in the fermenter and fermentation is to begin, it's pretty simple to keep the oxygen out - you need to ensure the drum or carboy is tightly sealed and that your bubble airlock / air vent has water in it.

Then try not to move it again!

When bottling your beer, a bottling wand and a steady hand will help to prevent aeration. Do not leave your filled bottles uncapped for too long either!

stirring wort with a whisk

Other tricks for stirring in oxygen:
  • Use whisk. Get in there and use some elbow grease
  • Use a beer spoon. Not as efficient as a whisk but a strong arm will make some foam
  • Add an agitation rod into a drill such as this mixer.
  • Use a siphon tube to spray the wort into the fermenter
Whichever agitation method s used, make sure that your implement is clean and sanitized to prevent risk of infection

Another great method is to use a pump system for aeration. Check out this instructional video on how to configure the pump.


If using an aquarium fish style pump, you need to make sure the diffusion stone is clean and sanitized and is small enough to fit into the neck of the carboy. The stone also needs to have a small micron level of  between .5 to 2 to ensure lots of gas bubbles are produced.

diffusion stone for wort oxygenation

For best results, aerate your chilled or cool wort for 20-30 minutes.

When racking beer, try not to disturb the beer too much


When you're racking to a secondary fermenter or to your fermenting bucket it's imperative to prevent the liquid from splashing or getting agitated. When using a siphon it's best to keep it smoothly flowing.

Do I have to oxygenate my beer?


No.

You do not need to proactively aerate your beer, fermentation will still occur.

The point of aeration is that you are trying to give the yeast a leg up.

That said, some brewers are known to starve the yeast of oxygen as this assists with the beer profile they desire. This process is called anaerobic fermentation.

How to use foam inhibitor to avoid 'boil over' or a 'krausen explosion'

Monday, October 8, 2018
pot boil over prevention

Beware the krausen! A watched pot never boils right? 


This rule doesn't apply on brewing day.

Even though you are paying keen attention to your boil, it takes but a second for a boil over to happen, making a mess and causing you to lose wort.

But what if there was a way to stop boil over?


Some pundits recommend that you add marbles or ball bearings to the brew to help boil over.

Or use a spray bottle of cold water whenever the foamy beast raises its head.

But if you want to make sure you don't suffer a boil-over, try using a foam inhibitor!

Foam inhibitor or 'defoamer' is a handy trick to keep your beer from boiling over.

A popular product is 'Fermcap-S'. A fancy way to describe it is that it is a "silicone based food-grade emulsion".

There are two main ways to use it - during the boil and during fermentation.

If you choose to use 'Fermcap-S' to prevent boil overs on the hot side, add 2 drops per gallon for a nice rolling boil.

If you wish to use it in your carboy or fermenter to prevent the krausen from escaping the fermenter, then the dosage is only 2 drops at the start of fermentation. If you didn't know, the krausen describes the foamy head that develops on top of fermenting beer.

If you have added your inhibitor during the boil, there is no need to add any to the fermenter as it will carry over.

When used in the fermenter, 'Fermcap-S' increases the bitterness of your beer (retained IBUs) by about 10 percent.

This sounds dandy but why should I use a foam inhibitor?


Boil-overs are more likely to be a problem if you are using a smaller pot. Users of fermcap have reported being able to make a 5.5 gallon batch in a 7 gallon pot.

While mess is annoying, the real reason you want to prevent this is that the foaming can cause any top-fermenting yeast to be expelled from the fermenter before it can do its job in the wort. 

This then requires the rest of the yeast to work harder to achieve the final terminal gravity which will not necessarily occur if yeast lost has been significant.

There is also another sweet effect of using an inhibitor like Fermcap it actually can help retain the IBUS from the hops - that is to say, it can help your beer become even more bitter when the product is added to the primary fermenter.

Beer is supposed to be foamy! This seems an odd product to use?


Using anti foam may seem to be a counter-intuitive idea. It would seem fair to consider that putting something in wort or fermenting beer to control foam will also kill the head on the finished product.

However, when anti-foams are used properly, quite the opposite is true!

Using vegetable based defoamer


Instead of silicone based products, you can also try vegetable oil versions.

Vegetable oil is a known yeast nutrient and will be consumed by the yeast during fermentation of beer before bottling or kegging.

Commercial breweries use it


Big commercial breweries often use defoamers and anti-foamers as part of their beer processing but given that it's not really within the spirit of purity brewing, it appears not many commercial operations will freely admit to adding silicone based products to their beer!

So what are you waiting for? Here's the cheapest Fermcap I have found on Amazon!

Begun, the beer wars have

Tuesday, October 2, 2018
Begun, the beer wars have.

Actually, this has been happening for a while now.

Big commercial brewers versus the little guy.

Big commercial brewers buying up the little guy.

Big commercial brewers trying to trademark beer lingo like radler.

And everyone hates them for it.

So when Tui attempted to bully Moa brewery a few years back, Moa stood up for themselves in a deliciously brilliant way.

While they are not the littlest guy, let's call them a mid-strength brand. They are on the NZ share market, and at the time of Tui's dig, there was nothing spectacular about their share price but they were slowly picking up sales around the world.

Either way, the diss Tui made as part of their famous yeah right campaign was 'worty' of a retort.

If you haven't read the above very word image, do it now. You'll see the story play out really well. Moa is making the point that Tui is part of a world conglomerate where there a layer of corporations and SHAREHOLDERS.

So attempting to pick on a small fish for their share performance is somewhat ironic and amounts to a form of corporate bullying.

It's also amusing as if we are comparing the flavour of Tui to Moa's product, it's this humble drinker's opinion that Moa has the superior product range.

Sure, Tui was a beer I swilled back in my University days (where my Speights drinking mate used to say of Tui beer, "Tui is a bird and let's leave it at that". And that's about what it's still great for, binge drinking at a Uni Bar or a party or summer BBQ somewhere.

Hey don't get me wrong, Lion Nathan who is owned by mega-sized Japanese company Kirin still make Steinalager, which despite its massive commercialization, it's one of the best beers around.

Other drinkers will disagree but for this drinker, there's something really special about that first taste of a cold bottle at the end of the day!

Using Malic Acid with wine to reduce the pH level

Monday, September 24, 2018
using malic acid to reduce pH in wine

How to manage pH levels with malic acid 


Did you ever see that episode of Knight Rider when K.I.T.T. was placed in an acid bath and he left it as shell of a car?

Yeah?

Well, don't use that acid when making wine, perhaps use malic acid instead.

Malic acid is an acid that is found in fruit and quite commonly in grapes and apples. Have you ever had a Granny Smith apple and found it to be quite sour?

That's the malic acid at work. It's quite similar to citric acid in that sense.

As such it's used in all kinds of foods to give that tart flavor. Ever tasted 'Salt and Vinegar' chips?

That's not just vinegar you're tasting...

So why would one use malic acid when brewing wine? 


It's a very handy compound for reducing the pH level of wine.

All good brewers know that both beer, cider, and wine need to be within certain pH level otherwise, the tasting experience will be horrible. The acidity works to counter the sweetness and bitter components of the wine such as tannins.

A wine that features too much acidity will taste extremely sour and sharp and produce a physical response from the mouth and tongue. A wine with not enough acid present will taste somewhat flabby and flat and its intended flavor will hard to discern.

This is why so many wine makers use pH testers (such as the Apera) to ensure their wine is in the correct range.

A word to the wise. If your wine is going to undergo malolactic fermentation (such as red or sparkling) do not add extra malic acid as this will convert to lactic acid.

Which wines suit the addition of malic acid?

  • Most reds
  • Rieslings
  • Gewurztraminer
  • Muscat 

When do I add acid to the wine?


Malic or tartaric acids may be added either before or after primary fermentation.

They can also be added during any blending or aging periods, but the increased acidity will become more noticeable to the drinker.

How much malic to add to the must?


It's a general rule of thumb that 3.4 grams per gallon will adjust the acidity by +.1%. 

It will lower pH less than tartaric acid will which is why some wine makers prefer to use that acid.

Order your acid from Amazon.

What is malolactic fermentation?


Malolactic fermentation or conversion is the chemical process in winemaking where the malic acid that is naturally present in grapes, is converted to lactic acid

Fermentation is caused by a family of bacteria known as lactic acid bacteria.

Malolactic fermentation usually occurs as a secondary fermentation shortly after the end of the primary fermentation. The process is usually undertaken for the vast majority of red wines produced. Some white varieties such as Chardonnay use it as a byproduct of the reaction is a diacetyl which imparts the 'buttery' flavor associated with Chardonnay.

This process helps give the wine a good 'mouth feel' which is something all good beer brewers appreciate.

If you're wondering how beer makers can reduce bitterness and pH levels, they can use gypsum salt and calcium chloride.

If you're making prison hooch with juice you can do the same with malic acid.

The best kettle spiders for straining hops

Saturday, September 22, 2018
hops kettle spider tripod

You could be forgiven for wondering what a hops spider is.

Is it some kind of jumping jack or a spider that lives on the hop plant?

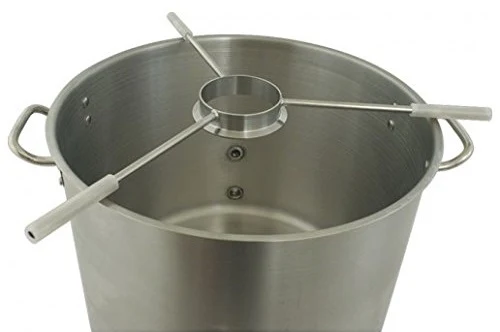
Nope, it’s an instrument to help add hops to your boil to help prevent sludge build up from the hops pellets or even the leaves. It’s ideal for preventing clogs in brewing gear and helps make brew day just that little bit cleaner.

The way a hops spider works is it is basically a mesh filter that sits over the building kettle and it simply acts as a strainer for the hops - you get want you want from the hops into your beer and the mess stays inside the filter and is simply removed by taking the spider out.

Too easy eh?

Many commercially made hop spiders will use a mesh of 300 micron as it filters the hops quite well.

If you are using leaves, it is actually a really good idea to use a kettle spider because any stray leaves can easily block a valve or inline filter and that could be a real pain to sort out!

What are the things to look for in a good hops spider?


  • Good micron size filter, 300 is standard
  • Made of stainless steel
  • Features a sturdy tripod that will fit across your kettle or
  • a hook that will fit the side of your kettle

I’ve heard hops filters reduce the utilization of hops. Is this true?


It’s a valid concern but perhaps one that is somewhat over thought but there are several things you can do to make sure you get the efficient hops utilization - and in case you didn’t know, we are talking about the IBUs that go into the hops and thus affecting the bitterness of the beer.

  • Make sure your filter sits inside the kettle quite low, say one or two inches from the bottle. This gives the hops enough surface area in which it can play. Check this before your first brew, not when it's time to add the hops!
  • Speaking of surface area, don’t overfill the hops filter. The hops needs its space, especially if you are using leaves. You don’t want them all mashed together, they should be able to float freely a bit. Hangin' and bangin' Jerry!
  • During the boil, give the hops a bit of a stir, or ‘agitate’ them if you will. Maybe use a brewing spoon for this, and remember you are dealing with hot boiling water so be careful as you usually are. 
  • When you remove the kettle filter, ensure that you let it drain completely so that anything that should go into the beer, is with the beer. 
  • You can always compensate by adding a little extra hops to account for any loss utilization. 
  • Some spiders have a tripod and some use a hook on the side of the kettle. Neither kind is better than the other if you follow the above way to use one.

What is the best hops filter to use?


One of the most popular kind of spiders is the 300 Micron Mesh Stainless Steel Hop Filter Strainer
Suitable for a brew bucket fermenter, you simply hang it to the side of brew kettle during the boil, easy to hang and keep stable.

This brew filter will dramatically keep hop trub from getting in your brew bucket. It's also easy to clean with a sprayer or brush. 

Made of stainless steel it is rust-proof and hot-resistant and if looked after, it will give you a long service life.


DIY  - making your own hops spider


home made hops kettle strainer


While there are plenty of really good hops spiders on Amazon, you may wish to make you own in the spirit of good keen homerbrewers every where. Given they are simple devices to make, if you follow the instructions (like in the below video tutorial) then there’s a good chance of making a handy spider.


How to use and replace an Italian Bottling Spigot

Thursday, September 13, 2018
When I first started brewing beer my mate said to me:

"yeah brewing's good and all but bottling is a real bitch".

I realized they weren't wrong when I once didn't notice the bottling wand had fallen out of the fermenter tap on bottling day and my brew was piling in a nice pool on the shed floor.

Anyways, a bottling spigot is a handy little device that can help make that bottling chore just a little bit easier.

So what is a bottling spigot and why are they often referred to as Italian?


The 1/2 half inch spigot tap is used to transfer the precious beer or wine into the bottles. It's a handy valve to control the rate of transfer and it's easy to turn on and off.

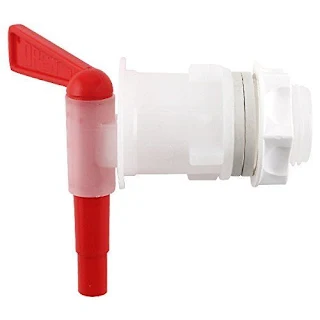
They look like this:

italian spigot for bottling

These spigots are commonly made in Italy from food-safe plastic but the truth is they are most likely manufactured in China. If you a serious about your plastic safety, look for a brand that has been FDA approved.

Note the tapered ending. This is so you can add a bottling wand or plastic tube for pouring (typically good for 5/16" and 3/8" size hose). This is handy if you will be running the brew threw an inline filter.

Here's a handy video guide on how to install the spigot


Taps can break fairly easily but lucky for brewers everywhere, spigots are cheap and easy to replace and install. 


There are some handy hints in the video that are worth mentioning:
  • Screw the unit in carefully. 
  • Remember to attach the gasket from the inside of the fermenter
  • Do a test with water to ensure the spigot is sealed properly
If your fermenter bucket doesn't have a hole for the spigot, you'll need to cleanly drill a hole that is 1" in size (25.4mm). This kit actually comes with a drill bit that you can use to drill the hole to the exact size.

Given the spigot is easily removable by unscrewing the gasket, they can be removed and cleaned quite easily. This is a good idea if you are keen on preventing beer infections and the like.

You can, of course, use spigots for any kind of beverage dispenser or 5-gallon bucket.

Check out what's available on Amazon.

Using calcium chloride to reduce pH of beer

Thursday, August 16, 2018
using-calcium-chloride-ph-level

How to use calcium chloride to reduce a high pH level


An experienced brewer will be no stranger to the fact that the pH level of one's beer has a direct effect on flavour. A beer that is pH balanced will feel good to the palate meaning you've a drinkable beer.

If your pH level is too high, one way to reduce it is with calcium chloride flakes.

By adding salt chlorides to your beer, you not only reduce the pH level but have the benefit of the chloride ions working to promote the sweetness, or mellowness of the beer's taste profile.

Charlie Sheen would call that #winning. 

Using calcium chloride has a variety of benefits for beer production
  • reduce pH levels as needed
  • promotes the water hardness of beer
  • help preserve mash enzymes
  • assist with increase extract yield
  • improve yeast metabolism growth and flocculation (great for clear beer)
  • accelerate oxalate removal
  • also used in cheese making as a firming agent
  • can be used to pickle vegetables!

How much calcium chloride do I add to my water?


General instructions are usually to use one teaspoon per 23 litres / 5 gallons (or as required). It will dissolve best in cold water, especially if it's stirred or shaken quite vigorously.

When you think it's properly dissolved, check with a ph meter to ensure the level is as you desire. 

You can then proceed to use your water for mashing or sparging.

Pickling with calcium chloride


I recently discovered that you can also use calcium chloride to help make pickles! Have you ever heard of Ball's Pickle Crisp? It's a popular product for when pickling dill pickles - it leaves them firm and hard which improves the eating experience. 

You've probably figured out by now that the secret ingredient of pickle crisp is that it is one hundred per cent made of calcium chloride flakes. So if you want to save yourself a bit of money from the brand name product, grab a no-frills bag which will cost you less and get you more. 

#winning. 

Replace the pressure relief valve if your corny keg is losing pressure

Wednesday, August 15, 2018
corny keg relief valve replace

Is your corny keg losing pressure? Replace the valve


Are your poppet valves and o-rings doing their job properly keep your brew fresh?

If they are, chances are your pressure relief valve is failing and needs to be replaced. And it’s important you do so as flat beer is a real, first world problem that can be damaging to one’s stomach and mental health!

The role of a pressure relief valve is pretty simple and obvious if you can read its name, they exist to let out pressure should your corny keg become over pressured. So you need them as a safety measure.

The valve will release automatically when the keg itself is at a pressure point of around 800 kPa. This could potentially occur when for example you have a regulator fail and CO2 keeps getting sent into the keg. This may seem a bit of a far-fetched example...

More reasonably, if you need to open your keg for some reason, using the relief valve to remove the pressure is a smart move to avoid spraying beer everywhere. Only beer rookies make that kind of mistake and they only make it once!

So if you’re experiencing a faulty valve, you can replace it quite simply and cheaply by ordering the part on Amazon and take advantage of your free shipping with Amazon Prime.

But not all relief valves are the same. Some are made of plastic, some stainless steel.

If you’ve ever read any other post on this site, you’ll know we always recommend quality over cheap parts and given steel is more durable than plastic, we think that’s what you should go for.

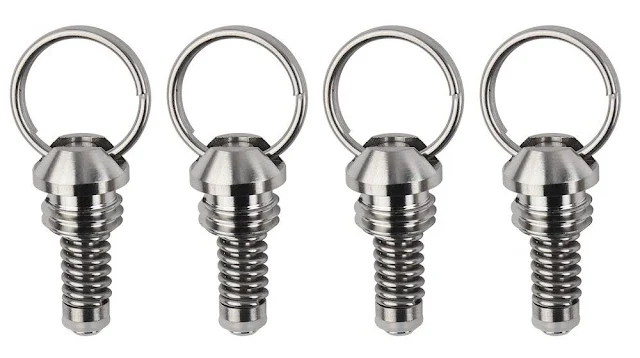
The valves come in two styles, the pull-ring or the toggle. You can tell the difference as the pull ring literally has a steel ring that you can manually pull when it's installed on your Cornelius keg to release the pressure.

If you have bought a second-hand corny keg, you may wish to replace the valve just for peace of mind. You could also consider replacing the entire lid of the corny keg, which would include a new valve - but you may not have the budget for that and so the idea of replacing the poppets and relief value if they are tired seems like a sensible precaution to me.

How to choose the best brewing spoon

Tuesday, August 14, 2018
choosing the best brewing spoon

This next question might cause a bit of a stir but what is the most useful item to have when brewing?

Is it a big kettle?

A giant mash tun?

A ph meter?

Those are nice things to have and all but we think the most useful item to have ready to hand on brew day is a spoon.

That’s right, a big spoon.

A big spoon to stir everything up just right. A spoon to unstick a stuck mash tun. A spoon to stir in hops. A spoon to stir in yeast. A paddle to break up clumped together ingredients.

Spoon or paddle, it doesn’t matter but the best ones do have a few factors about them that make them ideal for using on brew day.

They’ve got to be sturdy enough to stir with. Too weak and they’ll snap. This is why some brewers like steel spoons. Many of them have a corrugated design to prevent bending.

The only drawback is the steel can scratch your gear. If that’s a problem for you, use a plastic paddle if it’s strong enough. 

If you do choose the plastic fantastic, then ensure it’s food grade quality and that it is resistant to heat. 
Some of those brews can get pretty hot so if they are not heat resistant, they are more liable to break. Some smartly designed spoons will have a small head on the top of the spoon which can fit inside the next of a carboy which can be quite handy if you want to mix things up.

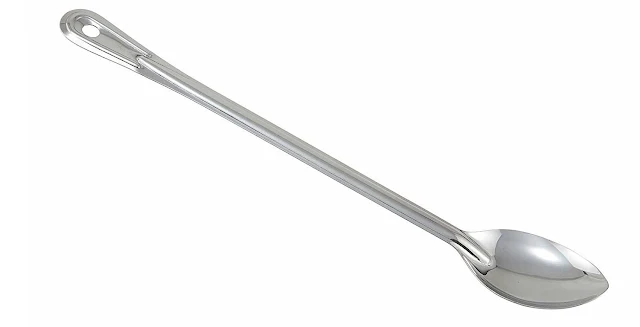
Conversely, steel spoons often have a bent top so they may be easily hung up on the side of a kettle or whatever. Else, they will have a hole in the top so they may be hung on a hook.

A great thing about stainless steel spoons is that they are easy to clean and will not retain odour. Handy if you’re also cooking crawfish or doing a turkey in a brewing kettle.

Wooden spoons can snap easily and can carry bacteria. No one wants a wooden spoon eh?

When stirring a mash, some prefer the paddle as they can be more effective in moving the grains around. 

You will of course what your brewing spoon to be a long enough length so that it can reach to the bottom of your kettle or drum. To that end, a 21 - 24 inch long brewing spoon should generally see you right for your stirring needs. Such spoons will work best with 4 to 10 gallon size brewing kettles.

As with all brewing equipment, you should only use a spoon that is clean. It doesn’t need to be sterilized when using before or after the boil as the heat should have killed any microbes that may have been lurking about. If however, you need to stir anything afterwards, then you will need to have sanitized your gear (we totally recommend you use sodium percarbonate for this task). This is especially true if you a simply mixing up a beer kit with some beer enhancer as there won’t be any heat to kill the bigs.

Check out some options on Amazon.

How to accurately use a refractometer to check specific gravity

beer brewing refractometer

What is a refractometer?


A refractometer is a tool used for measuring concentrations of aqueous solutions. It has many applications across food, agricultural, chemical, and manufacturing industries. A refractometer can be used to measure things like the total plasma protein in a blood sample, the salinity of water and even the amount of water content in honey.

They work by measuring the angle of refraction as light shines through the solution. Don’t ask me to explain the actual science behind it, I just work here man.

What I do know is the Brix scale is used as the means by which the measurement taken is assessed. Given we are talking measurements here, it should be no surprise that the Brix scale measures the sugar content of an aqueous solution.

This is when you might exclaim “Ha! I got you mate, wort is mostly malt sugars (maltose) and not sucrose so how does the Brix scale apply to beer?”

And I’d say you’d be right and you can account for this learning how to apply a wort ‘correction factor’. Frankly, this can be a bit of pain and is one of the reasons why some brewers prefer to use a hydrometer to calculate ABV.

Refractometers also only use a very small beer sample, especially less than a hydrometer which is why some brewers prefer them - especially if they are only brewing small batches of beer.

How is a refractometer used in homebrewing?


In terms of homebrewing, a refractometer used to measure the specific gravity of the wort before fermentation commences.

You probably already know what specific gravity is. If you don’t, a quick lesson from Wikipedia.

“Specific gravity is the ratio of the density of a substance to the density of a reference substance; equivalently, it is the ratio of the mass of a substance to the mass of a reference substance for the same given volume.”

Simple right?

In terms of brewing, one uses a refractometer to determine the amount of fermentable sugars which will be converted to alcohol.

What is the best refractometer to use when brewing beer?


There are many kinds of refractometers, and they serve different functions. As a brewer, you want one that is designed to measure sugar. Most brewers use is kind that fruit growers use to measure the sugar concentrations of their fruit to assess ripeness. This way you get a close approximation to wort, but it’s not exact and this needs to be factored when using the Brix scale as mentioned above.

Check out some options on Amazon.

How to properly calibrate a refractometer for testing beer


Just like when you use a pH meter, refractometers need to be calibrated.  There’s no way out of this.

Add distilled water (if you have it) close the plate. Ensuring the liquid to spreads completely across the prism without any dry spots. Allow 30 seconds so that the water can reach the same temperature as the refractometer.

This is important as the readings are temperature dependent.

You simply then aim the refractometer toward a natural light source. Look into the eyepiece and adjust it so that the scale is in focus.

Then adjust the unit’s calibration screw so that the refractometer reads exactly zero.

Now you are ready to sample your wort.

Testing wort with the refractometer


It’s fairly easy to use a refractometer, it’s largely the same process as setting up for calibration.

Once the unit has been properly cleaned of residue and correctly calibrated, place a small sample of wort on the glass. 

Shut the cover and take note that the glass is fully wet and has no stuck air bubbles. Give time for the same to warm to the same temperature as the unit.

Turn the refractometer to a natural light source. The refractometer should be held level with the window pointed at the light source. You can take the reading by checking via the eyepiece. Bob’s your uncle.

I should not have to advise you do look at the sun directly but as some of you drink and brew...

Check out some options on Amazon.

Bonus fact!


The first refractometer was invented by Enst Abbe. It was a complex device that included built-in thermometers and required a circulated water mechanism to keep the instrument cold. 

While the devices have been refined and digitised in the hundred years since Abbe’s invention, the principle of how they work remains the same.

Brewing with a Mangrove Jack's Stout Kit Review

Friday, July 20, 2018
mangrove jacks irish stout review
After my relatively successful effort with the Mangrove Jack's Dutch Lager kit (review), I thought I'd have a crack at their Irish Stout.

Brewed in the normal good manner of proper sanitization, careful cleanliness and a half-assed attempt to keep the brew warm during these winter months by wrapping it in several sheets, I am expecting a stock standard stout but I'm quite keen to compare it to Black Rock's Miner's Stout as I've brewed a fair few of those in the past year and found them to be excellent brews.

I'm keen to see how creamy the kit is.

I prepared the kit and added a beer enhancer that was specifically tailored to a stout and then left the unit in my shed outside to ferment.

During fermentation in the shed, we had our first winter frost. Not ideal for an ale but whatever.

I waited 10 days before conditioning at which point I batched primed with 70 mls of sugar that I dissolved in boiling water.

Honestly, batch priming makes it so easy to get a consistent brew across the batch and reduce the chances over an over-sugared bottle doing a gusher. I don't know why I was so reluctant to do so!

-

So it's now been over a week since I bottled condition, so I'm going to have a sneaky sample. I left the beer in the fridge overnight so the ale was nice and cold. It felt like it had a good body and it tasted like an ale but one that clearly needed to condition a fair bit longer.

So we wait.

-

Week 2. A wee sample after a nice chicken korma proved to be an odd, but a rewarding combination. The stout has settled somewhat.

Detected a hint of coffee which I expect will be gone in a week or two.

-

Week  3. This beer has turned out OK, I've made enough beers to know that if I give this batch another month to the condition it will be fine but nothing to write home about. I suspect I over sugared the batch as the beer gets quite the head when being poured. I'd say 50 to 60 grams probably suits.

The slight coffee notes remain.

Given this was actually the cheapest beer kit I've ever bought, the resulting beer is pretty fair. I do however prefer the Black Rock Miner's Stout over this.
Powered by Blogger.

Tags

absorption caps abv acetaldehyde acid adjuncts advice about beer brewing aeration aeration kit aging air lock alcohol alcohol poisoning ale ale beer kits alkaline alkaline brewery wash all grain american amylase apera apples attenuation autolysis automatic temperature compensation bacteria baker's yeast baking yeast ball lock ball valve bar keepers friend barley batch prime beer brewing beer capper beer dispenser beer filtration kit system beer gushers beer kit beer kit review beer kits beer lines beer salt beer taps beerstone best brewing equipment biotin bittering BKF black rock bleach blichmann blow off tubing bluelab bohemian pilsner boil in a bag boil over boneface bottle cap bottle caps bottle conditioning bottling bottling beer bottling spigot bourbon brettanomyces brew and review brew day brewing beer guide brewing salts brewing spoon brewing sugar brewing thermostat brewzilla british thermal unit brix brix scale BTU budvar buffer buffer solution burton snatch buyer's guide calcium chloride calcium sulphate calibration calibration probe calibration solution campden tablets capping carbon dioxide carbonation carbonation drops carboy cascade caustic soda cherry wine chinook chlorine christmas chronicle cider clarity cleaning your equipment clear beer clone recipe cloudy beer cold crashing coldbreak conditioning tablets conductivity conical fermenter contamination coopers copper tun corn sugar cornelius corny keg craft beer creamy beer crown cryo hops cubes danstar nottingham demijohn dextrose distilation DIY DME dopplebock draught dry hopping dry malt extract edelmetall brü burner eisbock ekuanot electrode enhancer enzyme equipment ester ethanol experiments in beer making faucet fermcap-s fermentables fermentation fermenter fermentis fermentor final gravity finings five star flat beer floccing foam inhibitor force carbonation french fresh wort pack fridge fruit fusel alchohol garage project gas burners gelatin gift and present ideas gin ginger beer glucose golden ale golden syrup goldings gose grain grain mill green bullet grist guinness gypsum hach hacks hallertauer heat mat heat pad heat wrap home brew honey hop schedule hops hops spider how not to brew beer how to brew that first beer how to brew with a beer kit how to grow hops how to make a hop tea how to wash yeast hydrated layer hydrogen sulfide hydrometer IBU ideas idophor infection inkbird instruments isoamyl acetate jelly beans jockey box john palmer juniper keezer keg cooler keg regulators kegco kegerator kegging kegs kettle kombucha krausen lactic acid lager lagering lauter lion brown liquid malt extract litmus LME lupulin lupulin powder lupuLN2 making beer malic acid malt malt mill maltodextrin mangrove jack's maple syrup mash mash paddle mash tun mccashins mead methanol micro brewing milling milwaukee MW102 mistakes mixing instructions moa mouth feel muntons must nano brewing New Zealand Brewer's Series no rinse nut brown ale oak oak wood chips off flavors original gravity oxygen pacific gem palaeo water pale ale panhead parsnip PBW pear pectine pectolase perlick ph levels ph meter ph pen pH strips ph tester pico brewing pilsner pitching yeast plastic drum poppet valve pot powdered brewing wash ppm precipitated chalk pressure relief valve priming prison hooch probe problem solving propane and propane accessories pruno pump system purity law radler re-using yeast recipe record keeping reddit refractometer reinheitsgebot removing beer labels from bottles review rice hulls riwaka rotten eggs saaz saccharomyces cerevisiae salt sanitization secondary regulator sediment seltzer session beer silicon simple tricks for brewing siphon site glass skunked beer small batch brewing soda soda ash soda stream sodium carbonate sodium carbonate peroxyhydrate sodium hydroxide sodium metasilicate sodium percarbonate sour beer sparge spigot spirals spirits spoon spraymalt star san starch STC-1000 steinlager steralisation sterilisation sterilization sterliization still stoke storage solution stout sucrose sugar supercharger tannins temperature temperature controller therminator thermometer tips for beginners tri-sodium phopsphate tricks and tips trub tubing tui turkey vodka infused gin vorlauf water water testing wet cardboard taste wet hopping weta whirlfloc tablets white claw williamswarn wine winter brewing wood wort wort chiller yeast yeast energizer yeast nutrient yeast rafts yeast starter yeast traps zinc
Back to Top