You nailed the mash.
The boil sang.
Hop timing was tight.
Now comes the make-or-break move, rapid chilling. Cool the wort quickly and cleanly so fermentation starts on your terms, not the microbes’.
Pitch yeast too hot and it dies fast, like the T-1000 in that molten-steel moment.
Pitch at the right temperature and it rewards you with clean flavor, bright aroma, and a stable beer.
The ultimate solution is to consider investing in a dedicated wort chiller. Relying on an ice bath in your kitchen sink is simply not viable for a serious brewer aiming for professional quality and repeatable sanitation.
Below is a practical rundown of chilling thermodynamics, real-world cellular tips, and the specialized gear you can compare to upgrade your brewhouse. Top contenders include the Copperhead, the Silver Serpent, the Therminator, and the NY Brew Supply Deluxe Chiller.

Top Picks to Compare
- The Copperhead
- The Silver Serpent
- The Therminator
- The NY Brew Supply Deluxe Chiller
The Science of the Drop: Why Fast Chilling Matters
Science note: Boiling hot wort actively inhibits and kills microbes. However, as it slowly cools below 60°C (140°F), it becomes an absolute buffet for ambient bacteria. Rapid chilling drastically narrows this biological danger window.
Plunging the temperature quickly protects your beer from unwanted guests like wild yeast and lactobacillus that cause sour, ruined batches.
Cleaner flavor and DMS reduction. During the mashing process of pale malts, a precursor compound is formed. When heated, this converts into dimethyl sulfide, or DMS. During a vigorous boil, DMS simply evaporates away into the steam.
But if your wort sits hot after the flame is turned off, DMS continues to form and gets trapped in the liquid. Too much DMS tastes exactly like creamed corn or boiled cabbage. Chill quickly and you help permanently avoid that terrible off note from making it into your final keg.
Protein drop and ultimate clarity. A rapid drop in temperature forces a chemical reaction known as the cold break. This sudden thermal shock causes heavy molecular weight proteins and hop polyphenols to bind together, coagulate, and violently drop out of suspension.
Leaving this gunk behind in the kettle means vastly brighter beer and a much smoother path to avoid chill haze later on. Aim to drive the heat below 27°C (80°F) fast. Once there, gently glide down to hit your specific yeast strain’s preferred pitching range with absolute, calculated intent.
The Three Chiller Types: Engineering the Heat Exchange
In the brewing world, there are three common mechanical designs for heat exchange. These are immersion, counterflow, and plate chillers. Each utilizes different laws of fluid dynamics to achieve the exact same goal.
Immersion chillers. A coiled length of copper or stainless tubing sits directly in the hot wort while cold tap water runs continuously inside the coil. Heat transfers naturally from the hot wort to the cold metal, heating the water before it exits out the drain hose. For a standard 19 L (5 gal) batch, most coils run 20 to 40 feet in length and get the job done reliably with very simple hookups and zero risk of internal clogging.
Counterflow chillers. This is a tube-in-tube design. Hot wort flows inside an inner copper tube while cold water moves in the exact opposite direction through an outer jacket. This opposite flow maximizes the temperature differential across the entire length of the chiller. It provides incredibly efficient thermal transfer and cools wort very fast, but it usually needs a brewing pump or a tall gravity service with excellent flow control to push the sticky wort through the inner tube.
Plate chillers. These units utilize dozens of thin, brazed stainless steel plates to create a massive amount of surface area within a tiny physical footprint. Cold water flows on one side of a plate while hot wort flows in the opposite direction on the other side. They chill the wort very fast, often bringing boiling liquid down to pitching temperature instantly in a single pass. However, the micro channels inside demand incredibly disciplined filtration and aggressive chemical cleaning to prevent infections.
Rule of thumb: Cooling speed ultimately depends on two unchangeable factors: your tap water coolant temperature and total surface area. A well sized immersion coil can easily rival complex plate units when your winter groundwater is freezing cold. Conversely, when summer groundwater is warm, absolutely any chiller design will heavily benefit from a pre-chiller or an ice water assist pump.
Featured Gear: Copperhead Immersion Wort Chiller
The standout features of Northern Brewer’s popular chiller include a substantial 25 foot copper coil and high quality vinyl tubing equipped with standard garden hose fittings right out of the box.
The all-copper coil conducts heat with exceptional efficiency. Copper has a thermal conductivity rating vastly superior to stainless steel, pulling heat out of the wort noticeably faster. It is also naturally antimicrobial and very easy to clean.
Heavy duty barbed fittings secure the tubing tightly and tame rogue water leaks. It also features drop-angle connections, which ensure any exterior condensation falls harmlessly outside the kettle, heavily reducing contamination risk. Dimensions are optimal at 9 inches wide and 16 inches tall to the bend, featuring 3/8 ID tubing.
There is absolutely no need to sanitize it separately in a bucket. Simply drop the raw copper coil directly into the rolling boil with 10 minutes left until flameout. The boiling wort sanitizes it in place. The standard garden hose connection provides immense flexibility for outdoor brewing on the patio or indoor laundry-sink hookups.

What Master Brewers say about this unit:
"Don't cheap out on the ones with simply raw copper ends and cheap hose clamps. The ends connectors on this IC are top notch. It completely changed my brew day. Brew on!"
"Worked perfectly and exactly as expected. No leaks whatsoever and cooled my dense 1.070 wort very quickly."
"This is hands down the best on Amazon. I thought about making my own from hardware store parts, but considering my time, the required pipe bender tools, and effort involved, it made complete sense to pay a bit more for one already professionally set up."

Silver Serpent: The Sanitary Stainless Option
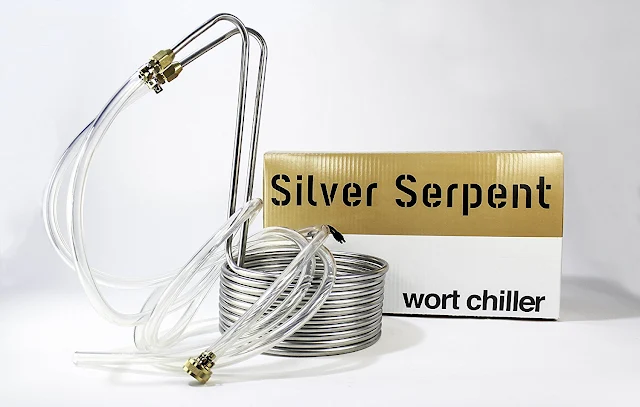
Called the Silver Serpent, Northern Brewer touts this stainless steel model as highly sanitary, incredibly durable, and easy to handle.
While stainless steel transfers heat slightly slower than copper, it brings massive durability benefits. It is virtually indestructible, immune to acidic oxidation, and can be aggressively cleaned with harsh caustic chemicals without pitting or tarnishing over time.
It features drop-angle connections with barbed fittings for secure, kink-free water tubing. Having fewer hose-clamp headaches means drastically less chance of disastrous unsterilized tap water leaking directly into your sterile kettle. The heavy duty tubing hangs tension free so you can focus entirely on monitoring chilling speeds and whirlpooling your trub.
Therminator Plate Chiller: Industrial Speed and Compact Power
The Blichmann Terminator is a legendary favorite plate chiller in many serious, advanced brew houses. Blichmann engineering is famous for precision, and they also make a highly respected gas burner, creating a solid bit of brew day kit for those looking to upgrade their entire system.

What it claims. Exceptional rapid chilling, incredibly low water usage, a very compact physical footprint, and heavy stainless straight-through connections that completely avoid flow kinks. Advanced users frequently report chilling massive 38 L (10 gal) batches entirely down to pitching range in mere minutes with proper water flow and a good kettle pump.
The tradeoff of micro-channels. Because the internal gaps between the brazed plates are microscopic, these plate units demand intensely disciplined cleaning regimens. Hop matter, crushed seeds, and sticky protein trub can easily lodge deep within the plates, causing invisible bacterial infections. You must backflush the unit with hot water immediately after every single use and circulate hot alkaline cleaner like PBW for best, sanitary results.
NY Brew Supply Deluxe Counterflow: The Best of Both Worlds

NY Brew Supply built an incredible reputation on their chiller. It features a highly durable high-temp outer hose containing 25 feet of thick 1/2 inch copper pipe inside. It utilizes heavy, garden-hose friendly brass fittings that let you easily set angles for tidy, professional hose runs.
Because the internal copper pipe is wide, it completely avoids the severe clogging issues of a plate chiller while still offering the rapid, inline speed of a counterflow system. Users consistently praise its thermal performance and monetary value. Many advanced brewers prefer upgrading it with high-temp silicone tubing and stainless clamps for decades of leak-free service.
The Kinetic Method: How to Use an Immersion Chiller Properly
Drop the clean metal coil directly into the kettle with exactly 10 minutes left in the active boil. The 100°C (212°F) liquid will violently heat sanitize the metal, instantly destroying any ambient bacteria resting on the copper.
At flameout, immediately connect the hoses to your cold water source. For an outdoor brew, use a standard garden hose. For an indoor brew, utilize threaded laundry sink adapters.
Turn the tap on full blast. Run the water continuously until you reach your specific target pitch temperature. Verify the liquid temperature frequently with a calibrated, long-stemmed thermometer. Do not overshoot into the cold zone. Pitching yeast into beer that is too cold will severely stall the colony and delay active fermentation.
Advanced Chilling Tips and Thermodynamic Tricks
Pro move: Whirlpool to break the boundary layer. If you drop the coil in and walk away, the wort immediately touching the cold copper forms an insulating boundary layer, trapping heat in the center of the kettle. Gently whirlpool the wort with a sanitized spoon. Moving hot wort actively across the coil skin massively boosts kinetic heat transfer and tightens your cold break pile.
Master brewer tip: Staggered cooling. If you want massive hop aroma without massive bitterness, utilize a hop stand. Chill the boiling wort rapidly to about 80°C (176°F) and pause the water flow. Toss in your aroma hops and let them steep. At this temperature, alpha acids do not isomerize into bitterness, but the delicate oils are perfectly extracted.
Rule of thumb: Flow management. Faster tap water flow helps push heat away. Slower hot wort flow helps transfer heat deeper into the cold water. If you have a mechanical pump, recirculate the hot wort gently while slightly throttling the output valve to maximize the total contact time.
Building Your Own: The DIY Options
Taking the hardware store route can save you cash if executed smartly and safely. Purchasing a spool of soft, bendable copper refrigeration tubing plus a few brass compression fittings can easily make a highly solid, professional-grade immersion coil. For creative design ideas and thermodynamics, see these brilliant immersion upgrades and a complex, highly rewarding counterflow build. Video walkthrough below.
Defeating the Heat: When Groundwater Is Too Warm
Quick rescue tip: If you live in a hot climate, your tap water in August might be 25°C (77°F). The laws of physics dictate that you can never chill your beer below the temperature of your coolant. To defeat this, you must use a pre-chiller.
Place a secondary copper coil inside a cooler filled with a heavy ice water bath to mechanically chill the incoming tap water down to near-freezing before it ever hits your main chiller. Twenty five to fifty feet of coil works exceptionally well for this. Here is a brilliant, simple setup to mimic.

Using frozen, solid water bottles submerged in the bath does the job for incredibly cheap without diluting the bath. Swap them aggressively as they thaw to keep the bath at a freezing thermodynamic state.
Cellar Management: Cleaning and Care
Immersion coils. Rinse the metal thoroughly with blasting hot water immediately after use, wipe away any visible protein or hop residue with a soft sponge, and let it dry completely in the open air. A light soak in a warm alkaline cleaner every few months completely restores the bright copper shine and removes oxidation.
Plate units. These require immediate action. Backflush the unit with high pressure water immediately in the exact opposite direction of the original wort flow to violently push out trapped hops and sticky trub. Circulate a hot alkaline cleaner with a pump for twenty minutes, then flush with hot water, and finally run a pass of acid sanitizer. Do not ever let organic residue sit inside the plates and dry. That is exactly how permanent, ruinous clogs happen.
Chemical Cleaners. PBW is the undisputed heavy-duty workhorse for dissolving organic matter. Star San plays incredibly well with copper and stainless for the final sanitization pass. Avoid household chlorine bleach entirely on your stainless steel equipment since it aggressively pits the metal and permanently damages the passive chromium surfaces.
Mechanical Pump Assist
If your residential tap water pressure is terribly weak, tying a small utility pump into the line helps tremendously. Many creative brewers use highly affordable submersible pond or aquarium pumps to actively recirculate a bucket of icy water continuously through the chiller coils. This guarantees faster cooling times and results in vastly less tap water waste going down the drain.
For cellular aeration later in the process, these aeration pumps are exceptionally good for wort and building strong yeast health. However, you must remember to aerate the liquid only once the wort has fully dropped into the safe, cool pitching range.
Buy your equipment once, clean it with scientific rigor, and chill your wort aggressively fast. Your yeast colony will thank you with a vigorous fermentation, and your finished beer will taste exactly the way you engineered it to taste.
