Ideas to make a Winter Christmas brew

Tuesday, November 28, 2017
winter christmas brew ideas

Mistletoe and Wine?

No, it's time for some brewing if you get the chance!

But what are some good brews to have a crack at over Christmas?

Depending on where you live, you're either in the heart of winter or you're enjoying t-shirts and shorts under the summer sky.

But if you're at the top of the world, perhaps somewhere in the latitude of the North Pole, winter naturally suggests that it's time for some winter ales!

A winter Christmas the diet might consist of figgy puddings, mince pies, toffee treats, caramel chews and the odd bit of dried fruit. And these food items contain 'note flavours ' that can be fairy good in an ale.

And that's not to forget cookies, mulled wine and other spices like cinnamon and orange zest.

All these things and more can go into your winter beer.

So what am I blathering on about?

Basically I'm suggesting one could make a beer which matches the food fare served on Christmas day!

Let's start with the basics. You're going to need to consider what your 'base beer' should be. Here's some traditional ideas for a Christmas or winter brew:
  • Ales!
  • Stouts, Porters
  • Wheat
  • Scotch Ale
  • Old Ale
  • Dark malty beer!
  • Nut Brown Ale
  • An old fashioned doppelbock 
  • Or for something completely different, an alcoholic ginger beer.
One you've decided on the base you need to think about how you are going to impart some of those holiday season flavour characteristics.

There are several options to choose from...
  • Spice Up Your Life was not just an amazing mega hit song for the Spice Girls, it's a way of life for many brewers. The beer most suited to the addition of spice is a moderately dark, alcoholic beer (often an Old Ale) that has a good body to complement the cold weather and choice of spices. Just make sure you don't add the spice from Dune or your eyes will go blue! Certainly, never over spice your beer. 
  • A Belgian-style ale can be flavored with cherries and honey. Goes well with waffles, I'm told.
  • This next one may seem odd but people do seem to love a batch of Christmas cookies and if for some unfathomable reason you want your beer to taste like a biscuit, make a sweet ale and a hint of lactic acidic to get that 'warm biscuit feel'. If you're brave add a hint of maple syrup.  
  • If you're going for that classic Christmas cake vibe, why not try using some dried (or zest) citrus peel (orange and lemon), or dried fruit such as raisins or plums?
  • Coriander. It adds a lemony, spicy flavor and aroma. Coriander is typically used in Belgian ales, especially witbiers. Crush the seeds well before adding to the wort.
  • Try a combo of a cranberry and orange zest.
  • Gingerbread spices
  • Juniper berries (wanna make some gin?)
  • Mint (actually this sounds  like bloody awful idea- Ed)
  • Mulled wine
  • Chocolate. There's many a recipe out there that incorporates chocolate.

It's important to not overspice your homebrew! How much spice is too much? 


Let's look to what the much vaunted brewer John Palmer says. For his "Ol' Yule Loggy" Christmas beer, he uses 1/2 teaspoon cinnamon, 1/4 teaspoon ginger, and 1/8 teaspoon each of nutmeg and allspice. You can find the recipe in Palmer's Brewing Classic Styles: 80 Winning Recipes Anyone Can Brew.

When should I brew my winter ale?


If you want to be drinking on Christmas Day, we suggest you brew two months in advance.

That is to say, you should get your brew down by the last week of October so that it has time to bottle condition nicely. There's nothing like a well condition ale so ensure you stick to this time table, especially if you want the characteristics you've worked so hard to product to really shine.

A last few points:


  • When brewing your holiday beer, consider that you might want to use as an additional fermentable such as honey, molasses, maple or golden syrup
  • What you may want to use less of is hops. This is beacause a beer with too much hops character would contradict the spices. 
  • You'll have to think of a cool name for your Christmas beer. Ruddolph's Revenge, Sozzled Santa, Who ate all the pies? 

How to save time and make beer bottling easier

Wednesday, November 1, 2017


Bottling beer efficiently to save time


There's no doubt that the care and maintenance of beer bottles to ensure a good brew can be a pain in the ass to keep up and get right.

From cleaning the bottles, removing labels, sanitising, filling and capping there's a lot to take care of and it can take a fair amount of time to get bottling done.

The obvious answer to save time is to keg your beer but for many brewers, that's a step too far both in the scale of their brewing and expense.

So for those keen beer bottlers, here are 5 ways to cut down on bottling time and getting your beer in the bottle more easily.

make bottling beer easy

Sanitize all your bottles at once in a big enough bucket


Sanitizing your beer bottles is a key element of beer brewing to keep those bugs at bay. A trick I like to do is dump all my bottles in a giant plastic washing basket, drop in some sodium percarbonate and fill it all up with the garden hose.

It's a pretty efficient way of ensuring you have healthy clean bottles ready because of you are bottling 23 liters of beer, a 30 or 35 liter bucket will be enough for all the necessary bottles to be covered in percarbonate solution.

The beauty of the sodium percarbonate is that it's 'no rinse' so you just need to empty the bottles and you are good to begin bottling.

So, now your bottles are sanitized, you may now wish to consider batch priming.

Batch Priming Beer to save time


In short, priming the batch is when one adds the entire amount of sugar needed to the fermenter so that when you fill each bottle, you don't need to add sugar as well, it's already in the beer wort. 

It saves you time as you don't need to add sugar to each individual bottle and it also saves you mess as we all know how sugar can end up everywhere when bottling!

This sounds simple right?

It really is.


How much sugar do I need to prime a batch or beer?


Batch priming benefits from some simple calculations that can be made to get that sugar just right.

If you're using a kit, you've probably used 23 litres (5 gallons) so the focus is on how much sugar you need to use. 

So first up, different beers need different levels of sugar. Advice from people who have brewed many beers suggests that ales need less sugar than lager style beers.

This is because many drinkers prefer a lager to have more carbonation and ales are quite drinkable with less.

Our analysis of beer brewing forums suggests these are the commonly used amounts of sugars to use for priming for a 23 liter brew.
  • Dextrose (Corn sugar) 3/4 cup or 4 or 5 oz / 95 grams
  • Cane sugar 2/3 cup or 3.8 - 4.8 oz / 86 grams
  • Dry Malt Extract - 130 grams
If you are priming with a different volume of beer, I suggest you try this priming calculator.


There's a reason Cinderella's Fairy God Mother used a wand


A bottling wand can help make bottling beer so easy.

You just stick the wand into the tap. You can then bottle without the need to turn the fermenter tap on and off because the wand's automatic foot-valve can control the flow of beer into the bottle when you touch the bottom of it to the bottom of the beer bottle!

Using a bottling wand also very handily keeps too much oxygen from entering your beer!

Capping your beer - two tools to do it


Beer cappers come in two forms being the hand held and the bench capper, one is easier than the other.

The 'wing' hand held capper


The hand held wing capper is a popular way to cap your beer. Often referred to as universal Rigamonti cappers  or the Red Baron, they are pretty handy and durable to use.

They do have a couple of draw backs - they can sometimes be hard to separate from the capped bottle if you've applied too much pressure and if you do apply to much force, then you can break the glass bottle, which is something that really bugs me.

It's actually very satisfying getting a cap on a bottle properly, there's this sudden 'thump' moment when the crown bends down and forms the seal.

If you get into a good rhythm, you can cap bottles very quickly, especially if you line them up with the caps on the top and go down them like a factory line.

You may wish to consider using oxygen absorbing bottle caps to help retain hop flavors.

The bench capper method of bottling


The bench capper can be easier to use because it's a simple pull-down lever action that one does with one hand whilst the other hand holds the bottle firmly in place. 

If you think a bench capper is for you we suggest that you buy one that accommodates different sized bottles. 

The Ferrari model does exactly that which can be quite handy if your bottle collection is all kinds of different shapes and sized.

Any decent beer cap should have a magnet where the cap goes so that it doesn't fall out just as you go to clamp it down!

So well done, you have easily bottled your beer and hopefully saved yourself some time. 

Your work is not finished 


No, you need to properly condition your beer and that doesn't mean you hide it under a tired blanket in an old swap-a-crate box and forget about it for a few weeks. 

Well actually you can do this if you want to be a reckless beer brewer, but if you want beer that you would be proud to share with friends,  there's a few things to think about when storing beer.

Here's some things to think about when storing your beer.
  • It's really good to have a storage place where the temperature is maintained at a steady rate.
  • Ales are condition best at lower temperatures
  • Lagers are happier to condition under higher temperatures
  • The middle of your house is probably cooler than nearer the outside. That could be a factor where you decide to store your beer.
  • If you find your beers are in too hot a place, move them!
  • Whatever you do, keep them away from direct sunlight
Now, let that beer rest quietly for at least three weeks. Before you enjoy that first taste test, refrigerate your beer for at least a few hours, 24 hours is preferable. 

Is plastic or glass better for fermenting beer?

Tuesday, October 31, 2017
using plastic for brewing

I saw on the 'net there had been some debate on NOT using plastic fermenters because of the risk of beer infection.


I thought this was a subject worth investigating further.

All I ever use is plastic fermenters and having only ever had one incident of infection which occurred to two different fermenters used in the same batch, I could be confident that I've never had an infection caused by using a plastic fermenter (what would the odds have been?!)

So what's the argument from the naysayers?

The reasoning is that given plastic is more easily scratched than glass those scratches can harbor bacteria so, the risk of infection is greater.

This seems a reasonable argument right?

And the simple solution would be to not scratch the plastic as you are cleaning and sanitizing right?

Given my experience and the fact, there are millions of plastic fermenters safely and happily in use around all corners of the globe, then there is nothing much to worry about.

That's provided of course that you follow a proper cleaning process before you add your beer wort for primary fermentation. 


Any decent beer brewer will tell you that the number one key to beer making success is by adopting methodical cleaning and sanitization practices every time you make beer.

We've covered this need before, but our favorite trick is to use sodium percarbonate and not being shy about using boiling water to kill bugs.

Home brewers around the world often swear by the ability of PBW to get their brewing gear brew ready.

So, to be clear I don't see the threat of infection as a reason to not use a plastic fermenter.

Sure, if they get too old or scratched you might totally want to replace one but on a cost basis when compared to glass carboys, they are a lot cheaper, indeed a check on Amazon shows that a carboy is generally roughly twice the price.

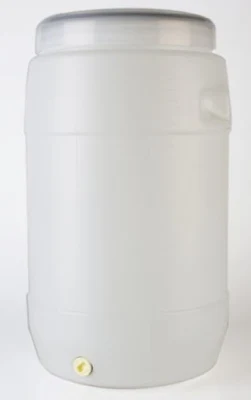
Indeed, if you are new to home brewing, the use of a plastic drum is a great way to start where you don't have to worry about damaging the glass!

Oxygen and beer aging


Aging beer is perhaps a reason that you may wish to use something other than a plastic fermenter. The reasoning here is that it's a bit easier for oxygen to enter the beer via plastic than it is beer.

If you weren't aware, other then when first mixing the wort, beer is best brewed with minimal exposure to O2 - and it's the same when bottling your beer as well.

That said the difference in permeability between glass and plastic arguably negligible when you consider most oxygen exchange is occurring through the bung and airlock.

ALSO, if you are trying to mimic the effect of a barrel-aged beer using oak, then some brewers do consider that some oxygen will help!

What you could do is do your primary fermentation in plastic and then if you intend to age a stout or whatever for a long time, you can transfer it to a secondary glass carboy.

Also (2!) bare in mind that by making such a transfer you create an opportunity for oxygen to enter the beer.

Whatever way you go, you totally need to keep your vessel free from a large amount of oxygen entering as it can assist with the growth of mould or other nasties and we really don't want that do we?

As you can see, it's a vicious cycle of contradictory information!

How the term 'session beer' is abused by craft brewers

Tuesday, October 17, 2017
What is a session beer?


What is the definition of a session beer? 


I saw this question asked in a beer-oriented Facebook group and I thought it seems such an obvious question that it didn't need an answer but then I realized not everyone drinks like a fish! 

A session beer is oft considered to be a beer which has an alcohol content of around 4 to 5 percent ABV or less.

A session beer is not defined by flavours or aroma.

The concept of this is that in a 'session' of beer drinking, you won't get hammered by drinking 5 beers at 4 or 5 percent as you may just do if you have 5 beers at eight percent (although obviously the difference between four and five percent beers can quickly catch up with you, given the way alcohol accumulates in the body and affects the brain)

So basically before the rise of craft beer, most beers were session beers - as historically beers have been from 4 - 5 % ABV.

How did this expression come about?

You can thank our beer drinking friends in England when back in the day and when men were still men,  many industries had rules where men could drink on the job in approved drinking 'sessions'.

Given their employers didn't want them getting hammered on the job, lower ABV 'pale ale' beers were consumed.

How times have changed!

But is this definition still true of craft beers?

And therein lies, the rub - the word session for beer has been totally abused by many craft brewers and their promotional campaigns and now it feels like every damn beer is pitched to beer drinkers as being a session beer. 

Even beer reviewers have started to throw it into their articles as if it adds a sense of romanticism to beer.

It doesn't and it devalues the meaning of the concept.

So a session beer is historically a beer of traditional strength which you can several glasses of in the course of an occasion. The more modern craft beer meaning of a session beer is any beer! It often seems to just be marketing verbiage or puffery.

How ordering bulk beer making ingredients will save you money (so you can brew more)

Wednesday, September 13, 2017


If you're a beer kit brewer like myself, you'll know that to make a good beer you really should use a beer enhancer as they give the body and taste that can tip a homebrew beer from 'just being a beer' into a really enjoyable brew, one that is worthy of being shared with family and friends.

But those beer enhancers are not cheap!

In my neck of the woods a beer kit can cost $18 - $22 and the enhancer will be ten dollars, about half the price of the extract kit!

It seems that enhancers are somewhat over priced but home brewers purchase them as they make OK beer into good beer.

So one way of saving money in the long term is to buy bulk ingredients so you can make your own beer enhancers.

So what goes into an enhancer?

Basically it's a ratio of three ingredients, Dextrose, Maltodextrin and DME which is dry malt extract.

Different ratios of the three suit different kinds of beer styles as below:

Beer style
Dextrose
Maltodextrin
DME
Light Beer 
60%
40%
0%
Ale, more malty beer
50%
25%
25%

So what you want to do is by these items in bulk as that's where you can make some great value savings.

Dextrose has a proper name of Dextrose monohydrate and often is referred to as corn sugar. So go on to Amazon and look for Corn Sugar (or Dextrose) in bulk and you will find plenty of options including 50 pounds! Which is about 22 KG.

We think anything that comes in a 50 pound sack has to be value for money! And if you can find your ingredient with free shipping, even better!

There are also plenty of Amazon based options to suit your maltodextrine budget as well.

Once you have your ingredients, you then get some large sealable bags and then make up the enhancer according to the above rations. You can then keep them in a safe place and pull one out every time you ready a kit for brewing.

Dead simple and an easy way to save money on your home brewing!

My secret way to properly pour a home brew beer

Wednesday, August 23, 2017

Have you ever poured a bottled home brew beer and it's been simply too fizzy and the head is like a giant ice-cream?

I'm not taking about a genuine beer gusher here, rather just a beer that's too frothy.

It's quite frustrating!

I've discovered a secret to helping poor such beers without much fuss.

But first, why fizzy beer?

In my case, I think this is caused by adding too much sugar to the bottle for secondary fermentation (which is a great argument for batch priming) but not so much that you've caused a gusher beer.

You can manage this in a couple of ways. Instead of having one glass for pouring the beer into, have two at the ready.

By doing a careful transfer you can get the whole beer into both glasses, let the head die down and then transfer into one glass. But that can actually froth things up even more.

Go figure.

So what's my secret?

Pour a little bit of water into the glass before you pour the beer. About 1 cm level is enough. Open your beer and pour slowly into the glass at about a 45 degree angle give or take.

As your beer fizzes into the glass, the water somehow manages to capture the froth and diffuses it somehow. Don't ask me the science of it, I just work here.

I discovered this trick by accident when going through an over sugared batch of stout and it seems a fairly good method.

I'm not saying you should add water to every beer for every time you pour but suggest that if you notice a batch has a tenancy to fizz up, then give it a try and see if that helps.

Nothing will save a beer that has too much sugar though!

Another tried and true trick to prevent fizzy pours is to ensure that your beer has been refrigerated for 24 hours. Based on my own personal testing, the cold definitely helps with a easy pour.

A wee caution

And in case you are very new to home brewing, don't pour out that last inch of beer from the bottle, those yeasty dregs of sediment are the bi-product of the fermentation process. They do not add to the drinking experience and apparently can have quite the laxative effect !

Panhead Supercharger APA Clone Recipe

Tuesday, August 15, 2017

Panhead Supercharger APA Clone Recipe


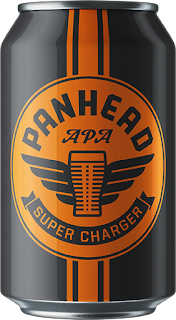
Panhead's Supercharger beer is one of the best new beers to come out of Wellington and indeed New Zealand in a fair while. Indeed, their range is pretty handy - we suggest you try their hoppy Vandal or APA. 

But back to the Supercharger, the beer that won the New Zealand Best Beer award in 2015. 

It's an absolutely drinkable beer and one that has few pretensions about it - its popularity is so much so that beer brewers are starting to clone it. 

panhead supercharger clone recipeHere's the best Supercharger Clone Recipe we could find. 

We found it at Wagon Brewing Co who sells a clone kit of the beer. 

Te Aro Valley also do a pretty handy copy of the beer too (check out their Obligatory wort while you are at it).  


This clone recipe is intended for your standard 23 litre beer batch.

Malts for the Supercharger clone


4.6 Kg - Gladfield Ale Malt (All Grain Option)

200g - Gladfield Light Crystal Malt

250g - Gladfield Toffee Malt


or for the Extract with Partial Mash option:


1x Black Rock Amber Extract 1.7kg Can

1x Black Rock Light Extract 1.7kg Can

200g - Gladfield Light Crystal Malt (Steep)

200g - Gladfield Toffee Malt (Steep)

What hops does the Panhead need?


10g - US Simcoe Pellet @ 13% AA for 60 minutes boil

10g - US Centennial Pallet @ 8.5% AA for 30 minutes boil

20g - US Simcoe Pallet @ 13% AA for 10 minutes boil

10g - US Centennial Pallet @ 8.5% AA for 10 minute boil

30g - US Centennial Pallet @ 8.5% AA for 1 minute boil

30g - US Citra Pallet @ 13.9% AA for 1 minute boil

20g - US Simcoe Pallet @ 13% AA for 1 minute boil

70g - US Citra Pallet @ 13.9% AA Dry Hop @ 7 days

50g - US Simcoe Pallet @ 13% AA Dry Hop @ 7 days

50g - US Centennial Pallet @ 8.5% AA Dry Hop @ 7 days

Phew, that's a lot of effort!

Panhead's yeast: 


Use the standard and very reliable Safale-US-05.

Panhead describes their own beer as "being an all-American show with Centennial, Citra and Simcoe overwhelming your nose, kicking you in the taste buds and departing with more bitterness than a Palm Springs divorce."

So that's the challenge for you as the home brewer, can you brew to match to Panhead's lofty claim?

Keen for a Steinlager recipe clone?

How to brew a good Nut Brown Ale

Tuesday, June 6, 2017


What is a nut brown ale and is it good to homebrew with?


Coming from the 'brown ale' family of beers, the nut brown ale is a great beer for the keen home brewer to have a crack at making.

Do you believe me?

You can answer that question soon but first a short history of the nut brown ale.

The Brown Ale style originally gained popularity in the down and dirty pubs of England, where beer guzzlers expressed a need for beer that was both flavorful and complex, but at the same time mild enough to be a session beer.

Words like Newcastle ale, English Style ale, 'All English' are bandied about when it comes to the brown ale. It's drank in many a London pub.

The style has a long history and if you see a reference to 'Northern ale', this is what historically is meant by a nut brown ale.

In reality, the style of nut brown ale may just have been a unique marketing movement promoted by the burgeoning beer companies in the first half of the 20th century.

At its most basic, a nut brown ale is a way to describe a variant of the standard brown ale.

Does a nut brown ale actually have nuts added to it?


A key thing to point out is that a nut brown ale recipe doesn't contain nuts! The reference to nuts is for the beer's colour, not necessarily it's taste. You could also describe the colour of the ale as a deep copper. There's nothing wrong with using nutty as a taste description if that's the case!

So what are the taste characteristics of the nut brown ale?


The taste of nut brown ale is obviously subjective. Some say it would have an 'obvious earthy' character. It may have faint traces of some flavor like molasses or possibly something like maple stripped of sugar.

You could almost say the ale has a mild bread like taste with that classic ale bite in the back of the mouth.

If brewed well, the taste offers a malty sweetness, with the slight presence of caramel. If properly balanced with a medium to low level of hops (as it's traditional for ales for be low in hops), the nut brown ale is a deserved beer to drink on a hot day. 

Is a nut brown ale a good for for homebrewing? What do I need to make a good one?


So if the above romantic descriptions of the beer, tempt you, we strongly suggest you try your hand at brewing one. I did, here's my review of the kit I used.


What hops can be used in a nut brown ale?


Traditional English ales are lightly hopped as the preference is for a low bitterness levels. Hence classic English hops choices such as Goldings, Fuggles, and sometimes Tettnanger could be made.

American brown ales have evolved differently and feature a higher level of bitterness and thus Cascade and Williamette hops are common.

So if you are going for the more traditional English nut brown ale style, you may want to favour the English hops.

They key thing to beer in mind is that your brew recipe should be light on hops so to not over bitter your beer.

So don't throw in the whole hops packet.


What's a good nut brown ale recipe? Here's some ideas of what you could use


There are many ways to make your own version of a nut brown ale. Here's two brief versions that you could go for if you were putting together your own recipe.

Version One:

Malts - lager,crystal,black malt
Hops - Green Bullet, Pacific Gem

Version Two:

Malts - brown, chocolate malt, caramel
Hops - Willamette both bittering and aroma


The call to action!


If you are going to brew a nut brown ale, we suggest you get a beer kit by way of Northern Brewer, a popular American supplier of beer product and equipment. 

They've a pretty good reputation!

What every beginning beer brewer should think about

Saturday, June 3, 2017
If you're a home brewer looking to up your game, you've come to the right place! We've gathered some valuable insights from seasoned brewers that can help you perfect your backyard brewing game.

Our collection of tips is designed to provide you with a wide range of ideas and tricks to improve your brewing skills. However, it's important to remember that not every suggestion may be the right fit for your particular brewing needs. Brewing is a process that requires experimentation and patience, so don't be afraid to try new things and find out what works best for you.

By following the tips shared by our expert brewers, you'll learn valuable insights that can help you fine-tune your brewing techniques and create better-tasting beer. With a little bit of practice, you'll be able to produce beer that rivals even the most popular craft breweries.


beer brewing hacks

  • If you're a kitchen-based brewer, bottling your beer over your dishwasher door can make clean up a breeze. Once you're finished bottling, simply close the door and any spilled beer or equipment can be easily cleaned up later.
  • When it comes to cleaning out your "Boil in a Bag" brew bag, shaking it out is a good start, but turning it inside out and holding it under the shower can help to remove any stubborn residue. This can help to ensure that your bag is thoroughly cleaned and ready for your next brew.
  • Pouring the contents of your brew bag into a bowl before adding it to boiling water can also make the process much easier. This can help to ensure that you're able to scrape out every last bit of extract, without any of it getting stuck to the bag or utensils.
  • If you're using dry malt extract, it's important to be aware that the steam from boiling water can cause significant amounts of extract to cake onto the sides of the bag. To avoid this issue, try adding the DME to the water first, before it starts boiling.
  • Adding rice hulls to your grain mash can also be a helpful technique to prevent the sparge from blocking. This can help to ensure that you're able to extract as much sugar as possible from your grains, without any unwanted blockages or complications.
  • Rehydrating dry yeast can also be an important step in the brewing process, especially if you've saved yeast from a previous batch. To rehydrate your yeast, simply pour it into a plastic bottle of water at the correct temperature, cap it, and shake gently. Be sure to burp any excess gas by gently opening the bottle before pitching the yeast into your wort.
  • Placing a packet of silica gel in your hydrometer case can help to absorb any residual moisture that may be left after using it. While this may not be a necessary step, it can be a helpful technique for brewers who are concerned about keeping their equipment in top condition.
  • Use a ph Meter to test your mash. When it comes to brewing beer, achieving the correct pH is critical. This is where a pH meter comes in handy. A pH meter is a device that measures the acidity or alkalinity of a solution. For homebrewers, pH measurement is particularly important during the mash stage, as the pH level of the mash affects the beer's flavor and fermentation process.Using a pH meter to test your mash is a simple yet effective way to ensure that your beer is brewed to perfection. Ideally, you should aim for a pH level of between 5.2 and 5.5 during the mash. This range provides the optimal conditions for the enzymes responsible for breaking down the malted grains to work effectively.
  • When it comes to making a yeast starter, it's important to be prepared for any potential mishaps. One common issue that can arise is an overflowing starter, which can create quite a mess. To avoid this, you can take a simple precaution by placing the flask inside a plastic grocery bag before putting it on the stir plate. This way, if the starter does overflow, the plastic bag will contain the mess and make cleanup a breeze. Additionally, using a stir plate can help increase the number of yeast cells in your starter, leading to a healthier fermentation and better tasting beer.
  • We love this idea. Put a book or other wedge under the back of your fermenter after sealing it up. On brewing day, gingerly slide the book/wedge to the front of the fermenter and you'll have a slanted yeast cake and a nice "deep end of the pool" in the back side of the fermenter to rack from.
  • A few marbles, glass beads, or large SS ball bearings will reduce the risk of boil over dramatically. It works by providing nucleation points at the bottom so that large bubbles rise up and pop and less small bubbles are available to form foam. Of course, if you use foam inhibitor such as Fermcap-S, you probably don't need any other hacks!
  • Using a spray bottle of Star San solution seems like a good hack. Doesn't waste time with dunking everything in a bucket when you can just spray it liberally and get good coverage.
  • When transferring out of a fermenter into a keg, fill 1 pint mason jars with the slurry, and refrigerate them so that you can use it as a yeast starter for another brew.
  • Buy hops in bulk to save money. Make sure you are going to use it though! You can store excess hops by keeping it frozen.
  • Instead of hand cleaning your bottles and dunking them in sanitizer put them in the dishwasher bottom rack. USE NO DETERGENT, and put the dishwasher on the hottest cycle. The temperature is hot enough to kill the nasties that could infect your beer (we also add the dish washer is handy for removing bottle labels).
  • You can add extra fermentables like DME on top of what your recipe asks for to increase the ABV of the beer.
These are some pretty simple homebrew hacks that make the preparation and brew day a bit easier - it's always best to do your brew as best you can however!

Using hops to bitter beer

Tuesday, May 23, 2017
what beer hops to use with beer

If you know a thing or two about beer, you'll know that the hops plant is so crucial to making good beer that the Germans made it the law for it to be an ingredient of beer!

There's a bit of mystery and magic about hops. They are like the secret ingredient that makes everything taste and smell so delicious. 

Honestly, having a sniff of a freshly opened packet of hops is one of the best smells in the world.

It smells like...victory. 

While you can't go terribly wrong with hops, you can go even better when you learn all the tricks and tips of using them. And that means questions need to be answered about how and when to use them.

Questions like: 

What kind and where from? 

What's a hop tea?

What is dry hopping? 

We have the answers!

Let's start with one of the most common questions about hops, what kind you might want to use.

What kind of hops should I use with my beer?


using beer hops with homebrewDifferent hop varieties suit different kinds of beer. After hundreds of years developing beer, there are now some well established rules of thumb for what kinds of hops brewers should use. 

Here's a wee guide for what hops to use:

  • The English Golding hop has become the signature hops of English ales. The popular Fuggle hop is another popular hop used for ale beer. 
  • Saaz hops are closely aligned with the brewing of lagers, mostly for the delicious aroma that has become associated with the beer. Saaz hops are an excellent choice of hop for the enthusiastic homebrewer.
  • Pilsner beers have become nearly synonymous with the four so called 'noble hops'. These are varieties of hop called Terrnanger, Spalt, Hallertauer and of already mentioned Saaz. As an aside, pilsner beers are known as traditionally coming from the Czech Republic.
  • If you're looking for hops that might help your beer taste a bit like the classic New Zealand beer, Steinlager, you might buy Green Bullet hops
  • America, the land of the free beer drinker, has become a home for hop production and many new varieties from old favorites have been developed. American hops are recognized and appreciated all around the world for their bold, and often intense flavors they imbue in beer. American hops are often described as being citrus like, however that's a most elementary description. Cascade hops are a very popular choice.
  • Chinook is another popular 'north western' hop.

What is 'hops tea'?


Sometimes when making homebrew, beer makes also like to make a cup of hop tea!

Why would we do this?

The idea here is that the great hops aromas and oils have been removed from bullets due to the boiling and will then mix easily with your wort brew.

How to make a hops tea for homebrewing


Put the hops in a muslin bag (or tie up a square of it) and then boil it for several minutes. During the boil, have a good smell and enjoy the aromas as it wafts around the kitchen. That's the deliciousness you want to impart to your beer.

When you've boiled the hops for long enough, turn the pan off but leave everything right where it is to cool.

If you have already prepared your wort, so now put everything you've boiled - the whole muslin bag and the tea that you've made into the primary fermenter.

You can also drink your own hops tea too! It's done slightly differently to the above method for beer - you let the hops steep as you would any other tea and then drink when cool enough.

When should I add the hops pellets to my beer?


Typically the beer wort is boiled with the hops added at crucial moments before it is cooled down to begin the fermentation process. The timings of when to add the hops in the boil can be critical as the different timings can cause the hops to work differently on the beer.

If you are making your own wort (that is you are not using a beer kit) then it's best practice to follow a tried and true recipe, at least as you first start out.

If you're at that point, you'll want to understand that the process is sometimes known as the “hop schedule”. A hop schedule will list the length of time that the hops should be in the boil, not the amount of time you should wait to add the hops.

This allows you to make your timings correctly.

The rough guide is the longer you boil the hops, the more bitterness they will impart. The shorter you boil them, the more flavor will be added. It depends on how you want your beer to benefit from the hops addition.

If you are using a simple beer extract kit then you can add the hops when you are preparing the batch of wort. Just throw it with your wort and nature will do the rest.

Some people like to delay adding the hops until a few days later. This is fine, but in our experience of using brewing kits, it makes little difference to the end result in the hop aromas and taste your beer will have. 

What's the best way to properly store hops?


It turns out that turns out freezing hops is actually a popular trick with beer brewers!

If you've purchased a vacuum-sealed packet of hops and have some leftover, then we do firmly recommend that you freeze them.

Quite simply, take your leftover beer hops and place them in a zip-lock bag. Remove the excess air and then seal. Grab a Sharpie and write on the name of the hops on the bag so you don't forget and then place in the freezer until required.

You can also refrigerate the hops. Again, put them in a ziplock bag or something airtight and remove as much air as possible if you can. I read that hops can stay fresh for up to a year this way but I know specialty brewing shops off load older hops much more regularly (handy trick, follow brewing specialists on Facebook - the ones I follow often announce that they are giving away their old hops stock because they have a fresh order coming in).

I reckon that as long as your hops have not been exposed to too much oxygen, it will keep well enough for the average homebrewer to not have to worry about hops going stale.

I've made a very hoppy beer, how long should I let it bottle condition?


We would recommend you start drinking your beer when it's ready to be drunk rather than saving it for a rainy day. Bottle conditioned beer starts to become very drinkable from around the 3-week mark, depending on the storage conditions so any time around then would be a good time to start drinking your beer.

Go on, you deserve it!

The longer you wait beyond this period, the strength of the hops begins to dissipate. Your beer, of course, will not be ruined, it will just be less hoppy than you may have expected.

What is the practice of dry hopping beer?


It sounds like a fancy technical term but 'dry hopping' is simply the moment when the brewer adds hops in (dry) pellet form to the fermenter after the wort has been prepared.

The brewer is, of course, using hops to improve the aroma of the beer and to add some bitterness to the brew (bitterness is best produced by the boiling of hops though).

This ‘dry’ practice is often done later in the fermentation cycle of the beer. The thinking behind adding the hops later is that the hops aroma is more likely to stay with the beer brew through to the bottling process.

This is because the bubbling process and emission of carbon dioxide via the airlock allows the aromas to escape.

Bearing in mind that one should leave one’s beer to sit quietly for a couple of weeks before brewing to ensure that the yeast has had a chance to do its thing, this is a great opportunity for the oils and bitterness of the hops to also transfuse into the beer. It’s for that reason why dry hopping is a popular practice.

So if that's dry hopping, what is wet hopping?


wet hopsWet hopping is simply adding in freshly grown hops into the primary. Homebrewers have been known to grow their own hops, harvest it and then add it to their beer. It's the natural way to use hops.

Turning hops into pellets has become popular as an easy means of distribution and serves as a way to preserve the life of the hops - it's a plant after all and just like when you don't eat the carrots in the fridge, they become rotten.

You can actually grow your own hops in your backyard garden too. All you need is to get your hands on some rhizomes, get your green fingers out and plant them in a spot that will let them grow like crazy.

A good source of hops rhizomes is from local Facebook groups. Home brewers often sell them to one another quite cheaply or just for shipping costs.

My hops is just floating in the primary fermenter. Is this normal?


Yes, when you first add hops to your wort it breaks apart from its pellet form and generally just floats at the top of the wort and this is normal. Given a few days, it will impart its wondrous qualities to the beer and then fall to the bottom of the fermenter, its job done.

If you don't want this to occur, you could think about placing your hops in a muslin bag and dropping them in. Maybe put a glass marble in the bag so it weights down.

Can I add hop pellets into the beer before bottling?


If you've ever wondered if you could simply add a hop pellet to each bottle of beer when bottling your batch, think some more.

You're setting yourself up for a potential disaster. While it can work, you are at serious risk of causing beer gushers. If it merely foams you are likely to experience your beer head to suffer from hop stuck in the head and floating in the beer.

Ideally, you want the hops to fall to the bottom of the fermenter so that when you fill your bottles you do not get the residue.

That said, if you leave your beer to condition for long enough so the hops drop to the bottom and become part of the sediment that usually forms, you might just get yourself a fairly hoppy beer. That said, leave your hoppy beer too long and you will lose the hoppiness.....

At the end of the day, if you're cool with your beer being a bit messy and prepared to run the risk of bottle bombs, you might get a good result.

Where can I buy hops?


There are two ways to buy hops - in person or online. If you are going to do it in person, you need to find a local specialty beer brewing shop. I love going into specialty beer shops as the owners and staff are usually beer enthusiasts and give the best service and advice. 

Seriously, if you live close by to one, using a specialty store can save you delivery and postage costs and it's worth it to get that personal contact and ask any questions too! My personal favourite in Wellington is Brewtopia and the lads at The Brewhouse have been very helpful too. 

However, if you're a busy brewer or live in the outback somewhere, shopping for hops online is a breeze. If you live in New Zealand we recommend Brewshop as they have fair prices and a very impressive delivery time.

For you Americans wanting to drown in cascade hops, just order hops from Amazon. There are plenty of reputable beer brewing equipment experts on there and between them, they have a large selection of the best hops to buy.

Extra for experts:


Review of 'Dry Stout' Kit by Williams Warn

Friday, May 12, 2017


So are these dry stout kits worthing using?


Having had a fairly good experience with the WilliamsWarn's 'Bohemian Pilsner' homebrew kit, I thought I'd give their 'Dry Stout' a go.

If you think of Irish stout's like Guinness or Murphy's, that's the ballpark we are in.

The product maker makes this claim:

"Our Dry Stout has a black appearance from the crystal malts, roasted malts and roasted barley employed in the grain mix. The result is a great Dry Stout that has liquorice, roasted coffee and chocolate flavours dominating."

dry stout beer kit
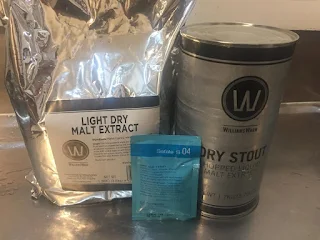
Getting ready on the kitchen bench!
Will I be able to make a beer that matches this claim?

Let's find out!

I did the basic preparation as you do for kits.

Basically, I followed my own beer making guide!

I left my wort to sit in a fermenter in my garden shed. As winter was starting to settle in, I took measures to ensure the temperature remained consistent by wrapping the fermenter with a few old painting sheets.

By controlling the temperature during fermentation, you can produce a better tasting beer. The cooler temperatures of winter can be an ideal time to brew, as long as you take precautions to maintain a consistent temperature. In my case, I was able to create an optimal environment for my beer to ferment by using a simple technique of wrapping the fermenter with old painting sheets.

The fermenter started bubbling within 24 hours and stopped doing so around day 4 or 5.

I bottled 8 days after getting the beer down. I didn't taste it but it had a nice smell, perhaps one more noticeable than many other brews I've previously done. 

And now we wait.

So while we wait for the stout to bottle condition, let's shoot the breeze about a few other things.

williams warn dry stout review

What was the yeast used for the stout?


The yeast that came with the beer kit was a 11g pack of Fermentis S-04 yeast.

This yeast is often used with English ales. It's an adaptable yeast that actually suits a range of ales (you could use it with a nut brown ale for example) and is known for its ability to form a compacted sediment at the bottom of the fermenter. This is awesome as when bottling there's less chance of sediment getting into your finished beer, giving you the oft prized clear beer.

Fermentis recommend that their yeast should be added to the wort when it is above 20 degrees centigrade. Frankly, after I filled the fermenter with water from the garden hose, I just pitched in it!

I've read that the kit also sometimes comes with the Danstar Nottingham ale yeast.

With the kit and same branded Light Dry Malt Extract, I paid 44 dollars which is a bit on the steep side, if you ask me. The DME cost 20 bucks! Nearly as much as the kit as itself.

So I guess the idea is that Williams Warn is supposed to be a 'premium beer kit' producer. Actually, the prices on Amazon are about the same as what I paid so go figure.

But to be frank, when I made the Bohemian Pilsner I didn't notice any real difference in quality say compared to a Mangrove Jacks or Coopers kit. I'm actually pretty sure that most kits on the market these days are quite suitable kits for brewing with.

But enough of this 'chit chat'.

The tasting results are in.

First up, I brought a few bottles in from the shed after a couple of weeks conditioning and left them in the fridge for two nights.

I then opened and slowly poured into a long glass. The beer smelled really good and was a nice dark colour, just the kind one would expect. A small but creamy looking head formed which bode well for the taste test.

And I gotta say, this was a pretty good darn beer. It had some thick body and it felt like it was heavy enough to count as a stout. The Williams Warn kit had delivered.

But did it deliver on the promise of making beer in which "liquorice, roasted coffee and chocolate flavours" dominate?

It's a romantic description but in a sense it's true.

While I certainly haven't detected any liquorice notes, the coffee and chocolate notes where present but they are not pronounced.

I can't help but wonder if this brew would have been better if I had used oak chips to give it some flavour boost.

Review Verdict: Recommend you have a crack. Order the kit from Amazon today.

You can also check out the time I made a double beer kit stout!

Using Mackintosh lollies as a beer enhancer

Thursday, April 13, 2017
mackintosh toffee lollies

You may have heard of beer kit brewers using 'beer enhancer' before. It's a handy way of giving your beer more body and flavour thus making your beer a more enjoyable drinking experience.

But where I come from, a quality beer enhancer will cost you anything from 7 to 14 dollars. Check out the prices on Amazon if you don't believe me!

If if you're a bit like me, you want to make good beer but you also want to do it fairly cheaply. Now you could simply use sugar instead of a beer enhancer but then your beer might feel thin and watery.

So I had an idea, what if I used a bag of Mackintosh Toffee Lollies as an enhancer?

Where I come from in New Zealand, these malty chews are probably one of the most popular treats around.

If you haven't picked why I would have this crazy idea, it's because of the malt and sugars that are in them. Given beer enhancer has a main ingredient of malt and dextrose, would this lolly be a good substitute for a beer enhancer?

So here's the experiment I ran. I knew I needed to test the effectiveness of the Mackintosh Lollies and I reasoned I needed to use a lager so that any malty flavours from a tin of ale or stout wouldn't mask or overpower any effect of the Mackintosh lollies.

A packet of Mackintosh Toffees costs about three dollars in NZ and for your trouble you get 250 grams in the 'farm pack' size.

So I figured I would need two packets as my enhancer substitute. That still comes in at 6 bucks and is a buck or two cheaper than a standard enhancer I would use.

So given one usually uses about 1 KG of beer enhancer, I also added another variable to the experient. I made up the difference with 500 g of dextrose. Dextrose will be wholly consumed the yeast in the fermentation process so will not effect the 'mouth feel' of the beer but will help the yeast do its job.

I wondered about just throwing lollies into the wort but thought better of it. I melted them in a pot on low heat. While removing the wrappers from two packets worth, I wondered if this experiment was even worth my time and effort.

So I prepared a lager brew using a Coopers Lager (as I've previously noted how these kits are fairly weak in body without enhancers). I let the batch ferment for a week and then bottled and stored them in the man shed. Two weeks later I placed a couple of bottles in the fridge and the next evening I sampled my experient.

Had the toffee lollies worked as a beer enhancer?


My first impressions were how sweet the beer was.

And then I realised the mistake I had made.

Or was it one?

The Mackinstosh lollies had all kinds of flavours such as mint, harrogate and coconut. I could certainly get a sense of these flavours. Not bothersome but there none-the-less.

And then I noticed that the lager had a small amount of body to it. Nothing huge but it was there. The head didn't retain for very long.

From my experience of using a Cooper's lager kit with an enhancer, I could tell that the toffees had added some substance to the beer.

So, a successful experiment from the point of view that the lollies added some mouthfeel to the beer but would I recommend this for future efforts? If I wanted to save a couple of bucks off the price of a standard enhancer, then sure.

But in terms of time and result, it's not worth it. It took about ten minutes alone to remove the wrappers and then a similar amount of time to melt down. If I'm making beer from a kit, I just want to get it done as quickly as possible.

And given that a beer enhancer does a more efficient job, I don't really recommend you use Mackintosh toffees as beer enhancer!

The best way to get labels off beer bottles is by...

Sunday, April 2, 2017

The best way to get labels off beer bottles is by... putting them in the dishwasher.

It's that simple.

soaking beer labels to remove themNow you can get on with easily bottling your beer.

Wait. 

You don't believe me?

Trust me, I've considered how to remove labels from beer and wine bottles before.

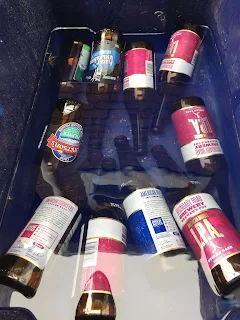
I had ideas along the lines of giving the bottles a good old overnight soak in products such as sodium percarbonate, powdered Brewery Wash, ammonia and even baking soda.

I'd even contemplated using steam from a kettle.

And they all work to a certain degree but all involve labour and mess and scrubbing to various degrees.

But using the dish washer makes peeling off labels so easy!

Here's how I discovered this most obvious solution to a problem that frustrates many brewers. 


I was rinsing the dishes last night and on the window ledge above me was a bottle with a label that I'd placed their the night before - and it had label I knew was going to be a real pain to remove as I'd suffered through that brand before (Boundary Road from NZ). 

A soak would not be enough, some firm scrubbing was going to be required.

Sigh.

So as I loaded the dishes into the dishwasher, on a whim I placed the bottle into the dishwasher and let it do it's thing. I was thinking about that steaming idea. You know how people apparently use to open letters by using the steam from a kettle as the glue would soften? That's the idea.

Now, I'm the kind of guy that likes to have the dish washer emptied before I go to bed so I don't have to empty it in the morning.

So I opened it up when the wash was through and the first thing I noticed was the brown bottle, with the label 9/10 removed and slipping down the bottle.

The dishwasher trick had worked!

I was able to quickly peel off the label while the bottle was still warm from the heat of the dish-washing process. There was a little bit of residual glue on the glass. A quick scrub with the dish-washing brush and it was removed. Not a challenge at all.

The easiest removal of a beer bottle label I'd ever done.

So now I'm convinced.

No more soaking bottles with chemicals for me. When I need to remove the labels, I'll simply use the dishwasher to help. This will also have the benefit of helping clean the bottles (not so much the inside maybe) and at the very least, the heat of the dish washer will help sanitize and even sterilize the bottles too.

Off course for those without a dishwasher, soaking is still going to be the best way to peel those labels off!
Powered by Blogger.

Tags

absorption caps abv acetaldehyde acid adjuncts advice about beer brewing aeration aeration kit aging air lock alcohol alcohol poisoning ale ale beer kits alkaline alkaline brewery wash all grain american amylase apera apples attenuation autolysis automatic temperature compensation bacteria baker's yeast baking yeast ball lock ball valve bar keepers friend barley batch prime beer brewing beer capper beer dispenser beer filtration kit system beer gushers beer kit beer kit review beer kits beer lines beer salt beer taps beerstone best brewing equipment biotin bittering BKF black rock bleach blichmann blow off tubing bluelab bohemian pilsner boil in a bag boil over boneface bottle cap bottle caps bottle conditioning bottling bottling beer bottling spigot bourbon brettanomyces brew and review brew day brewing beer guide brewing salts brewing spoon brewing sugar brewing thermostat brewzilla british thermal unit brix brix scale BTU budvar buffer buffer solution burton snatch buyer's guide calcium chloride calcium sulphate calibration calibration probe calibration solution campden tablets capping carbon dioxide carbonation carbonation drops carboy cascade caustic soda cherry wine chinook chlorine christmas chronicle cider clarity cleaning your equipment clear beer clone recipe cloudy beer cold crashing coldbreak conditioning tablets conductivity conical fermenter contamination coopers copper tun corn sugar cornelius corny keg craft beer creamy beer crown cryo hops cubes danstar nottingham demijohn dextrose distilation DIY DME dopplebock draught dry hopping dry malt extract edelmetall brü burner eisbock ekuanot electrode enhancer enzyme equipment ester ethanol experiments in beer making faucet fermcap-s fermentables fermentation fermenter fermentis fermentor final gravity finings five star flat beer floccing foam inhibitor force carbonation french fresh wort pack fridge fruit fusel alchohol garage project gas burners gelatin gift and present ideas gin ginger beer glucose golden ale golden syrup goldings gose grain grain mill green bullet grist guinness gypsum hach hacks hallertauer heat mat heat pad heat wrap home brew honey hop schedule hops hops spider how not to brew beer how to brew that first beer how to brew with a beer kit how to grow hops how to make a hop tea how to wash yeast hydrated layer hydrogen sulfide hydrometer IBU ideas idophor infection inkbird instruments isoamyl acetate jelly beans jockey box john palmer juniper keezer keg cooler keg regulators kegco kegerator kegging kegs kettle kombucha krausen lactic acid lager lagering lauter lion brown liquid malt extract litmus LME lupulin lupulin powder lupuLN2 making beer malic acid malt malt mill maltodextrin mangrove jack's maple syrup mash mash paddle mash tun mccashins mead methanol micro brewing milling milwaukee MW102 mistakes mixing instructions moa mouth feel muntons must nano brewing New Zealand Brewer's Series no rinse nut brown ale oak oak wood chips off flavors original gravity oxygen pacific gem palaeo water pale ale panhead parsnip PBW pear pectine pectolase perlick ph levels ph meter ph pen pH strips ph tester pico brewing pilsner pitching yeast plastic drum poppet valve pot powdered brewing wash ppm precipitated chalk pressure relief valve priming prison hooch probe problem solving propane and propane accessories pruno pump system purity law radler re-using yeast recipe record keeping reddit refractometer reinheitsgebot removing beer labels from bottles review rice hulls riwaka rotten eggs saaz saccharomyces cerevisiae salt sanitization secondary regulator sediment seltzer session beer silicon simple tricks for brewing siphon site glass skunked beer small batch brewing soda soda ash soda stream sodium carbonate sodium carbonate peroxyhydrate sodium hydroxide sodium metasilicate sodium percarbonate sour beer sparge spigot spirals spirits spoon spraymalt star san starch STC-1000 steinlager steralisation sterilisation sterilization sterliization still stoke storage solution stout sucrose sugar supercharger tannins temperature temperature controller therminator thermometer tips for beginners tri-sodium phopsphate tricks and tips trub tubing tui turkey vodka infused gin vorlauf water water testing wet cardboard taste wet hopping weta whirlfloc tablets white claw williamswarn wine winter brewing wood wort wort chiller yeast yeast energizer yeast nutrient yeast rafts yeast starter yeast traps zinc
Back to Top