
What are the best wort chillers to buy?
If you've done your all-grain brewing session, you've boiled your work well using a burner with high BTU, your hops timings were just perfect and it's all smelling incredible, it's time to quickly cool your wort so that your beer will taste the best it can be.
This is because the key part of the whole exercise is getting fermentation occurring as quickly as possible once the wort has been prepared.
The trouble is, the wort is usually bloody hot and if you add yeast to the wort straight away, it will die a miserable death.
Like the T-1000 in Terminator 2 when it falls into the molten steel.
So what can you do?
It’s simple.
You may wish to consider investing in a wort chiller.
Here's some selections to think about and compare:
- The Copperhead
- The Silver Serpent
- The Therminator
- The NY Brew Supply Deluxe Chiller
Why do I need to use a wort chiller to cool beer?
The use of one can improve the quality of your beer in several ways.
The first is to protect the beer against infections.
While the wort it is still hot bacteria and wild yeasts are inhibited from toying with your beer which is a good thing but it is very susceptible to oxidation damage as it slowly cools.
An efficient cool down can prevent this damage from occurring.
It also prevents the production of dimethyl sulphide. This compound can produce off flavourings in the beer so obviously, you’d want to remove the risk of this being produced as much as you can.
Ideally, the conscientious brewer should aim to get the wort to below 80°F (27°C) before oxidation or contamination has a chance to occur. The use of a wort chiller will get you there in no time.
You may have heard of ‘chill haze’. This is a really common cause of beer cloudiness where the wort has been boiled and the cooling process has not generated enough ‘cold break’.
The cold break is the proteins from the beer that are precipitated to the bottom of the beer by the cold temperature.
Using a copper wort chiller allows for an effective way to get more cold break forming and thus reduces the chance of chill haze in your finished beer.
The less crap in your beer, the better it will taste.
A tale of three kinds chillers
There are actually three types of wort chillers: immersion and counter-flow and plate.
- Immersion chillers are the simplest and work by running cold water through the copper coil (or stainless steel) which is immersed directly in the wort. The heat of the wort is transferred via the copper into the water which is quickly is carried away by the flowing water in the pipe. If you are doing a 5 gallon brew, the length of the tube is usually from 20 to 40 feet, although theу can be even longer.
- Counterflow chillers work in an opposite manner. The hot wort is drained from the cooking pot via copper tubing while cold water flows around the outside of the chiller. Counterflow chillers thus get their name because the two sets of tubing are set up so that the wort goes in one direction, and the cooling water the other.
- Plate chillers work by cold water is run through the unit's 'plates' in one direction and the hot brew is cooled very quickly with the cold water that is running through the other side in the opposite direction. Such a chiller will have hundreds of plates to offer a good surface area to allow for the heat exchange (so it's efficient).
Each kind of chiller has pros and cons. Given immersion chillers are usually the cheapest and easiest to keep clean and maintain and given that do not need a pump to push the water through, they are the most popular units used.
If you're thinking that surface area is the key to quick cooling you'd be right - but just remember that even though a plate chiller has a lot of surface area in the plates, a right sized immersion chiller will likely have a comparable surface area.
No one kind of chiller will reduce the water or wort temperature more than the other, they will only cool as cool as the temperature of the coolant used.
Our featured wort chiller - Copperhead Immersion Wort Chiller

The Copperhead features:
- All copper coil construction is easy to clean and will conduct heat better than other metals.
- Ensure secure tubing with proprietary barbed fittings. Eradicate shooting streams of water that make a mess in your brew cave.
- Drop-angle connections provide insurance against contamination.
- Dimensions: 9 inches wide, 16 inches tall to the bend, 3/8 ID tubing.
- No need to sanitize. Simply drop your clean chiller into the kettle a few minutes before the end of the boil and it will be ready to go.
- Cleaning is a breeze
- Standard garden hose connection allows for brewing outside or connects to a laundry sink faucet as your chilling water source
Here are some real reviews from real users who bought on Amazon
"Worked perfectly and as expected. No leaks and cooled my wort very quickly."
"This is the best on Amazon. I thought about making my own, but considering my time and effort involved, made sense to pay a bit more for one already set up"
Check out the pricing on Amazon.

The Copperhead also has a cousin from Northern Brewer, the 'Silver Serpent'
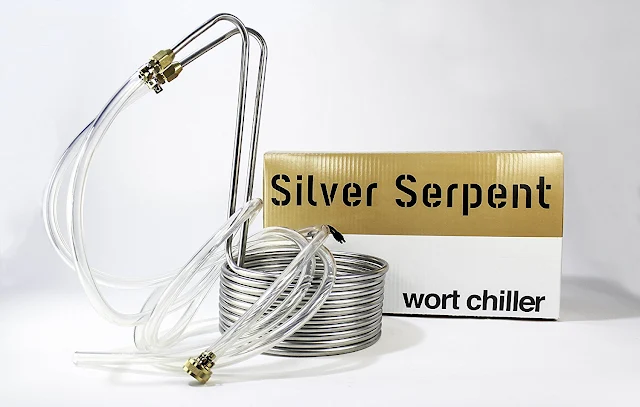
- Drop-angle connections and secure tubing with proprietary barbed fittings.
- Do away with ill-fitting hose clamps on misshapen chiller connections.
- The Silver Serpent drop-angle eliminates kinked tubing.
- No more hassles with propping up the water hose. Tubing can now hang tension-free, kink-free and problem-free.
- Surprise leaks stay outside your kettle and away from cooling wort.
Believe it or not! Remember if you have Amazon Prime you can probably get free shipping!
Check out the pricing on Amazon.
I see people raving about the Blichmann Therminator, is it any good?
As far as we can tell, the Blichmann Terminator is probably the most popular plate chiller in the brewing community.
Brewers often name drop it in brewing forums everytime someone asks 'what is the best wort chiller?"
Just google it and see! Actually, don't google it, keep reading!

Their gas burner is a well-respected piece of brewing day equipment (good for frying turkey too, apparently!) so you wouldn't go wrong to consider using their chiller.
The Therminator is a stainless steel plate-type wort chiller, a miniature version of the plate chillers that the pros use. It is the fastest and most efficient way to chill your wort to yeast pitching temperature.
The Therminator can chill 10 gallons of boiling wort to pitching temperature within 5 minutes when using 58°F cooling water at 5 gpm. This super-efficient chiller uses less water than most other chillers on the market, and is especially great for brewers in southern American climates!
Blichmann boast of their 20 years of experience designing cooling systems and coupled with 17 years of homebrewing experience, they stand by their product claim that it's the 'king of coolers':
"This chiller is incredible. I had been using an immersion copper wort chiller for a few years, so moving to this plate chiller was a big step up. It instantly cooled down my wort as I pumped it through. You do have to make sure you clean it well afterwards, but I think this product is well worth the money."
"Works phenomenally well. Took wort from boiling to 54 degrees in about 6 minutes. I used a gravity setup with my boil kettle valve wide open."
If brewers have one complaint about this product it's that cleaning the plate unit is a real process - as is with all plate chillers. I guess you have to factor in the time savings if using a plate chiller is an effective tool for you.

NY Brew Supply state the following about their chiller:
"The outer coil of our deluxe counter flow wort chiller is a super durable, high temperature 3/4" hose that will not get brittle over time and is more durable than standard garden hose designs. 25 feet of 1/2 inch copper tubing provides an extremely efficient transfer of heat.
Heavy duty brass fittings allow for easy connection to your cold water source (via garden hose connection). Unlike some "soldered copper" designs, our heavy duty brass fittings allow you the option to adjust the angle and position of the input and output hoses."
But don't let them do all the talking, try the opinions of these actual users on for size:
"I've used this twice in the last month. This is one of those purchases I wish I would have made years ago. Initially, I was considering upgrading my copper/immersion wort chiller to something larger. This is really not that much more expensive and MAN does it perform."
"This product works great, is well priced, and I would recommend it. If you buy it, keep the end caps as you can pour star san water into the copper inner coil and keep it sanitized while not in use. Also, I would recommend using proper silicone tubing and tube clamps."
"I went to the hardware store to gather the parts to make this. As I added up the cost in my cart, I realized I couldn't beat this deal! It costs as much to make on your own so, why bother! My time is worth the $100! And yours is too!"
The basic principle behind using an immersion wort chillers is fairly straight forward. The copper tubing, usually around 25-50 feet long, is formed into a large coil that can be submerged into the wort to cool it.
After the boil and, when you are ready, you connect your chiller to a piping system of some kind. Many brewers make their beer outside and so are quite happy to connect to the garden hose. If you are inside, your laundry taps might have the correct tap connectors.
NE ways, you run the water through the chiller until the wort is at the desired temperature. And gosh, if you need to ask how you know what the right temperature is, you take a thermometer reading!
But then you're going to ask but what is the best temperature to pitch your yeast? Look at the guidance on your yeast packet but note that different yeasts like different temperatures.
Just don't over cool your wort or it may take some time for fermentation to begin!
You may wish to consider buying a wort chiller that has a standard garden hose connection.
In the long run, it will be wort(h) it.
There are a few DIY options you can consider attempting.
If you're feeling like a bit of a mongrel you can always curl up your garden hose, tie it off and use it as you would an immersion cool but who are we kidding, the damn thing would probably melt if placed in a boiling wort!
Seriously though, you can buy your own tubing which will still allow for efficient cooling rates and be friendly on your wallet.
If you have found yourself in a very warm climate area, your groundwater temperature may not be sufficient to cool the wort to the desired lower temperature.

In the blue box, you can see the water bottles. These have been frozen and added to the water. Saves you buying ice!
Cleaning an immersion cooler is the easiest of the three kinds because you only need to wash the exterior coils. A quick rinse with a hose should be sufficient. Make sure you get all the gunk off.
Plate chillers are tough to clean as the metal plates are placed very close to each other and if you don't separate out the hops before cooling, they can clog up the 'plate trenches' quite quickly.
The Therminator is a stainless steel plate-type wort chiller, a miniature version of the plate chillers that the pros use. It is the fastest and most efficient way to chill your wort to yeast pitching temperature.
The Therminator can chill 10 gallons of boiling wort to pitching temperature within 5 minutes when using 58°F cooling water at 5 gpm. This super-efficient chiller uses less water than most other chillers on the market, and is especially great for brewers in southern American climates!
Blichmann boast of their 20 years of experience designing cooling systems and coupled with 17 years of homebrewing experience, they stand by their product claim that it's the 'king of coolers':
- Broad operating range at fast cooling rates.
- Low water usage for high efficiency.
- Low restriction for gravity feed at high flow rates.
- Compact size for easy use and sanitation.
- Heavy-duty mounting brackets for simple installation.
- Convenient straight-through water connections to prevent kinked hoses.
- Resistance to plugging.
- Substantial reduction in ice usage for chilling below cooling water temps.
Reviews of real users of the Therminator:
"Works phenomenally well. Took wort from boiling to 54 degrees in about 6 minutes. I used a gravity setup with my boil kettle valve wide open."
If brewers have one complaint about this product it's that cleaning the plate unit is a real process - as is with all plate chillers. I guess you have to factor in the time savings if using a plate chiller is an effective tool for you.
If there's a counterflow chiller you like, make it the NY Brew Supply Deluxe
Don't let its look put you off because remember, counterflow chillers are not placed inside the hot wort so the black piping serves a purpose:
"The outer coil of our deluxe counter flow wort chiller is a super durable, high temperature 3/4" hose that will not get brittle over time and is more durable than standard garden hose designs. 25 feet of 1/2 inch copper tubing provides an extremely efficient transfer of heat.
Heavy duty brass fittings allow for easy connection to your cold water source (via garden hose connection). Unlike some "soldered copper" designs, our heavy duty brass fittings allow you the option to adjust the angle and position of the input and output hoses."
But don't let them do all the talking, try the opinions of these actual users on for size:
"I've used this twice in the last month. This is one of those purchases I wish I would have made years ago. Initially, I was considering upgrading my copper/immersion wort chiller to something larger. This is really not that much more expensive and MAN does it perform."
"This product works great, is well priced, and I would recommend it. If you buy it, keep the end caps as you can pour star san water into the copper inner coil and keep it sanitized while not in use. Also, I would recommend using proper silicone tubing and tube clamps."
"I went to the hardware store to gather the parts to make this. As I added up the cost in my cart, I realized I couldn't beat this deal! It costs as much to make on your own so, why bother! My time is worth the $100! And yours is too!"
If those testimonies sound right up your alley, have a gander at the price on Amazon.
How to use a wort chiller
The basic principle behind using an immersion wort chillers is fairly straight forward. The copper tubing, usually around 25-50 feet long, is formed into a large coil that can be submerged into the wort to cool it.
After the boil and, when you are ready, you connect your chiller to a piping system of some kind. Many brewers make their beer outside and so are quite happy to connect to the garden hose. If you are inside, your laundry taps might have the correct tap connectors.
NE ways, you run the water through the chiller until the wort is at the desired temperature. And gosh, if you need to ask how you know what the right temperature is, you take a thermometer reading!
But then you're going to ask but what is the best temperature to pitch your yeast? Look at the guidance on your yeast packet but note that different yeasts like different temperatures.
Just don't over cool your wort or it may take some time for fermentation to begin!
What does the garden hose have to do with chilling beer?
You may wish to consider buying a wort chiller that has a standard garden hose connection.
This allows for brewing outside on a nice summer's day or connecting to a laundry sink faucet as your chilling water source.
That can give you some room to breathe outside rather than managing all kinds of cooling shenanigans in the kitchen!
You get what you pay for so look for wort chillers that cool efficiently, don’t leak and will last many brews so don't cheap out.
Just as you should always get the bigger brewing kettle, go for the quality but affordable wort chiller.
Go for quality
You get what you pay for so look for wort chillers that cool efficiently, don’t leak and will last many brews so don't cheap out.
Just as you should always get the bigger brewing kettle, go for the quality but affordable wort chiller.
What are some good DIY options for cooling wort?
There are a few DIY options you can consider attempting.
If you're feeling like a bit of a mongrel you can always curl up your garden hose, tie it off and use it as you would an immersion cool but who are we kidding, the damn thing would probably melt if placed in a boiling wort!
Seriously though, you can buy your own tubing which will still allow for efficient cooling rates and be friendly on your wallet.
How to make your own wort chiller
This guy has some good ideas about making counter flow chillers. Here's a great video on how to make your own copper tubing chiller:
What if my groundwater is too warm to chill the wort?
If you have found yourself in a very warm climate area, your groundwater temperature may not be sufficient to cool the wort to the desired lower temperature.
If that's the case, you will need to use a cooling water pre-chiller set up. You can use a copper coil immersed in a pail of iced water.
We recommend the coil is 25 to 50 feet in length. Use this to cool the groundwater before it enters the chiller i.e. it is placed between your chiller and the water source.
It might look rough but here's a good set up:

In the blue box, you can see the water bottles. These have been frozen and added to the water. Saves you buying ice!
How to clean wort chillers
Cleaning an immersion cooler is the easiest of the three kinds because you only need to wash the exterior coils. A quick rinse with a hose should be sufficient. Make sure you get all the gunk off.
Plate chillers are tough to clean as the metal plates are placed very close to each other and if you don't separate out the hops before cooling, they can clog up the 'plate trenches' quite quickly.
This reduces cooling performance and will make the unit just that bit more tricky to properly clean - and you need to clean them well so that no residue can pass on nasty bugs on the next use.
It’s a smart move to sanitize your plate chiller right after the brew is done. So your instructions are to not leave it for a day or two (or even next weekend) or you will likely have problems with the wort and gunk inside the chiller that will be very difficult to get out.
Do yourself a favour and back-flush your plate chiller with water from the faucet as soon as you finish your brew. By back-flushing, we meant that you rinse in the opposite direction of the wort flow to try and first expunge any hop or trub residue that may have entered collected inside the exchanger.
You can actually add PBW to your cleaning water to help with cleaning those pipes out...speaking of:
All the usual good stuff, including vinegar! PBW is probably your best bet. Star San has been known by home brewers to work really well on copper so feel free to give that a try.
What chemicals and cleaners do I clean a wort chiller with?
All the usual good stuff, including vinegar! PBW is probably your best bet. Star San has been known by home brewers to work really well on copper so feel free to give that a try.
Blichmann actually recommends that you do not use any chlorine products containing chlorine such as a bleach as chlorine can pit and erode stainless steel. So stay away from anything caustic.
If your water pressure is low or you want to reticulate water you just want to get on with the job of cooling the water, you may want to use a pump to help move the water along.
There are many different kinds of pumps on the market but I've noticed many brewers simply use pumps intended for ponds or aquariums as they operate at the power levels needed for chilling wort!
The benefit of using a pump is that it can contribute to lowering your overall chilling time.
These aeration pumps are good for wort.
Using a pump with wort chiller
If your water pressure is low or you want to reticulate water you just want to get on with the job of cooling the water, you may want to use a pump to help move the water along.
There are many different kinds of pumps on the market but I've noticed many brewers simply use pumps intended for ponds or aquariums as they operate at the power levels needed for chilling wort!
The benefit of using a pump is that it can contribute to lowering your overall chilling time.
These aeration pumps are good for wort.


