Mastering the Beer Kit
Transform extract into excellence. A comprehensive masterclass on brewing professional-quality beer from the comfort of your kitchen.
Your Journey to Brewing Success
Brewing with a beer kit is not just a convenient entry point into the world of craft beer; it is a legitimate pathway to brewing success.
Gone are the days when kit-brewed beers were synonymous with a "homebrew tang."
Modern kits utilize high-quality, vacuum-evaporated malt extracts that preserve the delicate flavors of the grain, allowing you to produce results that can rival commercial microbreweries.
The secret to success lies in the execution.
By starting with a kit, you bypass the complex chemistry of the "mash" and "sparge," allowing you to focus 100% of your energy on the two pillars that define a great pint: Fermentation Control and Sanitization.
When you master the environment of the yeast, you master the final flavor profile of the beer.

In this comprehensive masterclass, we will guide you through every nuance of the process.
We don't just stop at the "how-to"; we dive into the "why."
Below, you'll find our 8-Step Blueprint, a refined, master-level workflow designed to ensure every batch is your best batch.
The Master Brewer's 8-Step Blueprint
1. The Sanitization Creed
Cleaning and sanitizing are two distinct missions, and as a master brewer, you must treat them with equal reverence. Cleaning is the physical removal of dirt and organic residue where bacteria hide, while sanitizing is the chemical reduction of microscopic "bugs" that cause off-flavors.
If any object touches the beer after the boil, it must be sanitized - this includes your hands, the scissors you use to open the yeast, and even the thermometer probe. Scrub your fermenter with a soft cloth to avoid scratches; even a tiny micro-abrasion can house thousands of bacteria that a surface sanitizer simply can't reach.
Most importantly, don't fear the foam! If you're using a no-rinse sanitizer like Star-San, those bubbles are actually beneficial.
They create a "protective cloud" of acid and eventually break down into yeast nutrients. Never rinse your equipment with tap water after sanitizing, or you'll re-introduce the very bacteria you just worked to eliminate.
2. Mise-en-Place & The Hot-Tin Secret
A frantic brewer is a brewer who makes mistakes. Before you even touch the water, set your fermenter on its stand, prepare your airlock, and check your yeast's expiration date.
If your kit uses a tin of liquid malt extract (LME), you'll quickly find it can be thick and difficult to pour, often leading to waste and a sticky mess. To avoid this, place your sealed malt tins in a sink of very hot water for 15 minutes before opening. This simple act of pre-heating the extract lowers its viscosity until it flows out easily like warm honey.
You'll get every last drop of fermentable sugar into your brew without the struggle, ensuring you hit your target starting gravity perfectly every time.
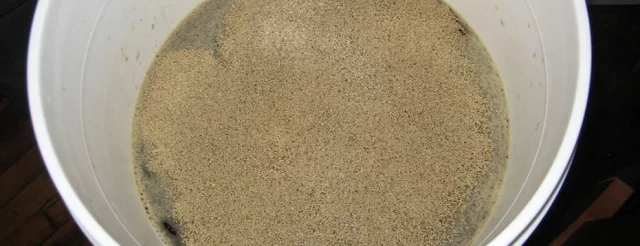
3. The Figure-Eight Wort Mix
Whether you choose to boil your wort or follow a "no-boil" kit approach, your primary goal is absolute homogenization.
If the heavy malt syrup settles at the bottom of the drum without being fully dissolved, it can scorch or lead to an uneven fermentation.
As you add your hot water to dissolve the malt, stir in a deliberate figure-eight motion rather than a simple circle. This creates much more turbulence, ensuring no syrup is "hiding" in the corners of the vessel.
Furthermore, if your kit calls for sugar, always reach for "Brewing Sugar" (Dextrose) rather than standard table sugar. Table sugar can lead to a "cidery" or thin flavor profile, whereas Dextrose ferments cleaner, allowing the malt character of your kit to truly shine.
4. The Patience of Chilling
Pitching your yeast into wort that is even slightly too hot is perhaps the most common reason for a "bad" homebrew. If the liquid is over 80°F (27°C), the yeast will produce "fusel alcohols" -the sharp, paint-thinner burn that causes nasty headaches and off-aromas.
You want your wort to be cool to the touch, ideally 64-68°F for ales, before the yeast ever makes contact. If your tap water is too warm to get the wort down to this range, don't force it. Simply seal the sanitized fermenter and let it sit in a cool room overnight. It is always better to wait 12 hours to pitch your yeast at the correct temperature than to pitch it immediately into "warm" wort.
This display of patience is what separates the masters from the amateurs.
5. Aeration & The Pitch
Pitching is the magical transition where wort becomes beer.
Yeast needs oxygen to build strong cell walls before it begins the anaerobic process of fermentation. If you just sprinkle the yeast on top of "dead," still water, it will struggle to reproduce.
Before you pitch, give that fermenter some muscle! With the lid on tight, shake the drum vigorously for at least two full minutes until you see a thick, meringue-like layer of foam on top.
This injects essential oxygen into the liquid, giving your yeast the literal fuel it needs for a fast, healthy start. Once oxygenated, pitch your yeast and seal it up. This vigorous start ensures your yeast "colonizes" the liquid before any stray wild bacteria can take hold.
6. Fermentation Climate Control
Once the airlock starts its steady rhythm, your primary job is to protect the environment. Keep the fermenter in a dark spot away from UV light, which reacts with hop oils to create "skunky" sulfur compounds.
Remember that temperature stability is far more important than the absolute number on the thermometer. A steady 72°F is significantly better for the yeast than a temperature that swings wildly between 60°F at night and 75°F during the day.
If the room is too warm, use the "wet t-shirt" method: wrap the fermenter in a wet t-shirt and place it in a shallow tray of water. The evaporative cooling will keep the internal temperature several degrees lower and remarkably stable throughout the active growth phase.
7. The Conditioning Clean-Up
When the airlock stops bubbling, your beer isn't done—it's just moving into the conditioning phase. The yeast is currently re-absorbing harsh chemicals like Diacetyl, which gives beer an oily, buttery texture that you definitely don't want. Give the beer a few extra days to "brighten" as the yeast and proteins settle to the bottom.
If you want a truly commercial-looking result, try "Cold Crashing." If you have the fridge space, put your entire fermenter in a fridge for 48 hours before bottling. The sudden drop in temperature causes the yeast and hop particles to drop like a stone, leaving you with crystal-clear beer that looks professionally filtered and tastes remarkably crisp.
8. Packaging & The PET Trick
Bottling is your final hurdle before enjoyment. Ensure your bottles are scrubbed and sanitized inside and out.
When filling, always leave about 1 to 1.5 inches of headspace at the top to act as an expansion chamber for carbonation. To be absolutely sure of your progress, use the "Squeeze Test."
Always bottle at least one plastic PET bottle alongside your glass ones. As the yeast ferments the priming sugar inside the bottle, the PET bottle will get harder.
When it feels like a rock and can no longer be squeezed, you have physical proof that carbonation is complete, and your glass bottles are ready for a final chill in the fridge.
The Brewer's Secret: Comprehensive Yeast Management
Focus: The Moment of Inoculation
Brewers don't actually make beer; yeast does. Your role is that of a "Zymurgy Landlord" - you provide the housing (fermenter), the food (wort), and the climate control. If the yeast is happy, the beer is great.
Fermentation Kinetics Data
- Target Pitch Rate: 0.75M cells / ml / °P
- Optimal Ale Temp: 18°C - 22°C
- Lag Phase Duration: 12 - 24 Hours
- Oxygen Requirements: 8 - 10 ppm
When you sprinkle dry yeast directly onto the wort, up to 50% of the cells can die due to shock. By rehydrating in plain, warm water first, you ensure a higher viable cell count.
For "big" beers, sugar concentration creates osmotic stress - always double your pitch rate in these cases.
The Science of Readiness
The Hydrometer
The hydrometer is the only tool that can give you a definitive answer. It measures the density of your liquid relative to water. As yeast consumes sugar and produces alcohol, the hydrometer will sink further, providing a lower reading.
A "stable" gravity is the same reading taken 48-72 hours apart. Never trust your gut - trust the gravity.
Visual Clues
During the first 48-72 hours, you should see a "krausen"—a thick, rocky head of foam. Once this head collapses, it's a visual signal that the most vigorous part of fermentation is over.
Active yeast stays in suspension, giving the beer a murky appearance. As fermentation ends and the yeast "flocculates," the beer will clear from the top down.
Sensory Evaluation
Sampling your beer before bottling is a critical habit. What you are looking for is the absence of "off-flavors." Does it taste cloyingly sweet? If so, the yeast hasn't finished. Does it have a strong buttery flavor (diacetyl)? The beer needs a few more days on the yeast to clean up.
Your sample should taste like a flat version of the intended style.
The Fluid Foundation: Water Science
Beer is 90-95% water. If you wouldn't drink a glass of your tap water with pleasure, you shouldn't brew with it. Mineral composition determines yeast health and hop "sharpness."
Chlorine & Off-Flavors: Most municipal water contains chloramines. These react with malt to create chlorophenols—a medicinal taste that cannot be aged out. Use half a Campden tablet for 20L to neutralize instantly.
Chemistry of pH: Ideal pH is 5.2 - 5.5. Use a pH meter. High alkalinity extracts tannins, leading to astringency. Calcium helps clarity, and Sulfates make hops taste "crisp."
The Soul of the Brew: Advanced Hopping
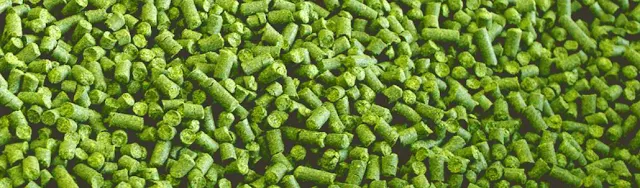
Hops added at the start provide bitterness, while hops added at the very end or during fermentation (Dry Hopping) provide aroma.
To elevate a kit, add 25g - 50g of hop pellets 3 days before bottling.
Try a "hop tea" or "bio-transformation" (adding hops during active ferment) for juicy results.
Cascade
Grapefruit & Floral notes. Perfect for American Pale Ales.
Saaz
Earthy & Spicy. The definitive choice for any crisp Lager.
Simcoe
Pine & Dank passionfruit. Favored in West Coast IPAs.
Mosaic
Tropical Fruit & Berry. Modern favorite for hazy IPAs.
Nelson Sauvin
Kiwi Legend. Sauvignon Blanc character & Gooseberry.
Pitfalls & Master Fixes
Oxidation: Avoid splashing the beer. Oxygen after fermentation causes "wet cardboard" flavors.
Stuck Ferment: If gravity stops high, try "rousing" the yeast by gently swirling the fermenter drum.
Autolysis: Don't leave beer on yeast for months. Cells rupture, creating a "meaty" taste.
Diacetyl: A buttery flavor. Always wait for the yeast to "clean up" after bubbles stop.
Safety & Microbial Diagnostics

Diagnosing Infection
Every master brewer is part scientist and part detective. For your standard kit lager, wild bugs are total batch killers.
The Pellicle: A white, waxy, or bubbly film. This is a biofilm created by wild yeast to protect themselves from oxygen.
Acetic Aroma: Smells like strong vinegar. Acetobacter convert alcohol into acetic acid in the presence of oxygen.
The Methanol Question
Can you go blind from homebrew? Virtually Never. Simple beer brewing produces Ethanol. Methanol requires high-pectin fruits and *distillation* to reach dangerous levels.
Spoilage makes beer taste like vinegar, but it won't make you blind.
Master Brewer's Checklist
Keep a Brewing Journal: Maintain a record of every batch to track progress.
Temperature Stability: Stability is the "secret sauce" of quality. Avoid the swing.
"Master the kit, and you master the soul of the beer."
Ready to Brew?
The first pint is the hardest. After that, it's just passion.
© 2024 Home Brew Masterclass Series


