10 Tips to Elevating Your Home Brewing Beer - Through Science & Process Control
All new home brewers want to make their beer taste better- it's simply a fact of life in one's quest to make beer. This process is rarely about buying the fanciest or most expensive equipment; it is about reducing uncertainty and controlling variables.
The sharpest brewers are not those who experiment wildly (can have great results!), but those who understand the biochemistry at play.
This guide breaks down key brewing pressure points - from protein hydrolysis in cleaning to the isomerization of alpha acids - and offers practical methods to master them using the equipment you already own.
Sanitation vs. Sterilization
Science: Oxidation & Hydrolysis
Most brewing infections - manifesting as sourness or phenolic "band-aid" flavors - occur post-boil. It is crucial to distinguish between cleaning (removing organic soil) and sanitizing (killing microorganisms). You cannot sanitize dirt; the organic matter shields bacteria from the chemical agent.
For cleaning, alkaline cleaners like PBW use hydrolysis to break down proteins and emulsify fats. For sanitation, Sodium Percarbonate is highly effective. When dissolved in water, it releases hydrogen peroxide, which further breaks down into water and free oxygen radicals. These radicals aggressively oxidize biological cell walls, effectively sterilizing your equipment without leaving harsh chemical residues.
Best practice: Clean immediately after use to prevent biofilm formation, then sanitize immediately before the next use.
Deep Dive: Using Sodium Percarbonate Correctly →Building Body & Mouthfeel
Science: Complex vs. Simple Carbohydrates
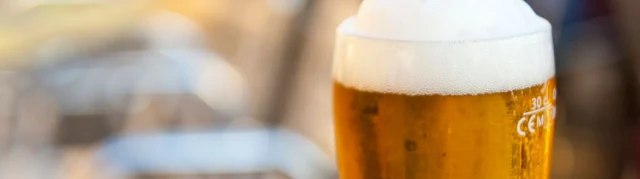
A common fault in homebrew, particularly when using extracts or high sugar adjuncts, is a "thin" or watery mouthfeel. This happens when yeast consumes all available simple sugars (monosaccharides), leaving little behind for structure.
To correct this, you must introduce long-chain sugar molecules that yeast cannot metabolize (unfermentables). Maltodextrin is a tasteless polysaccharide that increases viscosity and foam stability without adding sweetness. Alternatively, using a "Beer Enhancer" blend (typically Dextrose + Maltodextrin) provides a dual function: the dextrose boosts ABV, while the maltodextrin retains the body, preventing the beer from drying out too much.
Learn More: Beer Enhancers & DME →Complexity via Wood Aging
Science: Lignin & Tannin Extraction
Wood aging mimics the complexity of barrel storage. Alcohol acts as a solvent, extracting compounds like vanillin (from lignin breakdown) and tannins from the wood structure. These tannins precipitate unstable proteins, potentially aiding clarity, while adding a perceived "dryness" to the finish.
Surface area is the controlling variable. Oak chips have a high surface-area-to-volume ratio, leading to rapid extraction (often 5–7 days). Cubes extract much slower, allowing for a more subtle integration of oxygen and wood character over months.
Be careful: extraction is not linear; flavor can shift from "subtle vanilla" to "sawdust" effectively overnight with chips.
Guide: Using Oak Chips Properly →Standardizing Carbonation
Science: Henry's Law & Pressure
Inconsistent carbonation is a hallmark of amateur brewing. Priming with loose sugar varies wildly depending on your spoon size and how well the sugar dissolves. If the priming sugar isn't evenly mixed, one bottle may explode while another remains flat.
Carbonation drops are pre-measured, pharmaceutical-grade doses of glucose. By placing exactly one drop in each bottle, you ensure a fixed amount of fermentable material.
As the yeast metabolizes this specific amount of sugar in the sealed environment, it produces a predictable volume of CO₂, which dissolves into the beer according to Henry's Law, ensuring every bottle has identical fizz.
Review: Are Carbonation Drops Worth It? →The Batch Priming Method
Science: Homogeneity
If you prefer not to use drops, batch priming is the superior alternative. This involves dissolving your total sugar weight into boiling water to create a sterile syrup, then gently racking the beer onto this syrup in a bottling bucket.
The gentle swirling motion during racking ensures the sugar solution is distributed 100% evenly (homogeneously) throughout the liquid volume.
This eliminates "stratification," where heavy sugar syrup sinks to the bottom, causing the last few bottles to be dangerous "bombs" while the first few are flat.
Tutorial: Easy Batch Priming →Optimizing Hop Utilization
Science: Isomerization vs. Volatiles

Hops contribute two main things: bitterness (Alpha Acids) and aroma (Essential Oils). These behave differently under heat. Boiling hops causes isomerization, converting insoluble alpha acids into soluble, bitter compounds. However, this heat also evaporates the delicate essential oils responsible for floral and citrus aromas.
To maximize your beer, separate these functions. Use a high-alpha hop early in the boil strictly for bitterness. Save your expensive, aromatic hops for "flameout" (0 minutes) or dry hopping.
Dry hopping utilizes cold-side diffusion to extract oils like myrcene and linalool without adding bitterness, resulting in the "juicy" profile of modern IPAs.
Deep Dive: Hop Profiles & Chemistry →Wikipedia: Hops Biology →

Haze is usually caused by suspended proteins and yeast cells. While cold crashing (lowering the temperature to near freezing) helps these particles settle via gravity, adding gelatin supercharges the process through ionic chemistry.
In acidic beer environments, gelatin protein carries a net positive charge. Yeast cells and haze-forming proteins carry a net negative charge. When you introduce gelatin, it acts like a magnet, binding to the yeast and proteins to form heavy clumps (flocculation) that drop out of suspension rapidly. This creates brilliantly clear beer without affecting flavor.
Step-by-Step: Clearing Homebrew with Gelatin →
Dry yeast is in a dormant, dehydrated state. When you toss it directly into sugary, high-gravity wort, the cell walls cannot regulate the influx of liquid properly due to osmotic pressure. This can kill up to 50% of your cells instantly.
Rehydration in plain, warm water allows the cell membranes to reorganize and become flexible again before they face the stress of fermentation. Furthermore, pitching temperature is critical. Pitching too hot (above 24°C/75°F) encourages rapid ester production (fruity/solvent flavors) and fusel alcohols (rocket fuel heat) that will not age out.
Tutorial: How to Hydrate Yeast →Managing Vigorous Fermentation
Science: Exothermic Reactions & CO2
Fermentation is exothermic—it creates heat. A vigorous fermentation can raise the liquid temperature 5°C to 8°C above the ambient air temperature. This activity also produces massive volumes of CO₂ and krausen (foam).
A standard S-bend airlock can easily clog with hops and foam, creating a sealed pressure vessel that may eventually explode, painting your ceiling with yeast. A blow-off tube—a wide diameter hose leading from the fermenter into a bucket of sanitizer—allows this heavy foam to escape safely. It also helps regulate the internal temperature by allowing heat to escape more efficiently than a sealed plastic lid.
Setup Guide: Blow-Off Hose →Boosting alcohol (ABV) requires adding more fermentable sugar, but the type of sugar matters. Adding plain white sugar (sucrose) increases alcohol but thins the body and can contribute a "cidery" tang due to how yeast metabolizes sucrose vs. maltose.
To increase ABV while maintaining beer quality, use Light Dry Malt Extract (DME). This adds sugar for the yeast but also brings proteins and unfermentable dextrins to support the heavier alcohol weight. Remember: High gravity environments are stressful for yeast. If aiming for high ABV (>7%), you must increase your pitch rate (cell count) and oxygenate the wort thoroughly to ensure the yeast can finish the job.
Guide: Increasing ABV Safely →