How to use Sparkolloid finings when making wine

Thursday, May 25, 2023

Sparkolloid. 


It sounds like some kind of strange alien planet.


The reality is that it is a very handy fining agent for use when making wine or mead. 


Sparkolloid is a popular inorganic fining clarifier agent widely used in the winemaking industry for its remarkable ability to clarify and stabilize wines. It is known for its natural composition and its effectiveness in enhancing wine clarity.


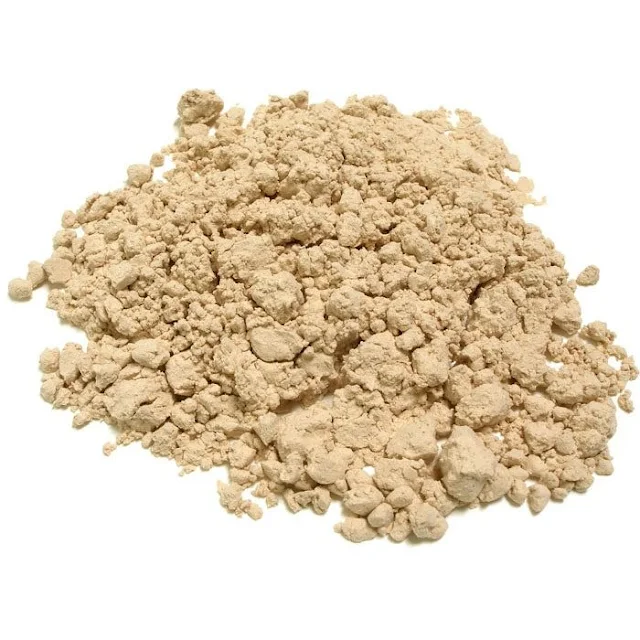
Sparkolloid is composed of a blend of diatomaceous earth, a type of fossilized algae, and purified isinglass, a substance derived from fish bladder. This combination of natural materials creates a fining agent with excellent clarifying properties. It comes in powder form:

sparkolloid-fining-agent-wine
One of the key properties of Sparkolloid is its high adsorption capacity. It has a strong affinity for haze-causing compounds, proteins, and unwanted particles present in wine. When added to the wine, Sparkolloid attracts and binds with these substances, forming larger particles that precipitate out of the liquid, resulting in a clearer wine.


Compared to other fining agents, Sparkolloid offers several advantages. Firstly, it is a natural fining agent, appealing to winemakers who prefer to minimize the use of synthetic substances in their winemaking process. Its composition of diatomaceous earth and purified isinglass aligns with the demand for more natural and sustainable winemaking practices.


Secondly, Sparkolloid demonstrates a high level of effectiveness in achieving wine clarity. Its ability to remove haze-causing compounds, such as proteins and tannins, is particularly notable. The resulting wine exhibits improved brilliance, color stability, and reduced sedimentation.


Furthermore, Sparkolloid is relatively easy to use. It can be added directly to the wine and does not require extensive preparation or complicated procedures. Winemakers appreciate the convenience and efficiency that Sparkolloid offers in the fining process.


Overall, Sparkolloid stands out as a reliable and efficient fining agent, renowned for its natural composition, outstanding clarifying properties, and ease of use. In the next sections, we will delve into the step-by-step process of using Sparkolloid in winemaking, enabling you to harness its potential and enhance the clarity of your wines.


How Sparkolloid works


To understand the fining capabilities of Sparkolloid, it's essential to explore the science behind its mechanism of action. Sparkolloid interacts with various wine components, particularly proteins and tannins, to achieve its clarifying and stabilizing effects.


When Sparkolloid is added to the wine, its diatomaceous earth component acts as a matrix with a vast surface area. This surface area provides binding sites for the wine's proteins and tannins, which are responsible for haze formation and color instability.


Proteins, often derived from grape juice or yeast, can contribute to haze in wine. These proteins can form complexes and cause turbidity, negatively impacting the wine's visual appeal. Sparkolloid's diatomaceous earth absorbs and binds to these proteins, removing them from the wine matrix. This process is known as adsorption.


Similarly, tannins, which are natural compounds found in grape skins, seeds, and stems, can also contribute to haze formation and color instability. Sparkolloid's isinglass component interacts with these tannins, forming insoluble complexes. These complexes precipitate out of the wine, leading to improved color stability and clarity.


The combined action of Sparkolloid's diatomaceous earth and isinglass components effectively reduces the concentration of haze-causing compounds, proteins, and tannins, resulting in a clearer and more stable wine.


Furthermore, Sparkolloid also aids in the removal of suspended particles, such as sediment or colloidal materials, from the wine (parsnip?). These particles can contribute to a cloudy appearance or unpleasant texture in the final product. Sparkolloid's binding action helps agglomerate these particles into larger, more settleable forms, allowing for easier removal during racking or filtration.


By targeting proteins, tannins, and suspended particles, Sparkolloid significantly enhances wine clarity, stability, and overall sensory experience.


How to use Sparkolloid finings when making wine


When using Sparkolloid as a fining agent, it's important to determine the optimal timing and dosage for its addition. Additionally, certain factors like pH and temperature should be considered to ensure its effectiveness. 


Let's explore a step-by-step guide on incorporating Sparkolloid into the winemaking process.


1. Timing: The optimal timing for Sparkolloid addition varies depending on the specific winemaking scenario. In general, it is recommended to add Sparkolloid after fermentation is complete, and any desired aging or clarification steps have taken place. This timing ensures that the majority of yeast sediment has settled, allowing Sparkolloid to target proteins, tannins, and suspended particles more effectively.


2. Dosage: The recommended dosage of Sparkolloid can vary depending on factors such as wine style, grape variety, and the desired level of clarification. It is advisable to follow the manufacturer's instructions or consult with an experienced winemaker to determine the appropriate dosage. Typically, dosages range from 0.2 to 2 grams per gallon of wine. It's important not to exceed the recommended dosage, as excessive amounts may lead to over-fining and undesirable sensory effects.


3. Preparation: Before adding Sparkolloid to the wine, it's essential to prepare a slurry. To do this, mix the required amount of Sparkolloid with a small amount of warm water, stirring gently until it forms a smooth, lump-free paste. This step helps disperse the fining agent evenly in the wine and ensures proper interaction with the target compounds.


4. Addition: Once the Sparkolloid slurry is prepared, gently stir or mix it into the wine. It's important to distribute the slurry evenly throughout the wine to maximize contact between Sparkolloid and the haze-causing compounds. Avoid excessive agitation, as it can introduce oxygen into the wine and potentially affect its sensory qualities.


5. Settling and Aging: After adding Sparkolloid, allow the wine to settle undisturbed for a recommended period, typically around 2-3 weeks. During this time, the fining agent will work to clarify the wine by attracting and binding with the targeted compounds. Regular monitoring of the wine's clarity and sedimentation is recommended.


6. Racking or Filtration: Once the settling period is complete, carefully rack or filter the wine to separate it from the sediment and any remaining particles. Racking involves transferring the wine to a clean vessel, leaving the sediment behind. Filtration can further enhance the wine's clarity by removing smaller particles. It is important to follow proper sanitation practices during these steps to maintain the wine's quality.


Factors to Consider:


  •  pH: Sparkolloid is most effective within a specific pH range. Generally, a pH range of 3.0 to 3.5 is considered optimal. If the wine's pH is outside this range, adjustments may be necessary to achieve better results. Monitoring and adjusting the pH prior to fining can improve Sparkolloid's performance.
  • Temperature: Sparkolloid works best at cooler temperatures, typically between 50°F (10°C) and 70°F (21°C). Lower temperatures facilitate the settling and agglomeration of particles, aiding in the clarification process. It's recommended to store the wine at a controlled temperature during the settling period for optimal results.


Sparkolloid's impact on Wine Clarity


The use of Sparkolloid as a fining agent can have a significant impact on wine clarity and various sensory attributes. Let's evaluate its visual impact on wine clarity and brilliance, assess its effect on wine aroma (cherry?) and flavor profile, and explore the connection between wine clarity and consumer perception of quality.


Sparkolloid plays a vital role in enhancing wine clarity and brilliance. By effectively removing haze-causing compounds, proteins, and tannins, it contributes to a visually appealing wine with a crystal-clear appearance. The removal of suspended particles and sediment further adds to the wine's visual attractiveness. A clear and brilliant wine is visually enticing and often perceived as a mark of quality craftsmanship, inviting consumers to indulge in its sensory experience.


While Sparkolloid primarily focuses on improving wine clarity, it can also have subtle effects on the wine's aroma and flavor profile. By removing proteins and tannins that contribute to haze and potential off-flavors, Sparkolloid can enhance the wine's aroma and flavor clarity. It allows the true character and nuances of the wine to shine through, revealing more pronounced and distinct aromas and flavors. Additionally, the removal of sediment and suspended particles can contribute to a smoother and more refined texture, further enhancing the overall sensory experience.


Wine clarity plays a crucial role in shaping consumer perception of wine quality. A clear and visually appealing wine is often associated with meticulous winemaking practices, attention to detail, and high-quality grapes. When consumers observe a wine with excellent clarity, it creates a positive first impression, suggesting a well-crafted product. The visual aspect of wine influences expectations and anticipation, setting the stage for the sensory experience that follows. 


Therefore, achieving optimal wine clarity through the use of fining agents like Sparkolloid can positively influence consumer perception and contribute to a favorable assessment of wine quality.


Comparisons with Other Fining Agents:


When exploring fining agents for wine clarification, it's valuable to contrast Sparkolloid with other commonly used options. Let's highlight the advantages and disadvantages of Sparkolloid in comparison and provide case studies or examples showcasing its efficacy in real winemaking scenarios.


1. Bentonite: Bentonite is an inorganic fining agent widely used in winemaking. It consists of clay minerals with high adsorption properties. While both Sparkolloid and bentonite are effective in clarifying wines, there are notable differences. Sparkolloid tends to have higher adsorption capacity and can target a broader range of haze-causing compounds, including proteins and tannins. Bentonite is particularly effective in reducing unstable proteins but may have limitations in removing certain tannins. Additionally, Sparkolloid is easier to use as it forms a slurry for direct addition to wine, whereas bentonite requires prehydration and careful mixing. They do however complement each other and many wine makers will use both agents.


2. Gelatin: Gelatin, an organic fining agent derived from animal collagen, is commonly used for wine clarification. Gelatin is effective in reducing protein instability and haze formation. However, it may have limitations in removing certain tannins and may require longer settling times. Sparkolloid, with its combined diatomaceous earth and isinglass composition, offers a broader spectrum of fining capabilities, targeting both proteins and tannins more efficiently.


Advantages of Sparkolloid:

  • High adsorption capacity for proteins and tannins, resulting in improved clarity.
  • Natural composition appeals to winemakers preferring a more organic approach.
  • Ease of use with its simple slurry preparation and direct addition to the wine.
  • Demonstrated effectiveness in enhancing wine clarity and stability.


Disadvantages of Sparkolloid:

  • Sparkolloid contains fish-derived isinglass, which may not be suitable for vegan winemaking practices.
  • Some winemakers may find the use of inorganic fining agents less aligned with their overall winemaking philosophy.


Considerations and limitations of using Sparkolloid as a fining agent


While Sparkolloid is an effective fining agent for wine clarification, there are certain considerations and limitations that winemakers should be aware of. Let's discuss potential side effects or challenges associated with Sparkolloid usage, precautions for winemakers, and alternative fining agents for specific winemaking situations or preferences.


Potential Side Effects or Challenges:


  • Over-fining: Excessive use of Sparkolloid can lead to over-fining, resulting in a loss of desirable aroma and flavor compounds. It's important to follow recommended dosage guidelines and monitor the wine closely during the settling period to avoid this issue.
  • Fish Allergies: Sparkolloid contains isinglass, which is derived from fish. Winemakers should be cautious if they or their consumers have fish allergies or dietary restrictions. Alternative fining agents that are suitable for vegan winemaking practices should be considered in such cases.


Precautions for Winemakers:


  • Handling: When preparing the Sparkolloid slurry, it's advisable to wear appropriate protective gear, such as gloves and goggles, as a safety precaution. Avoid inhaling the powder and minimize skin contact.
  • Storage: Proper storage of Sparkolloid is crucial to maintain its effectiveness. Store it in a cool, dry place, away from moisture and direct sunlight. Follow the manufacturer's recommendations regarding storage conditions and shelf life.


It's important for winemakers to carefully evaluate their specific winemaking goals, wine characteristics, and consumer preferences when selecting a fining agent. Consulting with experienced winemakers or enologists can provide valuable insights and guidance in choosing the most suitable fining agent for a particular situation.

Sparkolloid is a reliable and effective tool for winemakers seeking to elevate their wines' visual appeal and overall sensory experience. By employing Sparkolloid as a fining agent, winemakers can unlock the full potential of their wines and deliver exceptional quality to wine enthusiasts around the world.


Bentonite as a fining agent for making clearer wine

The pursuit of exceptional wine quality involves various techniques and ingredients, and one crucial aspect is achieving clarity in the final product. Wine clarity not only enhances its visual appeal but also reflects its overall quality.

Among the many clarifying agents available to winemakers, Bentonite stands out as a popular choice due to its effectiveness in achieving remarkable wine clarity. In this discussion, we will delve into the use of Bentonite as a clarifying agent when making wine, exploring its properties, application techniques, and the impact it has on the final product's clarity and sensory attributes.

Bentonite is a clay mineral with unique properties that make it well-suited for wine clarification. It consists mainly of montmorillonite, which possesses a high surface area and a negative electrical charge. These characteristics enable Bentonite to attract and bind with positively charged particles, including proteins, haze-causing compounds, and certain polyphenols.

Bentonite is typically applied in the form of a fining agent. It can be added during different stages of winemaking, such as after fermentation or during aging, depending on the desired outcome. The dosage of Bentonite may vary based on factors like grape variety, pH levels, and the initial turbidity of the wine. It is crucial to follow recommended dosage guidelines and conduct small-scale trials to determine the optimal dosage for each specific wine.

When Bentonite is introduced into the wine, it forms a gel-like substance that settles at the bottom of the container over time. This gel acts as a binding agent, attracting and capturing suspended particles, proteins, and tannins responsible for haze formation. As the Bentonite settles, it takes along the captured particles, leaving the wine clearer and more visually appealing.

Bentonite plays a significant role in enhancing wine clarity. By removing proteins, tannins, and other haze-causing compounds, it contributes to a visually stunning and brilliantly clear wine. The removal of these substances also has an impact on the wine's sensory attributes. Bentonite can reduce astringency, bitterness, and unwanted flavors associated with certain proteins and tannins, resulting in a smoother, more balanced wine with improved aroma and flavor clarity.

While Bentonite offers many advantages, it is essential to consider certain factors and limitations. Bentonite can remove not only unwanted proteins but also desirable aroma and flavor compounds. Over-fining is a potential risk if excessive Bentonite is used, leading to a loss of desired complexity and character. Additionally, Bentonite may have limited effectiveness in reducing certain tannins and other complex compounds, requiring the consideration of alternative fining agents or techniques in specific winemaking situations.

In certain winemaking scenarios, Sparkolloid can be used in tandem with Bentonite to achieve even greater clarity and stability in wines. While Bentonite is effective in removing proteins and certain haze-causing compounds, Sparkolloid, as an additional fining agent, can target other problematic particles such as tannins. 

By combining the unique properties of both fining agents, winemakers can address a broader range of clarity concerns and ensure a more comprehensive fining process. When using Sparkolloid in conjunction with Bentonite, it is crucial to carefully adjust the dosages of each agent to maintain a balance and avoid over-fining. 

Small-scale trials and monitoring the settling process can help determine the optimal ratio and timing for the dual application. The complementary actions of Sparkolloid and Bentonite can synergistically enhance wine clarity, stability, and sensory attributes, resulting in wines of exceptional quality and visual appeal.

Hop Storage Made Easy: Revolutionize Your Brewing Process with a Vacuum Sealer

Saturday, May 13, 2023
So you’ve got a pile of delicious fresh hops and you need to keep your tasty treasure fresh until your next brew.

You could bung the hops into a ziploc bag and keep it in the fridge or you could splash some cash for a vacuum sealer which extends the freshness of your hops for months and months !

Vacuum sealers are an effective tool for keeping beer brewing hops fresh.

Let's cut to the chase, what's the best vacuum sealer for hops?

It's the Anova Culinary Precision Vacuum Sealer Pro!


anova vacuum sealer review for hops

Here's a quick review of the Anova sealer:


The Anova Culinary Precision Vacuum Sealer Pro is a reliable and efficient vacuum sealer that offers excellent performance for sealing beer hops. Here's a quick review of its features and suitability for hop storage:


1. Powerful Vacuum Sealing: The Anova Precision Vacuum Sealer Pro boasts a strong vacuum pump, providing robust suction power to create airtight seals around hops. This feature ensures optimal freshness and extends the shelf life of the hops by preventing air and moisture exposure.


2. Versatile Design: The vacuum sealer's sleek and compact design allows for easy handling and storage. It offers a user-friendly interface with intuitive controls, making it convenient to operate. The unit also has a built-in bag cutter, which simplifies the process of creating custom-sized bags for sealing hops.


3. Adjustable Sealing Options: The Precision Vacuum Sealer Pro offers adjustable sealing settings, allowing you to choose between gentle and regular sealing options. This versatility is beneficial when working with delicate hop varieties that require a more careful sealing approach to preserve their delicate aromas.


4. Compatibility with Various Bag Types: This vacuum sealer is compatible with a wide range of vacuum sealer bags and rolls. It works well with textured vacuum sealer bags and embossed rolls designed for vacuum sealing, offering flexibility in bag selection and size.


5. Durable Construction: The Anova Precision Vacuum Sealer Pro is constructed with durability in mind, ensuring long-lasting performance. It is built to withstand frequent use, making it suitable for home brewers who regularly vacuum seal their hops.


6. Precise Sealing: The precision-controlled sealing mechanism of the Anova vacuum sealer ensures consistent and reliable seals. This feature is vital for maintaining the integrity and freshness of the hops, preventing any leaks or air seepage that can compromise their quality.


7. Value for Money: While the Anova Precision Vacuum Sealer Pro is priced higher than entry-level models, its performance and reliability justify the investment for serious home brewers or small commercial breweries. It offers a combination of power, versatility, and durability, ensuring that your hops stay fresh for extended periods, reducing wastage and saving money in the long run.

storing hops with a vacuum sealer


Here's a review left by a user on Amazon:


"This machine has all the bells and whistles I will ever need. I has excellent vacuum strength and the double heat seal ensures the bag is sealed. The biggest plus for me is the built in bag slicer. It is extremely easy to use and works every time. Being able to store a roll of bag material right behind it makes cutting bags even easier. Put what you want in the bag, lay the open end on the sealer strip with the bag opening in the vacuum tray. Shut the machine, lock it, and hit the “Vacuum and Seal” button. In about 40 seconds you’re done. No fuss, no muss. Did I tell you I’m loving this sealer?"

In summary, the Anova Culinary Precision Vacuum Sealer Pro is a top-quality vacuum sealer that proves to be a valuable tool for storing beer brewing hops. With its strong suction power, adjustable sealing options, and compatibility with various bag types, it provides an efficient and reliable solution for vacuum sealing hops, preserving their freshness, aroma, and flavor.


If you are looking for something a bit bigger, then the Nesco Deluxe Food VS-12 Vacuum Sealer could be for you.

The Nesco Deluxe Food VS-12 Vacuum Sealer is a reliable and feature-packed option for those seeking a versatile vacuum sealer for food preservation, including beer hops. This vacuum sealer offers strong suction power, ensuring airtight seals that help to extend the shelf life of hops.

Nesco Deluxe Food VS-12 Vacuum Sealer

It provides customizable sealing options, allowing users to adjust the vacuum pressure and seal time according to their specific needs. The VS-12 also comes with a built-in roll storage compartment and cutter, making it convenient for creating custom-sized bags.

Its durable construction and user-friendly design add to its appeal. Overall, the Nesco Deluxe Food VS-12 Vacuum Sealer is a dependable choice for brewers looking to preserve the freshness and quality of their hops.

Here are some benefits of using a vacuum sealer:


1. Increased shelf life: Hops, like many other food items, are prone to oxidation, moisture, and other environmental factors that can lead to spoilage and deterioration of quality. Vacuum sealing helps to create an airtight seal around the hops, preventing air from getting inside and extending the shelf life of the hops.


2. Retention of aroma and flavor: Hops are known for their fragrant and flavorful properties, which are crucial for beer brewing. Vacuum sealing helps to retain the aroma and flavor of the hops, as it prevents exposure to oxygen and moisture, which can cause the hops to lose their freshness and potency.


3. Space-saving: Vacuum sealing can compress the hops into a compact package, which makes it easier to store and transport. This is especially important for home brewers who may not have a lot of storage space for their brewing supplies.


4. Cost-effective: By extending the shelf life of hops, vacuum sealing can help to reduce waste and save money in the long run. Brewers can buy hops in bulk and then seal them in smaller portions, which reduces the risk of spoilage and saves money on frequent trips to the store.


What are the best kind of bags to use with a vacuum sealer with hops?

When vacuum sealing hops, it's crucial to use the appropriate plastic bags that are specifically designed for food storage and vacuum sealing. Here are some of the best types of plastic bags to consider:


1. Vacuum sealer bags: These are bags specifically made for use with vacuum sealing machines. They are typically textured on one side to facilitate air extraction and have a smooth, airtight side for proper sealing. Vacuum sealer bags are often made from a combination of polyethylene (PE) and nylon (PA) materials. They are durable, puncture-resistant, and provide an excellent barrier against moisture and oxygen.


2. Embossed vacuum sealer rolls: These are rolls of plastic material used to create custom-sized bags for vacuum sealing. They work with vacuum sealer machines that have a built-in cutter to create bags of desired lengths. Embossed vacuum sealer rolls are similar to vacuum sealer bags, with one side textured for air extraction and the other side smooth for sealing. They offer flexibility in bag size and are suitable for sealing larger quantities of hops.


3. Mylar bags: Mylar bags, also known as foil bags or metalized bags, are made from a polyester film called BoPET (biaxially-oriented polyethylene terephthalate). These bags provide excellent oxygen and moisture barrier properties, making them a good option for long-term storage. Mylar bags are commonly used in the food industry for preserving freshness. However, they require heat sealing rather than vacuum sealing, so they are not suitable for use with standard vacuum sealing machines.


It's important to ensure that the plastic bags you choose are labeled as food-safe and specifically designed for vacuum sealing. They should be free from harmful chemicals and BPA. Additionally, select bags that are thick and durable to prevent punctures and leaks during storage.


When using vacuum sealer bags or rolls, follow the manufacturer's instructions for proper sealing and storage recommendations. Always leave enough headspace in the bag to accommodate the hops and allow for proper sealing. Label the bags with relevant information, such as the hop variety and date of sealing, for easy organization.


Overall, vacuum sealer bags and embossed rolls designed for use with vacuum sealing machines are the most recommended options for sealing hops, providing a reliable and effective packaging solution.

vacuum seal hops for freshness


Using a vacuum sealer for hops in the context of beer brewing can have some practical considerations

Here are some important points to consider:


1. Hop pellet compatibility: Most vacuum sealers work best with solid items, such as hop pellets. Hop pellets are compressed hop cones that are commonly used in brewing. They are denser and easier to vacuum seal compared to whole cone hops, which can be bulkier and less suitable for vacuum sealing.


2. Proper packaging: It is essential to use appropriate packaging materials when vacuum sealing hops. Food-grade vacuum sealer bags or rolls are commonly used for this purpose. These bags are designed to withstand the vacuum sealing process and provide a barrier against moisture and oxygen. Ensure that the bags are sized appropriately for the amount of hops you want to seal, leaving enough headspace for effective sealing.


3. Pre-freezing considerations: Hops contain natural oils, which can cause the bags to be less airtight during the vacuum sealing process due to oil residue. To mitigate this issue, some brewers prefer to pre-freeze the hops for a short period before vacuum sealing. Freezing the hops helps to reduce the release of oils during the sealing process, leading to a tighter seal.


4. Vacuum sealing equipment: Choosing the right vacuum sealer is crucial. There are various types available, including handheld models and countertop machines. Consider factors such as budget, frequency of use, and sealing requirements when selecting a vacuum sealer. Look for models that offer adjustable sealing options and strong suction power to ensure a proper seal.


5. Storage considerations: Once the hops are vacuum sealed, it's important to store them properly. Keep the sealed bags in a cool, dark, and dry place, away from heat, sunlight, and moisture. A refrigerator or freezer can be an excellent storage option for maintaining the hops' freshness and preserving their aroma and flavor.


6. Labeling and organization: When vacuum sealing hops, it's helpful to label the bags with relevant information such as the hop variety, alpha acid percentage (if known), and date of sealing. This ensures proper organization and allows you to keep track of the hops' age and usage in your brewing process.


Remember that while vacuum sealing can help prolong the freshness of hops, it is still best to use them as fresh as possible for optimal flavor and aroma in your beer. Over time, even vacuum-sealed hops may experience some degradation in quality, so it's recommended to use them within a reasonable timeframe.

Elevate Your Winemaking with Lalvin D47 Wine Yeast: A Must-Have for Wine Brewers

Welcome to the world of winemaking! As an aspiring home brewer, you understand that using quality ingredients is key to crafting exceptional wines (cherry or parsnip perhaps?). In this review, we'll explore the remarkable Lalvin D47 Wine Yeast and how it can enhance your winemaking process


Prepare to unlock the full potential of your grapes and create wines that impress even the most discerning palates.

Lalvin D47 Wine Yeast

Superior Fermentation Performance:

Lalvin D47 Wine Yeast is renowned for its exceptional fermentation capabilities. It ensures a clean and complete fermentation process, leaving no residual sugars behind. This yeast strain is ideal for producing medium- to full-bodied white wines and certain red wines, such as Pinot Noir. The result? Wines with enhanced flavor profiles, well-balanced acidity, and a delightful aromatic character.


Unleash the Aromas:

One of the standout features of Lalvin D47 Wine Yeast is its ability to accentuate and preserve the delicate aromas of your grapes. It promotes the development of fruity and floral esters, giving your wine a captivating bouquet that will entice your senses. With Lalvin D47, you can be confident that the distinct qualities of your grapes will shine through, creating a truly memorable drinking experience.


Versatile and Reliable:

Whether you're a seasoned winemaker or just starting out, Lalvin D47 Wine Yeast offers the versatility and reliability you need. This strain performs exceptionally well across a range of temperatures (15-20°C / 59-68°F) and is highly tolerant to difficult fermentation conditions. With its reliable performance, you can achieve consistent results with every batch, ensuring that your wines are of the highest quality.


Smooth and Balanced Finishes:

One of the hallmarks of a well-crafted wine is a smooth and balanced finish. Lalvin D47 Wine Yeast excels in this area by promoting malolactic fermentation, which reduces acidity and enhances the overall mouthfeel of your wines. The result is a velvety texture and a harmonious integration of flavors, ensuring that each sip is a delight to the palate.


Lalvin D47 Wine Yeast is a game-changer for home brewers of wine, offering unparalleled fermentation performance, aroma enhancement, versatility, and reliability. With this exceptional yeast strain, you can take your winemaking skills to new heights, creating wines that will impress and satisfy even the most discerning wine enthusiasts. Elevate your winemaking journey with Lalvin D47 Wine Yeast today!

Guide to Proper Ingredient Storage: Keeping Hops, Grains, and Yeast Fresh

Friday, May 12, 2023

For seasoned homebrewers that are really getting into the swing and science of making beersies, they begin to become very cognisant that quality and freshness of ingredients play a crucial role in creating great-tasting beer. 


This ultimately leads to the understanding that proper storage of ingredients like hops, grains, and yeast is essential to maintain their freshness and preserve their flavors.


In this guide, we will explore effective techniques for storing these ingredients, including the use of airtight storage containers and vacuum sealers. By following these recommendations and brewing tips, you can ensure that your homebrewing ingredients remain at their best, resulting in exceptionally delicious brews.


keeping grain fresh for brewing

1. Understanding Ingredient Storage Basics:

Before delving into specific storage methods, it's important to understand a few fundamentals of ingredient storage for home brewing:


Temperature Control: Keeping your ingredients stored at a cool and consistent temperature is vital for preserving their freshness. Fluctuations in temperature can lead to degradation and flavor loss. Aim for temperatures between 35°F and 50°F (2°C and 10°C), as this range helps slow down the process of oxidation and maintains the stability of the ingredients.


Protection from Light: Light exposure can be particularly harmful to hops, as it can cause them to lose their aroma and bitterness. Similarly, light can affect the quality of grains and yeast. To minimize light exposure, store your ingredients in opaque containers or in a dark area, such as a pantry or cellar (also beer does not enjoy being exposed to light).


Moisture can lead to spoilage and mold growth in ingredients like grains and yeast. Ensure your storage area is dry and free from excess humidity. Avoid storing ingredients in basements or areas prone to moisture. Additionally, use appropriate containers with airtight seals to keep ingredients dry and prevent moisture absorption.

proper hops storage


2. Selecting Airtight Storage Containers:

Airtight storage containers are an excellent choice for storing your homebrewing ingredients. They help maintain freshness by keeping out air, light, and moisture. 


Here are some recommendations:


Food-Grade Plastic Containers: Choose containers made of food-grade plastic that are specifically designed for long-term storage. Look for containers with airtight seals and consider options with a UV-blocking feature for hop storage. Plastic containers are lightweight, durable, and provide an effective barrier against external elements.


Glass Jars: Glass jars with airtight lids can also be suitable for ingredient storage, especially for smaller quantities. Mason jars, for example, work well for storing hops. Glass containers are non-reactive and do not absorb odors or flavors, making them an excellent choice for preserving the integrity of the ingredients.


Metal Containers: For grains, consider metal containers such as stainless steel canisters or bins. Make sure they are airtight and have a seal to keep moisture out. Metal containers provide an additional layer of protection against light and can help preserve the freshness of the grains.


hops fresh storage

best hop storage guide

3. Utilizing Vacuum Sealers:

Vacuum sealers are an effective option for long-term ingredient storage, as they remove air and seal the bags tightly. Here's how to use them:


Invest in a Vacuum Sealer: Purchase a vacuum sealer specifically designed for home use. These devices come with vacuum bags or rolls, which allow you to customize the size of the bags according to your needs.


Bag Preparation: Cut the vacuum sealer bags or rolls to the desired size, leaving enough space for the ingredients. Ensure the bags are clean and dry before use to prevent contamination or moisture buildup.


Filling and Sealing: Place the ingredients in the bag, leaving some room for expansion. Insert the open end of the bag into the vacuum sealer and follow the manufacturer's instructions to remove the air and seal the bag. The vacuum sealer will create an airtight seal, removing the majority of the air from the bag and preventing oxygen exposure, which can lead to ingredient degradation.


Labeling and dating: Once the bags are sealed, it's important to label them with the type of ingredient and the date of packaging. This labeling system will help you keep track of the freshness of your ingredients and ensure you use them in a timely manner.


yeast brewing beer freshness

4. Additional Tips for Ingredient Storage:

Consider these supplementary tips to maximize ingredient freshness:


Purchase Fresh Ingredients: Start with fresh, high-quality ingredients to extend their shelf life. Check the packaging dates and opt for reputable suppliers to ensure you're working with the best possible ingredients.


Store Yeast Properly: Yeast is a sensitive ingredient that can be affected by temperature fluctuations. Check the specific storage requirements of the yeast strain you're using. In general, it's best to store yeast in the refrigerator, following the manufacturer's instructions. Keep it in a sealed container or airtight bag to prevent exposure to air and moisture.


Use Moisture Absorbing Packs: Including moisture-absorbing packs or desiccants in your storage containers can help minimize moisture buildup. These packs are designed to absorb excess moisture and maintain the dryness of the ingredients. They are particularly useful for grains, preventing spoilage and the growth of mold.


Rotate Your Stock: Practice FIFO (first in, first out) by using the oldest ingredients first and replenishing your stock regularly. By rotating your ingredients, you ensure that the freshest ingredients are used in your brews, minimizing the risk of using stale or expired ingredients.


Monitor Storage Conditions: Regularly check the storage area for any signs of issues such as moisture, pests, or temperature fluctuations. Address any problems promptly to maintain optimal ingredient freshness.


Proper storage of brewing ingredients is essential for maintaining their freshness and ensuring the quality of your homebrewed beer. By utilizing airtight storage containers and vacuum sealers, you can protect your hops, grains, and yeast from air, light, and moisture, preserving their flavors and aromas. 

fresh beer ingredients


Remember to follow the fundamental storage principles of temperature control, protection from light, and moisture prevention. With these storage techniques in place, you'll be well-equipped to create exceptional brews with the freshest ingredients available.


Cheers to your brewing success!

What effect do hops have on beer?

Wednesday, May 10, 2023


What are hops and what do they do to beer?

Hops are what makes beer taste wonderful!

At their most basic form, hops are the cone-shaped flower of the plant known as 'Humulus lupulus'. 

Hops may be added to the beer wort to impart a bitterness which balances the sweet malt flavour of beer.

Hops can be used to create a variety of tastes and to offer unique aromas which enhance the drinking experience. 

Beer makers of the last millennium recognized that hops were a crucial element of brewing good beer. It was the Germans who were amongst the first beer makers to recognize their needs. So much so, it became the law that only hops could be used in beer as opposed to another beer flavoring such as anise (aniseed), heather and rosewood. 

The beauty of the hops plant is that its varieties give different qualities to the beer, meaning there are so many opportunities for making brewing discoveries.

The climate and location of where the hops are grown help determine these qualities but most importantly, the alpha or beta acids of the hop cause the greatest contribution. 

Hops also offer the ability to act as a stability agent, preventing spoilage of the beer (hence Indian Pale Ales shipped to India from Great Britain were heavily hopped). Its properties allow the beer yeast to thrive over any other potential contaminants.

It also helps with head retention and acts as a natural clarifier agent.

Hops also contain oils which add to the flavour. Hops can be added at different points in the brewing process and the differing temperatures will also have an effect on those oils and flavour. 

jedi knight brewing hops
A concept of a Jedi Knight brewing beer inside the belly of a giant worm


Hop associations with certain kinds of beers 

Certain kinds of hops are commonly associated with particular styles of beer or beer from certain regions.

Here's some common examples: 
  • Pilsner beers have become nearly synonymous with the four popular 'noble hops' being the varieties of hop called Terrnanger, Spalt, Hallertauer and Saaz. Saaz hops in particular are associated with the brewing of lagers, most for the aroma that has become associated with the beer. Pilsner beers are known to traditionally come from the Czech Republic.
  • The English Golding hop has become the signature hops of English ale. The Fuggle hop is another popular hop used for ale. 
  • America has become a home for hop production and many new varieties from old favorites have been developed. American hops are recognized and appreciated all around the world for the bold, and often intense flavors they impart to beer. American hops are often described as being citrus-like, however that's a most rudimentary description.
Hops in pellet form
Hops in pellet form

What form do hops come in for brewing?

Hops are traditionally distributed as pellets, plugs or whole leaf but they now can come in cyro hop form.

What hops should I use in my beer brewing? 

It of course depends on what kind of beer you are trying to make. If you are making beer clones or following recipes, you probably want to follow what other brewers have found to work well. 

Here's a list of some common hops that are often used by home brewers and ones I have used myself:
  • Cascade: This is an extremely popular American hop. Known for its floral hop trait, it is often liked to a grapefruit. Cascade is known as a versatile hop variety that is popular for bittering, finishing and dry hopping of pale ale and American-style beers.
  • Czech Saaz: as mentioned a popular hop for pilsner and lager style beers. Saaz offers a delicate, mild floral aroma.
  • Green Bullet offers a traditional bittering quality and hop flavour. A Kauri-like giant of the New Zealand brewing industry this hop is closely associated with the world renowned Steinlager beer. Green bullets is best considered a bittering variety typically lager beers.
  • Motueka Hops: Hey, I'm a Kiwi so why not promote a second Kiwi hops? The Moteuka hops comes from the region it is grown in, being the top of the South Island of New Zealand. Very suitable for more traditional style lagers, especially the increasingly popular Bohemian Pilsener
  • Golding hops are good for bittering, finishing and dry hopping a range of ales
If you are a beginner brewer looking to use hops for the first time, we feel confident enough from our experience with using these hops that you won't go wrong -  as long as you match them to your intended style of beer.

We have a fond memory of a brew which used both cascade and green bullet hops to make a loosely approximate version of Steinlager.

It was a fine brew!

And so from that, you can take that it is OK to add different hops together to get different flavours and aromas!

When do I add hops to my beer?

Typically the beer wort is boiled with hops before it is cooled down to begin the fermentation process. The timings of when to add the hops in the boil can be critical as the different timings can cause the hops to work differently on the beer.

If you are making your own wort (as is, not using a beer kit) then it's best practice to follow a tried and true recipe, at least as you start out.

You can of course become more adventurous when you have a bit of confidence in your beer making skills!

If you're at that point you'll want to understand that the process is sometimes known as the “hop schedule”. A hop schedule will list the length of time that the hops should be in the boil, not the amount of time you should wait to add the hops.

This allows you to make your timings correctly. The rough guide is the longer you boil the hops, the more bitterness they will impart. The shorter you boil them, the more flavour will be added.

If you are using a simple beer kit, you have two choices when to add hops. You may add them when you bring all the ingredients of the kit together, or you can add them near the end of the fermentation process. The choice is yours, and in our experience, there doesn't appear to be much of a difference in the end result. 

Where can I buy quality hops?

Your local brewshop will typically have a wide selection but there are online stores everywhere, we recommend NZ's Brewshop but internationally you'll have some good luck buying on Amazon.

Extra for Experts:

↠ How to stop cloudy home brew from happening

Monday, May 1, 2023
Cloudy beer can suck visually, but why does it happen? I did a batch of beer and nicely conditioned it and on pouring, it came about cloudier than usual.

It looked like a wheat beer that had been mixed with sawdust.

An imperfection.

Tasted alright though, but I wondered what had caused this to happen? Usually, my brews look deliciously golden...
  • Was it because I made a mistake brewing?
  • Did I get the temperature wrong?
  • Was my yeast off?
Well, the truth is cloudy home brew beer is a common thing and it can occur for various reasons.

reduce cloudy haze in beer

First up, as you are bottling your beer, you may notice that beer can be cloudy. This is a very normal part of the process as the beer hasn’t fully become beer yet.

As you bottle, you add some form of priming sugar. The residual yeast in the bottle will feed on that sugar and carbonation war occur. As the sugars are consumed by the yeast, the yeast will fall to the bottom of the bottle and the beer will go "clear".

You’ll obviously be able to tell this has happened as your beer will not be cloudy AND there will likely be some sediment at the bottom of the beer bottle.

Leaving the beer in the fermenter a bit longer than you might usually do so gives your beer time to clear even more.

By letting the yeast do its thing for a longer time, your beer will taste better too.

Do you know what the best trick is to avoid cloudy beer is? 


Cold crashing.

Chilling your beer in a fridge at the end of fermentation will cause yeast to fall to the bottom giving you greatly improved clarity. The short version of cold crashing is that you place the whole 23 litre fermenting drum into a pretty cold fridge and you leave it for several days to allow the cold to do its thing.

You can then bottle or keg in the normal manner.

Conditioning beer is very important


A careful pour from the bottle will usually avoid stirring up the sediment which causes a cloudy glass of beer. 

This is especially so if you have got a perfect level of carbonation – an over-sugared beer means more bubbles which increases the chance of the sediment being stirred up into your pour.

If opening your beer causes the beer to go cloudy because the bubbles stir the sediment up too much, I've found cooling the beer in a fridge for 24 hours can help prevent this quite well.

You can also use finings to 'clear' your beer of unwanted proteins what can also cause cloudiness.

Cooling and refrigeration


One of the reasons why beer does go cloudy is due to improper refrigeration timings and techniques.

The process of storing beer is called laagering (sounds like lager eh?). Lagers are lagers because they are best stored cold.

Nordic Vikings learned this method years ago when they laagered their beer barrels in cold caves over the winter or something...

Refrigeration of storing beer in a cool place helps to clear beer rapidly.

The science behind this is at lower temperatures it is more difficult for the yeast, tannins and proteins in the beer to remain suspended.

Cold stored beer will clear much more rapidly than beer stored at a normal room temperature.

If you intend to lager your beer you must wait until carbonation has occurred. If you cool your beer too soon, you run the risk of disrupting the yeast from its secondary fermentation process and carbonation may not occur (or it will be very slow to do so).

Fining agents can reduce cloudiness


A number of fining agents can be added to the finished beer that will aid in clearing the beer quickly.

These agents work by attaching themselves to the yeast, tannins, and proteins to help them precipitate to the bottom of your fermenter or bottle more quickly.

Plain gelatin can be used quite well. Dissolve it in warm sterile water and add it to your fermenter a few days before bottling.

Polyclar is also a popular product to use.

I also have a sneaky suspicion that gelatin in jelly beans also works to help clear the beer.

Chill haze and the 'cold break'


You may have heard of ‘chill haze’. This is a really common cause of beer cloudiness where the wort has been boiled and the cooling process has not generated enough ‘cold break’. 

The cold break is the proteins from the beer that are precipitated to the bottom of the beer by the cold temperature.

Using a copper wort chiller allows for an effective way to get more cold break forming and thus reduces the chance of chill haze in your finished beer.

prevent cloudy beer tips


German wheat beers are often cloudy and that's just the way it is


If you are making a German style wheat beer, it is natural for a wheat beer to have an element of cloudiness.

Some beers, like German Hefeweizens, use yeasts and ingredients that make the beer cloudy no matter what you do.

So how do the big breweries avoid producing cloudy beer?


It’s a simple trick.

Commercial brewers (including craft beer breweries)  filter their beer.

From it, they take all the live yeast and basically bottle a “lifeless” product. The beer you homebrew and drink still contains live yeast so there’s a much more likelihood of a cloudy home brew happening.

Beer like Steinlager that you buy from commercial brewers (and even craft beer breweries) will have been filtered.

Another handy trick that the home brewer can do to improve their beer is to use a fining agent. 

The agent is usually a form of gelatin or moss (!) and it binds to the yeast and other particles in the beer and drags them down to the bottom of the beer to take their grave as sediment.

Sugar 

Make sure that you do not over sugar your beers. If you do, you run the risk of extra fizzy beer or gushers which can clearly upset the sediment.

A cloudy beer isn’t the end of the world but hopefully, this will give a little insight into why your beer is cloudy and how you can try to clear it up the next time that you brew.

Powered by Blogger.

Tags

absorption caps abv acetaldehyde acid adjuncts advice about beer brewing aeration aeration kit aging air lock alcohol alcohol poisoning ale ale beer kits alkaline alkaline brewery wash all grain american amylase apera apples attenuation autolysis automatic temperature compensation bacteria baker's yeast baking yeast ball lock ball valve bar keepers friend barley batch prime beer brewing beer capper beer dispenser beer filtration kit system beer gushers beer kit beer kit review beer kits beer lines beer salt beer taps beerstone best brewing equipment biotin bittering BKF black rock bleach blichmann blow off tubing bluelab bohemian pilsner boil in a bag boil over boneface bottle cap bottle caps bottle conditioning bottling bottling beer bottling spigot bourbon brettanomyces brew and review brew day brewing beer guide brewing salts brewing spoon brewing sugar brewing thermostat brewzilla british thermal unit brix brix scale BTU budvar buffer buffer solution burton snatch buyer's guide calcium chloride calcium sulphate calibration calibration probe calibration solution campden tablets capping carbon dioxide carbonation carbonation drops carboy cascade caustic soda cherry wine chinook chlorine christmas chronicle cider clarity cleaning your equipment clear beer clone recipe cloudy beer cold crashing coldbreak conditioning tablets conductivity conical fermenter contamination coopers copper tun corn sugar cornelius corny keg craft beer creamy beer crown cryo hops cubes danstar nottingham demijohn dextrose distilation DIY DME dopplebock draught dry hopping dry malt extract edelmetall brü burner eisbock ekuanot electrode enhancer enzyme equipment ester ethanol experiments in beer making faucet fermcap-s fermentables fermentation fermenter fermentis fermentor final gravity finings five star flat beer floccing foam inhibitor force carbonation french fresh wort pack fridge fruit fusel alchohol garage project gas burners gelatin gift and present ideas gin ginger beer glucose golden ale golden syrup goldings gose grain grain mill green bullet grist guinness gypsum hach hacks hallertauer heat mat heat pad heat wrap home brew honey hop schedule hops hops spider how not to brew beer how to brew that first beer how to brew with a beer kit how to grow hops how to make a hop tea how to wash yeast hydrated layer hydrogen sulfide hydrometer IBU ideas idophor infection inkbird instruments isoamyl acetate jelly beans jockey box john palmer juniper keezer keg cooler keg regulators kegco kegerator kegging kegs kettle kombucha krausen lactic acid lager lagering lauter lion brown liquid malt extract litmus LME lupulin lupulin powder lupuLN2 making beer malic acid malt malt mill maltodextrin mangrove jack's maple syrup mash mash paddle mash tun mccashins mead methanol micro brewing milling milwaukee MW102 mistakes mixing instructions moa mouth feel muntons must nano brewing New Zealand Brewer's Series no rinse nut brown ale oak oak wood chips off flavors original gravity oxygen pacific gem palaeo water pale ale panhead parsnip PBW pear pectine pectolase perlick ph levels ph meter ph pen pH strips ph tester pico brewing pilsner pitching yeast plastic drum poppet valve pot powdered brewing wash ppm precipitated chalk pressure relief valve priming prison hooch probe problem solving propane and propane accessories pruno pump system purity law radler re-using yeast recipe record keeping reddit refractometer reinheitsgebot removing beer labels from bottles review rice hulls riwaka rotten eggs saaz saccharomyces cerevisiae salt sanitization secondary regulator sediment seltzer session beer silicon simple tricks for brewing siphon site glass skunked beer small batch brewing soda soda ash soda stream sodium carbonate sodium carbonate peroxyhydrate sodium hydroxide sodium metasilicate sodium percarbonate sour beer sparge spigot spirals spirits spoon spraymalt star san starch STC-1000 steinlager steralisation sterilisation sterilization sterliization still stoke storage solution stout sucrose sugar supercharger tannins temperature temperature controller therminator thermometer tips for beginners tri-sodium phopsphate tricks and tips trub tubing tui turkey vodka infused gin vorlauf water water testing wet cardboard taste wet hopping weta whirlfloc tablets white claw williamswarn wine winter brewing wood wort wort chiller yeast yeast energizer yeast nutrient yeast rafts yeast starter yeast traps zinc
Back to Top